
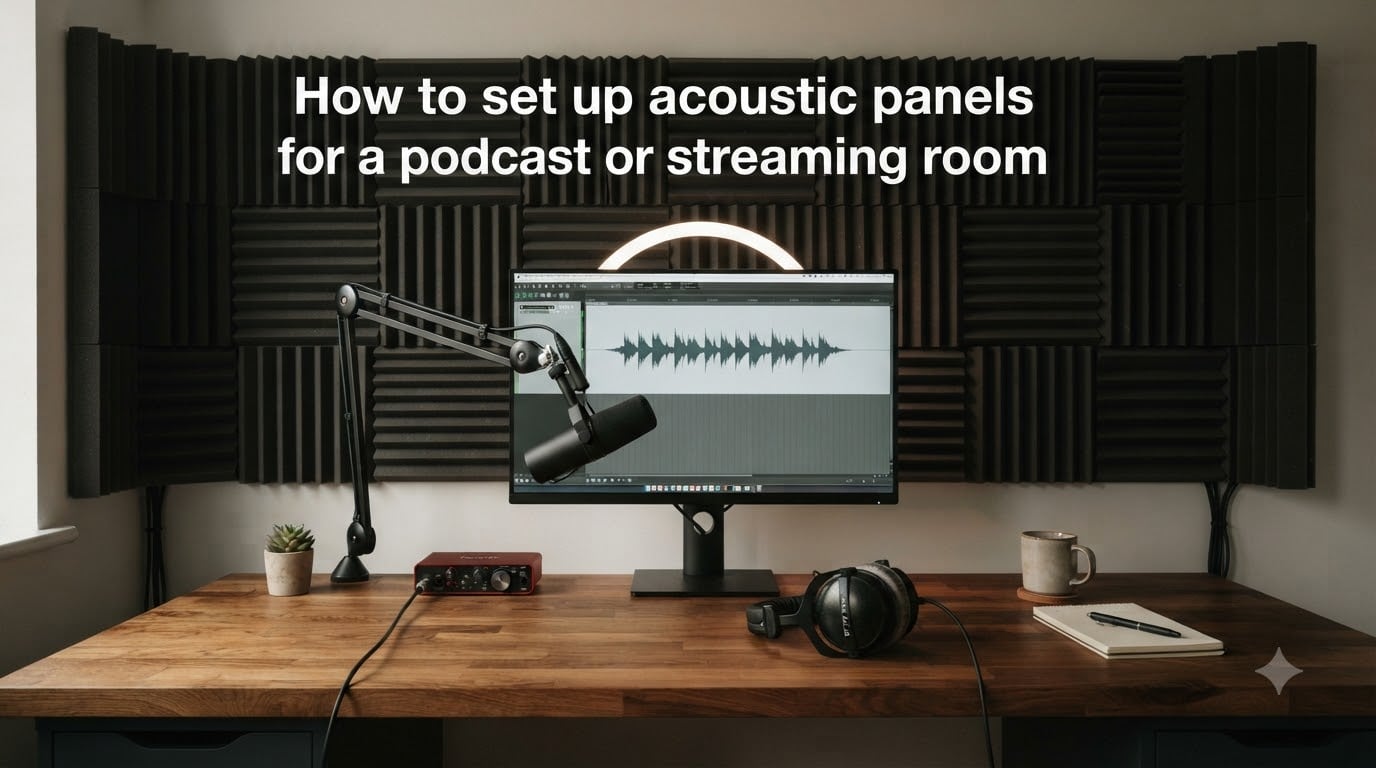
You can buy the most expensive microphone on the market, but if your room sounds like the inside of a tin can, nobody will stick around to hear what you have to say. I learned this the hard way when I started my first podcast from a spare bedroom with bare walls and hard floors. The echo was so bad that listeners thought I was recording in a bathroom.
Learning how to set up acoustic panels for a podcast or streaming room completely changed my audio quality. Within a weekend of installing panels at the right reflection points, my recordings sounded like they came out of a professional studio. The difference was not subtle. It was the single biggest upgrade I ever made to my content setup.
This guide walks you through everything I wish I had known from the start. You will learn where to place panels, how many you actually need, which materials work best, and how to get professional-sounding acoustics even if you rent and cannot drill into walls. Whether you are podcasting, streaming on Twitch, recording YouTube videos, or producing music, proper acoustic treatment is the foundation of clean, professional audio.
Table of Contents
- Why Room Acoustics Matter for Podcast and Streaming?
- Soundproofing vs Sound Absorption: What Your Room Actually Needs
- Understanding First Reflection Points and the Mirror Method
- How Many Acoustic Panels You Need for Your Room Size?
- Where to Place Acoustic Panels: Walls, Corners, and Ceiling?
- Choosing the Right Acoustic Panel Materials
- Step-by-Step: How to Set Up Acoustic Panels in Your Room?
- Renter-Friendly Acoustic Treatment Without Drilling
- Common Mistakes to Avoid When Setting Up Acoustic Panels
- Frequently Asked Questions
- Final Thoughts: Building a Room That Sounds Professional
Why Room Acoustics Matter for Podcast and Streaming?
Viewers and listeners notice bad audio before they notice anything else about your content. Studies on viewer retention consistently show that people will tolerate poor video quality far longer than they will tolerate poor audio. If your voice sounds distant, echoey, or muddy, they click away within seconds.
The problem is not your microphone. The problem is the sound bouncing off every hard surface in your room before it reaches the mic. When you speak, sound waves travel outward in every direction. Some go straight to the microphone, but most hit your walls, ceiling, floor, and furniture first. These reflected waves arrive at the mic milliseconds later than the direct sound, creating that hollow, reverberant quality that screams amateur.
Acoustic panels solve this by absorbing those reflected sound waves before they can bounce back into your microphone. The result is a tighter, more intimate sound where your voice feels close and present rather than distant and washed out. For podcasters, this means crystal-clear dialogue. For streamers, it means your audience hears you cleanly over game audio and music without muddiness.
I have tested rooms with and without treatment side by side, and the treated room always wins. Even a modest setup of four to six well-placed panels makes a dramatic improvement that your audience will notice immediately, even if they cannot explain why.
Soundproofing vs Sound Absorption: What Your Room Actually Needs
This is the single biggest point of confusion I see among new podcasters and streamers. Soundproofing and sound absorption are completely different things, and mixing them up will waste your money and leave you frustrated.
Soundproofing means preventing sound from entering or leaving a room. If your goal is to stop your neighbors from hearing your late-night streaming sessions, or to block traffic noise from ruining your podcast recordings, you need soundproofing. This requires mass, decoupling, and sealing gaps. It means adding dense materials to walls, sealing cracks around doors and windows, and sometimes building a room-within-a-room. It is expensive and usually involves construction.
Sound absorption, on the other hand, means controlling how sound behaves inside a room. This is what acoustic panels do. They do not stop sound from getting in or out. They absorb the sound waves already inside your room so they do not bounce around and create echo and reverb. This is what makes your recorded audio sound clean and professional.
Here is the truth that most beginners miss: acoustic panels will not soundproof your room. If you stick acoustic foam all over your walls, your neighbors will still hear you, and outside noise will still get in. But your recordings will sound dramatically better because the internal reflections are controlled.
For the vast majority of podcasters and streamers, sound absorption is what you need. You want your recorded audio to sound professional, and acoustic panels handle that. True soundproofing is a separate, much larger project that you can tackle later if noise bleed becomes a real problem.
Understanding First Reflection Points and the Mirror Method
If you remember one thing from this guide, make it this: where you place your acoustic panels matters more than how many you use. The most important locations are called first reflection points. These are the spots where sound from your mouth (or your speakers) hits a wall or ceiling for the first time before bouncing back to your microphone.
Treating these points first gives you the biggest improvement for the least effort and money. I have seen creators transform their audio with just four panels placed at first reflection points, while others cover every inch of wall and get worse results because they ignored proper placement.
So how do you find these reflection points? You use a technique called the mirror method. It is simple, effective, and used by professional studio engineers worldwide.
Step 1: Sit in your normal recording or streaming position. Have a friend hold a small mirror flat against the wall to your left or right, at the height of your ears or microphone.
Step 2: Have them slide the mirror along the wall until you can see your monitor speakers (or your mouth position) reflected in the mirror from where you sit. That spot on the wall is a first reflection point. Mark it with a piece of tape.
Step 3: Repeat this process on the opposite side wall, on the wall behind your speakers or desk, and on the wall directly behind you. Each spot where the mirror shows your sound source is a primary reflection point.
Step 4: Repeat the same process on the ceiling. Sound bounces off ceilings just as much as walls, and the ceiling reflection point is often the most overlooked. If you can treat one ceiling point above your listening position, do it.
Once you have marked all your reflection points, those are your priority locations for acoustic panel placement. Cover those first, and you will have addressed roughly 80 percent of your room’s acoustic problems with minimal panels.
How Many Acoustic Panels You Need for Your Room Size?
This is one of the most common questions I see in podcasting and audio forums. The answer depends on your room size and how much acoustic improvement you need, but there are solid guidelines that work for most creators.
For a small room, which I would classify as anything under 100 square feet (roughly 10 by 10 feet or smaller), you typically need four to six panels. Place them at your first reflection points and you will notice a significant reduction in echo and reverb. A small bedroom converted into a podcast space usually falls into this category.
For a medium room, between 100 and 250 square feet, aim for eight to twelve panels. This covers reflection points on side walls, the wall behind your setup, and the wall behind you, plus corner bass traps. A dedicated home office or medium bedroom fits here.
For a larger room, over 250 square feet, you may need twelve or more panels plus dedicated bass traps in the corners. Larger rooms have more surface area generating reflections, and they also accumulate more low-frequency buildup that requires thicker absorption.
Start with reflection points first. Add more panels only if the room still sounds too reverberant after a test recording. Over-treating a room can make it sound unnaturally dead, which is a problem I will cover in the mistakes section below. The goal is not silence. The goal is controlled, natural-sounding speech.
A good rule of thumb from studio engineers: treat 20 to 30 percent of your total wall surface area. This is enough to tame reflections without killing the natural life of the room. You can always add more panels later, but removing them once you realize you overdid it is harder.
Where to Place Acoustic Panels: Walls, Corners, and Ceiling?
Now that you know how many panels you need, let us talk about specific placement. There is a priority order that gives you the best results for your money and effort. Follow this sequence and you will build a well-treated room systematically.
Priority 1: Side Wall Reflection Points
Start with the side walls. These are the walls to your left and right as you face your desk or microphone. Sound from your mouth hits these walls almost immediately and bounces straight back into your mic. Use the mirror method to find the exact spots, then place your first panels there.
These two panels alone will make a noticeable difference in your recordings. If you are on a tight budget and can only afford two panels, put them on your side walls at the reflection points. I cannot stress this enough.
Priority 2: Wall Behind Your Setup
The wall directly behind your desk, monitor speakers, or microphone is the next most important surface. Sound from your speakers hits this wall and reflects back toward you and your microphone. A panel or two here cleans up a significant amount of mid and high frequency reflections.
If you have a visible background for your stream or video, this is also a great opportunity to use visually appealing panels. Fabric-wrapped panels or wood acoustic panels can look fantastic on camera while serving an acoustic purpose.
Priority 3: Wall Behind You
The wall behind your seating position catches sound that passes you and bounces back toward the microphone from behind. This rear wall reflection is subtler than the side reflections but still contributes to overall room echo. One or two panels here complete your basic treatment.
Priority 4: Ceiling Cloud
The ceiling is the most neglected surface in home studio treatment, and treating it often produces surprising results. Sound travels straight up from your mouth, hits the ceiling, and comes right back down to your mic. A single panel suspended above your listening position, called a ceiling cloud, can dramatically reduce this vertical reflection.
You do not need to cover the entire ceiling. One panel roughly two by four feet, suspended a few inches below the ceiling surface, handles the primary ceiling reflection point effectively.
Priority 5: Corner Bass Traps
Low frequencies build up in corners. This is where bass traps come in. Bass traps are thick, dense absorbers placed in the vertical corners of your room where two walls meet, or where walls meet the ceiling. They control the low-frequency energy that regular acoustic panels cannot handle.
For podcasting and voice work, bass traps are helpful but not as critical as they are for music production. If you primarily record speech, prioritize your wall reflection points first. Add bass traps when you want to deepen and tighten the low end of your recordings. Start with the two front corners of your room where bass buildup is most pronounced.
Choosing the Right Acoustic Panel Materials
Not all acoustic panels are created equal. The material inside and outside the panel determines how effectively it absorbs sound and at which frequencies. Here is a breakdown of the most common types you will encounter.
Acoustic foam panels are the cheapest and most recognizable option, usually seen in that classic wedge or egg-crate shape. They absorb mid and high frequencies reasonably well but do almost nothing for low frequencies. They are fine for budget voice recording but will not give you full-range treatment. Look for foam with a density of at least 1.7 pounds per cubic foot for meaningful absorption.
Fabric-wrapped fiberglass or mineral wool panels are the workhorses of professional home studios. A rigid frame holds a core of dense fiberglass or mineral wool insulation, wrapped in acoustic fabric. These panels absorb a wide frequency range, including more of the low-mid range than foam. They offer excellent value for performance and are what I recommend most often for podcast and streaming rooms.
Felt panels are made from compressed PET felt, often from recycled materials. They are lighter than fiberglass panels, come in a wide range of colors, and many feature self-adhesive backing for easy installation. They absorb mid and high frequencies well and look clean and modern on camera. Their lower density means they are less effective at low frequencies than fiberglass options.
Wood acoustic panels combine slatted wood fronts with acoustic felt or foam backing. They offer a premium, designer look that works beautifully on camera for streamers who care about aesthetics. The wood slats provide some diffusion while the backing handles absorption. They are pricier but solve the problem of wanting both acoustic function and visual appeal.
When comparing panels, look for the NRC rating. NRC stands for Noise Reduction Coefficient, and it measures how much sound a panel absorbs on a scale from 0 to 1. An NRC of 0.80 means the panel absorbs 80 percent of the sound that hits it. For podcast and streaming rooms, aim for panels with an NRC of 0.70 or higher. Most quality two-inch thick fiberglass panels hit 0.90 or above.
Step-by-Step: How to Set Up Acoustic Panels in Your Room?
Now let us walk through the actual installation process. I will cover the most common mounting methods so you can choose what works for your space and skill level.
Step 1: Map Your Room and Mark Reflection Points
Before buying or mounting anything, sit in your recording position and use the mirror method described earlier to find all your first reflection points. Mark each spot with a piece of painter’s tape. This gives you a visual map of exactly where your panels need to go.
Take photos of your marked wall from your seating position. This helps you plan panel arrangement and serves as a reference during installation.
Step 2: Choose Your Mounting Method
For acoustic foam panels with self-adhesive backing, installation is straightforward. Clean the wall surface, peel the backing, and press firmly. Hold each panel in place for 30 seconds to ensure the adhesive bonds. Note that self-adhesive foam can damage paint when removed, so this is better for spaces you own.
For heavier fabric-wrapped or wood panels, you have several mounting options. Command strips rated for the panel weight work for lighter panels and are renter-friendly. For heavier panels, use wall anchors and screws with mounting brackets on the panel back. Some panels come with impaling clips that you screw into the wall, then push the panel onto.
For ceiling panels, use eye hooks and wire to suspend the panel a few inches below the ceiling. This air gap behind the panel actually improves low-frequency absorption. Alternatively, some ceiling panels use a direct-mount track system.
Step 3: Install Side Wall Panels First
Start with your two side wall reflection points. Position each panel so its center aligns with the marked reflection point. For panels that are 24 by 48 inches, the center should sit roughly at ear or microphone height when you are seated.
If your panel uses adhesive, press it against the wall starting from one edge and smoothing across to prevent air bubbles. If using screws or brackets, use a level to make sure the panel sits straight. A crooked panel is distracting on camera and looks unprofessional.
Step 4: Install the Wall Behind Your Setup
Place one or two panels on the wall directly behind your desk or microphone position. Center them behind where your sound source sits. If you use monitor speakers, the panels should be positioned symmetrically behind them.
Step 5: Install Rear Wall Panels
Add panels to the wall behind your seating position. One panel centered behind your chair is a good starting point. If you have extra panels, you can add one on each side for more coverage.
Step 6: Add Corner Bass Traps
If you are including bass traps, install them in the vertical corners of your room. They should run from floor to ceiling for maximum effectiveness. If full-height traps are not practical, place them in the upper corners where the walls meet the ceiling, as this is where bass buildup is often most concentrated.
Step 7: Add Ceiling Treatment
Install your ceiling cloud last. Suspend it directly above your listening or recording position using wire and eye hooks. Leave a two to four inch air gap between the panel and the ceiling for improved absorption performance.
Step 8: Test and Adjust
Record a test clip speaking normally into your microphone. Listen back on headphones and compare it to a recording from before treatment. You should hear a tighter, more focused sound with noticeably less reverb and echo.
If the room still sounds too live, add panels one at a time at secondary reflection points and test again. If the room sounds too dead or muffled, remove a panel or two until you find the right balance.
Renter-Friendly Acoustic Treatment Without Drilling
One of the most common pain points I hear from podcasters and streamers is that they rent and cannot drill into walls. This is a real constraint, but it is not a dealbreaker. You can achieve excellent acoustic treatment without permanently modifying your space.
Command strips and similar damage-free hanging solutions are your first line of defense. Heavy-duty Command strips rated for framed pictures can hold lighter acoustic foam and felt panels securely. Test the weight rating against your panel weight and use more strips than you think you need for safety.
Freestanding acoustic panels are another excellent option. These are large panels mounted on stands or gobo frames that you can position around your desk without any wall mounting. Move them into position when recording and push them aside when you need the space. Professional studios use gobos for exactly this kind of flexible treatment.
Bookshelves loaded with books act as natural acoustic diffusers and absorbers. Positioning a tall bookshelf against a reflection-point wall provides genuine acoustic benefit while being completely furniture-based. Similarly, heavy curtains, plush furniture, and area rugs all contribute to sound absorption without any installation.
If you have a clothing closet near your recording position, recording with the closet doors open turns your hanging clothes into a surprisingly effective acoustic absorber. Many bedroom podcasters use this trick as a zero-cost bass trap and broadband absorber combined.
Common Mistakes to Avoid When Setting Up Acoustic Panels
I have made most of these mistakes myself, and I see them constantly in podcasting forums and streaming communities. Avoiding them will save you time, money, and frustration.
Mistake 1: Using egg cartons. This is the oldest myth in home recording. Egg cartons do not absorb sound. They provide minimal diffusion at best and actually look terrible on camera. They do nothing for echo or reverb. Use real acoustic panels instead. The difference is night and day.
Mistake 2: Covering every inch of wall. More panels is not always better. Over-damping a room makes it sound unnaturally dead, like you are recording inside a padded box. Speech loses its natural life and warmth. Aim for 20 to 30 percent wall coverage and test as you go.
Mistake 3: Ignoring the ceiling. The ceiling is a massive reflective surface directly above your microphone, yet most people never treat it. A single ceiling cloud can make as much difference as two wall panels. Do not skip it if your budget allows.
Mistake 4: Placing panels randomly. Panels placed on random wall sections that are not reflection points do almost nothing useful. Always identify your first reflection points first using the mirror method, then place panels there. Strategic placement beats quantity every time.
Mistake 5: Forgetting about bass traps. Wall panels handle mid and high frequencies well, but low frequencies pass right through them and build up in corners. If your recordings sound boomy or muddy in the low end, you need bass traps. They are essential for full-range audio quality.
Mistake 6: Confusing foam with professional panels. Cheap acoustic foam from budget marketplaces often has inadequate density and thickness to provide meaningful absorption. Quality foam should be at least two inches thick with proper density. For the same price, a DIY fiberglass panel often outperforms commercial foam significantly.
Mistake 7: Treating only one wall. Sound bounces in all directions. Treating only the wall behind you while ignoring side walls and the ceiling leaves major reflection paths open. Treat your room as a three-dimensional space, addressing all the surfaces that reflect sound toward your microphone.
Frequently Asked Questions
What is the best placement for acoustic panels?
The best placement for acoustic panels is at your first reflection points. These are the spots on your side walls, the wall behind your setup, the wall behind you, and the ceiling where sound from your mouth or speakers bounces directly back to your microphone. Use the mirror method to find these points: have someone slide a small mirror along each wall until you can see your speakers or mouth reflected in it from your seated position. Place panels at each marked spot.
How do I soundproof my room for streaming?
True soundproofing requires adding mass to walls, sealing gaps around doors and windows, and sometimes building decoupled wall structures. Acoustic panels alone will not soundproof a room, as they only absorb internal reflections rather than blocking sound transmission. For basic streaming soundproofing, start by sealing door gaps with weatherstripping, adding a heavy door sweep, using thick curtains on windows, and placing a thick rug on hard floors. These steps reduce both sound leakage and external noise entry.
How to soundproof a room for a podcast?
To acoustically treat a room for podcasting, first identify your first reflection points using the mirror method. Install acoustic panels at side wall reflection points, behind your microphone position, and behind your seating position. Add bass traps in room corners to control low-frequency buildup. Install a ceiling cloud above your recording position. For each step, test your audio with a short recording and add or adjust panels until your voice sounds tight and present without excessive reverb.
How far off the wall should acoustic panels be?
Acoustic panels can be mounted flush against the wall for basic treatment, but leaving a one to two inch air gap behind each panel significantly improves low-frequency absorption. For ceiling clouds, a two to four inch air gap between the panel and ceiling is ideal. The air gap effectively increases the thickness of absorption without requiring thicker material, making your panels more efficient across a wider frequency range.
Final Thoughts: Building a Room That Sounds Professional
Knowing how to set up acoustic panels for a podcast or streaming room is the difference between content that sounds amateur and content that sounds polished and professional. You do not need to cover every wall or spend a fortune. You need the right panels in the right places.
Start with your first reflection points using the mirror method. Add four to six panels at those priority locations, test your audio, and build from there. Whether you are using budget foam, professional fiberglass panels, or renter-friendly freestanding gobos, strategic placement always beats quantity. Your audience will hear the difference, even if they cannot explain what changed.
Pick up a small mirror, grab some painter’s tape, and map your reflection points this weekend. Your recordings will never sound the same again.