
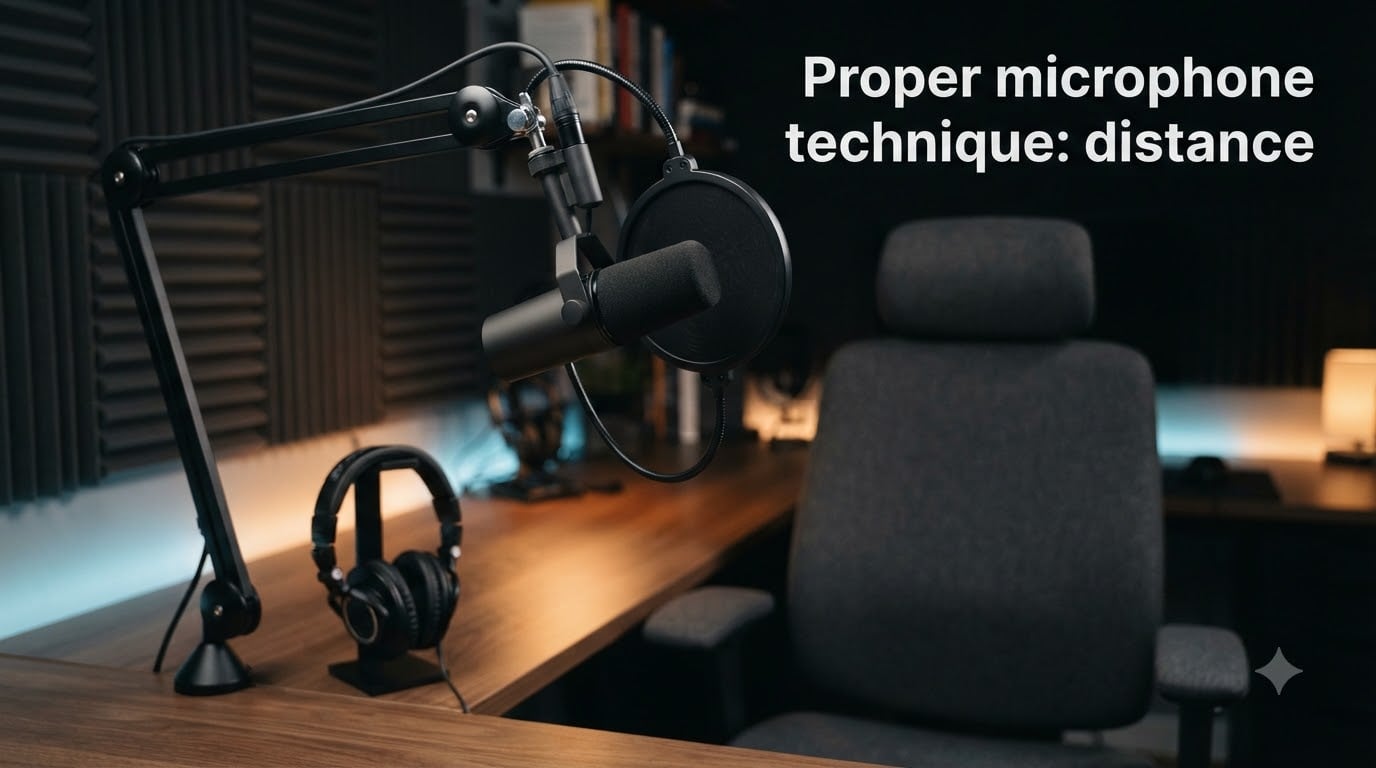
Most people think upgrading their microphone will automatically fix their audio. But after helping dozens of streamers and podcasters dial in their setups, I can tell you the gear matters far less than how you use it. Proper microphone technique—controlling your distance, angle, and proximity to the capsule—is what separates professional-sounding content from amateur recordings.
The good news is that microphone technique costs nothing to learn. Whether you are streaming on Twitch, recording a podcast, or doing voice-over work, mastering distance, angle, and plosive control will transform your sound. Even a modest dynamic microphone in the right position will outperform a premium condenser placed poorly.
In this guide, I will walk you through every element of microphone technique step by step. We will cover the optimal distance from your mouth, why the angle of your mic matters as much as where it sits, how to eliminate plosives for good, and advanced placement strategies that most tutorials completely skip.
Table of Contents
- Why Microphone Technique Matters More Than Your Gear?
- Microphone Distance: Finding the Sweet Spot Between Proximity and Clarity
- Microphone Angle: Off-Axis Positioning to Control Plosives and Harshness
- Plosive Management: 7 Techniques That Actually Work
- Polar Patterns and How They Affect Microphone Placement
- Step-by-Step Microphone Placement Guide for Streaming and Recording
- The 3:1 Rule for Multiple Microphones
- Streaming and Gaming Setup Tips: Matching Technique to Voice Type
- Frequently Asked Questions
- Final Thoughts on Microphone Technique
Why Microphone Technique Matters More Than Your Gear?
I have heard $400 condenser microphones sound muddy and thin, and I have heard $80 dynamic microphones sound warm and broadcast-ready. The difference was never the microphone itself—it was microphone technique.
Think of your microphone as a camera lens. The lens captures light, but the photographer decides framing, focus, and exposure. Similarly, your microphone captures sound waves, but your technique determines which frequencies get emphasized, how much room noise bleeds in, and whether your voice sounds intimate or distant.
Every problem people blame on their microphone—plosives that punch through the mix, thin and lifeless tone, excessive background noise, inconsistent volume between takes—stems from technique. Understanding distance, angle, and plosive control gives you the tools to fix all of these issues without spending another dollar.
The concept is simple: microphone technique is the physical relationship between your mouth, the microphone capsule, and the room. Get that relationship right and everything else falls into place.
Microphone Distance: Finding the Sweet Spot Between Proximity and Clarity
Distance is the single most important variable in microphone technique. Move an inch closer or farther and your entire tonal balance shifts. This happens because of a phenomenon called the proximity effect.
The proximity effect is a bass boost that occurs when a directional microphone—like a cardioid pattern—gets very close to the sound source. At 1 inch from the capsule, your voice sounds deep, warm, and radio-ready. At 12 inches, that low-end warmth disappears and the tone becomes thinner and more natural. This effect is most pronounced with cardioid and figure-eight patterns, while omnidirectional microphones barely exhibit it at all.
For most streaming, podcasting, and voice recording scenarios, the sweet spot is 6 to 12 inches (about 15 to 30 centimeters) from your mouth. Here is how that breaks down by use case:
At 2 to 4 inches, you get maximum proximity effect. This is the classic radio DJ sound—thick, warm, intimate. It works well for dynamic microphones like the Shure SM7B or Rode PodMic in untreated rooms, because being close lets you turn down the gain and reject more background noise. The trade-off is that plosives become aggressive and breathing is more audible.
At 6 to 8 inches, you hit the most versatile distance for content creators. You retain enough proximity effect for a full-bodied tone while giving breath blasts room to dissipate before they hit the diaphragm. This is where I recommend most beginners start.
At 10 to 12 inches and beyond, the proximity effect largely disappears. Your voice sounds natural and open but thinner. Background noise and room reflections become more noticeable because you need to increase gain to compensate. This distance works better for condenser microphones in acoustically treated spaces.
The Thumb-and-Fist Measurement Trick
If you do not have a ruler handy, use the fist method. Make a fist and extend your thumb outward—that distance from your thumb tip to the outer edge of your fist is roughly 6 to 7 inches. Position the microphone at that distance from the corner of your mouth, not directly in front of it, and you have a reliable starting point every single session.
I learned this trick from a voice actor on a recording forum, and it solves one of the biggest pain points people report: inconsistent audio between sessions. When you measure distance the same way each time, your recordings stay consistent without guessing.
Why Your Mic Might Sound Distant or Thin
This is one of the most common complaints I see in audio forums. If your recordings sound far away or lifeless, the cause is usually distance combined with too much gain. When the microphone sits 14 or more inches from your mouth, you have to crank the input level to hear yourself clearly. That extra gain picks up room noise, fan hum, keyboard clicks, and echo from bare walls.
The fix is counterintuitive: move closer and turn the gain down. Pull the microphone to 6 inches from your mouth, reduce the gain until your loudest speaking peaks hit around negative 12 to negative 6 decibels, and the background noise will drop dramatically while your voice sounds fuller.
Microphone Angle: Off-Axis Positioning to Control Plosives and Harshness
Most people point their microphone directly at their mouth—on-axis, straight ahead. This is intuitive, but it is also the number one cause of plosive problems. When you speak directly into a microphone capsule, every P, B, T, and K sound launches a blast of air straight at the diaphragm. The capsule cannot distinguish between sound waves and moving air, so it translates that blast into a thumping pop.
The solution is off-axis positioning. Instead of aiming the microphone at your mouth, angle it so your voice travels across the capsule rather than directly into it. A 15 to 45 degree angle is the range that works for most setups. You can angle the microphone slightly upward from below the mouth, slightly downward from above, or to the side.
The off-axis technique works because plosive bursts are highly directional. The air from a P sound travels in a straight line from your lips. When the microphone capsule is angled away from that direct path, most of the air blast passes by the diaphragm harmlessly. Meanwhile, higher frequencies from your voice bend around the edges of the capsule, so you still capture clear, intelligible speech—just without the pops.
I typically recommend positioning the microphone slightly above mouth level, angled downward toward the mouth at about 15 to 20 degrees. This has three benefits: it reduces plosives, it tilts your head up slightly which opens your airway for better vocal projection, and it keeps the microphone out of your direct line of sight on camera.
On-Axis vs Off-Axis: What Actually Changes
On-axis means the sound source hits the front of the capsule directly. This captures the maximum possible detail and high-frequency content, which is why studio vocalists sometimes record on-axis with a pop filter for protection. The risk is harshness on consonant sounds and aggressive plosives without proper filtering.
Off-axis means the sound source arrives at an angle to the front of the capsule. This slightly rolls off high frequencies—think of it as a natural de-esser—and dramatically reduces plosive intensity. The trade-off is a marginally softer, less detailed sound. For spoken word, podcasts, and streaming, that trade-off is almost always worth it.
Plosive Management: 7 Techniques That Actually Work
Plosives are those low-frequency thumps that explode through your audio every time you say a word with a P or B. They happen because those consonants release a burst of compressed air from your lips. That air slams into the microphone diaphragm faster than it can recover, producing a pop that can spike 20 decibels above your normal speaking level.
Forum posts are full of creators asking how to get rid of plosives even when they already use a pop filter. The answer is that no single solution eliminates plosives completely. You need a layered approach combining several of these techniques:
Technique 1: Increase your distance. The air pressure from a plosive drops off rapidly with distance. At 2 inches, a P sound can hit the capsule like a hammer. At 8 inches, the same P sound is barely a whisper of moving air. Moving back just a few inches can reduce plosive intensity by 12 decibels or more.
Technique 2: Angle off-axis. As described above, positioning the capsule at an angle to your mouth directs the air blast past the diaphragm. Even a 15-degree tilt makes a noticeable difference. Combined with increased distance, this single change eliminates the majority of plosive problems.
Technique 3: Use a pop filter. A nylon-mesh pop filter placed 2 to 3 inches in front of the microphone diffuses air bursts before they reach the capsule. Circular nylon filters on a gooseneck are the studio standard, but metal mesh filters work too—they use fine perforations to redirect air while preserving more high-frequency detail than nylon.
Technique 4: Try a foam windscreen. A foam slip-on cover provides a lighter level of protection than a pop filter. It is less effective against direct plosives but works well as a secondary layer or for mobile recording setups where a pop filter is impractical.
Technique 5: Engage a low-cut filter. Most microphones and audio interfaces include a high-pass filter (also called low-cut or low rolloff) that rolls off frequencies below 80 or 100 Hertz. Since plosive energy is concentrated in the 20 to 80 Hertz range, engaging this filter removes a significant amount of thump without affecting the natural range of your voice.
Technique 6: Control your speech. Some people naturally produce more plosive energy than others. You can train yourself to soften P and B sounds by speaking slightly across the microphone rather than into it, or by using a technique called breath support—speaking from the diaphragm rather than pushing air from the lips.
Technique 7: Fix it in post-production. As a last resort, you can reduce plosives after recording using a dynamic equalizer or a de-plosive plugin. Tools like FabFilter Pro-DS, iZotope RX De-plosive, or even a manual cut at 80 to 120 Hertz can tame residual pops. But always try the physical techniques first—fixing audio in post is more time-consuming and never sounds as clean as capturing it right.
The most effective combination I have found is distance at 6 to 8 inches, a 20-degree upward angle, a nylon pop filter, and the low-cut filter engaged. This setup eliminates plosives for nearly every voice type without requiring any post-production work.
Polar Patterns and How They Affect Microphone Placement
Your microphone technique must account for the polar pattern—the directional sensitivity map of the capsule. A cardioid microphone hears sound from the front and rejects sound from the rear. An omnidirectional microphone hears sound equally from all directions. A figure-eight microphone hears sound from front and back while rejecting sound from the sides.
Each pattern changes how distance and angle interact with your voice and your room.
Cardioid is the most popular pattern for streaming, podcasting, and voice work. It focuses on the sound directly in front of the capsule while rejecting audio from behind. This rear rejection helps minimize room reflections and background noise. Cardioid mics exhibit strong proximity effect, so moving closer adds noticeable bass warmth. Most placement advice in this guide is written with cardioid in mind.
Supercardioid and hypercardioid patterns are even more focused than standard cardioid. They reject sound from the sides more aggressively but pick up a small amount of sound directly behind the capsule. These patterns are common on shotgun microphones used in film and broadcast. For close-up voice work, they behave similarly to cardioid but with slightly tighter pickup and a bit more off-axis coloration.
Omnidirectional microphones pick up sound equally from every direction. They have no rear rejection, so room acoustics matter more. They also exhibit almost no proximity effect—your tone stays consistent whether you are 1 inch or 12 inches away. This makes them forgiving for beginners who struggle with distance consistency, but less useful for rejecting background noise in untreated spaces.
Figure-eight (bidirectional) microphones pick up sound from the front and back equally while rejecting sound from the sides. They are popular for two-person interview setups where both speakers face opposite sides of the same microphone. Figure-eight mics have the strongest proximity effect of all patterns, which can produce a beautifully intimate tone but also aggressive plosives if you are close.
| Pattern | Picks Up Best | Rejects | Proximity Effect | Best For |
|---|---|---|---|---|
| Cardioid | Front | Rear | Strong | Streaming, podcasting, voice-over |
| Supercardioid | Front (narrow) | Sides | Strong | Noisy environments, broadcast |
| Omnidirectional | All directions | Nothing | Minimal | Natural tone, lavalier, untreated rooms |
| Figure-Eight | Front and back | Sides | Strongest | Two-person interviews, ribbon mics |
Step-by-Step Microphone Placement Guide for Streaming and Recording
Here is the exact process I use when setting up a microphone for a new streaming or podcasting session. Follow these five steps in order and you will have a repeatable, consistent sound every time.
Step 1: Mount and position the microphone. Attach your microphone to a boom arm or sturdy stand. Position the capsule so it sits slightly above mouth level—about 1 to 2 inches higher than your lips when you are seated in your normal recording posture. This upward angle is the foundation of plosive control.
Step 2: Set your distance. Use the fist-and-thumb measurement or a ruler to place the capsule 6 to 8 inches from the corner of your mouth. Aim the microphone at the corner of your mouth rather than dead center—this further reduces direct air blasts while keeping your voice centered in the pickup pattern.
Step 3: Angle the microphone off-axis. Tilt the capsule 15 to 20 degrees so it points down toward your mouth from above. Verify by looking at the setup from the side: your breath path should travel past the microphone, not straight into it.
Step 4: Add a pop filter if needed. Place a nylon or metal pop filter 2 to 3 inches in front of the capsule. If you are using a foam windscreen, slip it over the microphone head. This is your second layer of defense against plosives.
Step 5: Set your gain level. Speak at your normal recording volume—the loudest you would naturally get during a stream or episode. Adjust the gain on your interface or mixer so peaks hit around negative 12 to negative 6 decibels on the meter. Never let peaks reach zero or clip. Engage the low-cut filter at 80 Hertz if your microphone or interface has one.
Run a 30-second test recording and listen back through headphones. Check for plosives on words with P, B, T, and K sounds. Check for background noise during silence. Check for sibilance—harsh S sounds—on words with multiple consonants. Make small adjustments to distance or angle and test again until the audio sounds clean and natural.
The 3:1 Rule for Multiple Microphones
When you use two or more microphones in the same space—say, a podcast with co-hosts facing each other—the microphones can pick up the same sound at slightly different times. This creates phase cancellation, a destructive interference pattern that hollows out your tone and creates comb-filtering artifacts. The 3:1 rule solves this problem.
The rule is simple: the distance between any two microphones should be at least three times the distance from each microphone to its intended sound source. If your microphone is 6 inches from your mouth, the nearest other microphone should be at least 18 inches away from yours. This ratio ensures that sound bleeding from one source into another microphone arrives at a low enough level—about 10 decibels quieter—to avoid audible phase problems.
For a two-person podcast, this usually means placing the hosts at least 3 feet apart with microphones angled away from each other. If you cannot achieve the 3:1 ratio due to space constraints, consider using omnidirectional microphones positioned close together (a technique called spaced pair) or switch to a single figure-eight microphone that both speakers share from opposite sides.
The 3:1 rule is not a law of physics—it is a practical guideline that works in the vast majority of recording situations. Breaking it does not guarantee disaster, but following it eliminates the most common cause of thin, hollow-sounding multi-mic recordings.
Streaming and Gaming Setup Tips: Matching Technique to Voice Type
Streaming and gaming present unique challenges for microphone technique. You are likely sitting at a desk with keyboard clicks, mouse movements, fan noise, and game audio all competing for the microphone’s attention. Your technique needs to reject as much of that ambient noise as possible while keeping your voice front and center.
For most streaming setups, I recommend a dynamic microphone with a cardioid pattern. Dynamic mics handle high sound pressure levels (SPL) well, reject off-axis background noise better than condensers, and are more forgiving of untreated rooms. Position the microphone 4 to 6 inches from your mouth on a boom arm, angled upward at 15 to 20 degrees. This tight placement lets you keep the gain low, which means less keyboard and fan noise bleeds into your stream.
Condenser microphones work for streaming too, but they require more careful placement and acoustic treatment. If you use a condenser, keep it 6 to 8 inches away with a pop filter, and make sure your room has absorption panels or at least soft furnishings to reduce reflections. Condensers capture more detail and high-frequency clarity, but that same sensitivity means they capture more of the room around you.
Voice Type Matching
Not every voice sounds the same at the same distance. Deeper, resonant voices—think bass and baritone ranges—benefit from slightly more distance (8 to 10 inches) because the proximity effect can make them sound boomy or muddy up close. Higher, thinner voices—tenor and soprano ranges—can get closer (4 to 6 inches) to add warmth and body without overwhelming the low end.
If your voice sounds muddy, back the microphone off by an inch or two and listen for the low-end buildup to clear up. If your voice sounds thin or harsh, move closer to engage the proximity effect and add warmth. Small adjustments of even half an inch make an audible difference.
The Fredman Technique
The Fredman technique is an advanced placement method that originated in professional recording studios. It involves positioning two microphones—a primary vocal microphone and a secondary microphone—facing each other with their capsules aligned. The primary mic captures the voice directly while the secondary mic, phase-inverted, captures the same sound a fraction of a millisecond later. When mixed together, the two signals cancel out background noise and room reflections while preserving the direct vocal.
This technique is overkill for most home setups, but it illustrates an important principle: microphone technique is not just about one microphone. Understanding how multiple capsules interact with sound gives you creative control over your recordings that no single piece of gear can provide.
For practical purposes, content creators can borrow the spirit of the Fredman technique by using a noise gate or expander plugin that reduces background sound during pauses. This achieves a similar result—cleaner vocal isolation—without the complexity of dual-microphone phase alignment.
Frequently Asked Questions
What is the 3:1 rule for microphones?
The 3:1 rule states that the distance between two microphones should be at least three times the distance from each microphone to its sound source. For example, if your mic is 6 inches from your mouth, the nearest other microphone should be at least 18 inches away. This prevents phase cancellation and comb filtering that thin out your audio.
What is the best positioning for a microphone when streaming?
Position a cardioid dynamic microphone 4 to 6 inches from the corner of your mouth, slightly above lip level, angled downward at 15 to 20 degrees. Add a pop filter 2 inches in front of the capsule. Set gain so peaks hit negative 12 to negative 6 decibels. This placement rejects keyboard and fan noise while keeping your voice full and clear.
What is the Fredman technique?
The Fredman technique uses two microphones facing each other with aligned capsules. The primary mic captures the voice directly, while a secondary mic phase-inverted captures the same sound slightly later. When combined, the signals cancel background noise and room reflections while preserving the vocal. It is an advanced studio method rarely needed for home streaming setups.
How to reduce plosives on a mic?
Combine these techniques: increase distance to 6 to 8 inches, angle the microphone 15 to 20 degrees off-axis, use a nylon or metal pop filter, engage the low-cut filter at 80 Hertz, and speak across the capsule rather than directly into it. For residual pops, apply a de-plosive plugin or dynamic EQ cut at 80 to 120 Hertz in post-production.
How to fix mic sounding far away?
Move the microphone closer to 6 inches from your mouth and reduce the gain. Recording too far away forces you to increase input level, which amplifies room noise and makes your voice sound distant and thin. Closer placement engages proximity effect for a warmer, more present tone while lowering background noise pickup.
What causes plosives in a microphone?
Plosives are caused by bursts of compressed air from consonant sounds like P, B, and T hitting the microphone diaphragm. The capsule cannot distinguish between sound waves and moving air, so it translates the air pressure as a low-frequency thump. Plosive energy is concentrated in the 20 to 80 Hertz range and can spike 20 decibels above normal speech.
Final Thoughts on Microphone Technique
Mastering microphone technique—distance, angle, and plosive control—gives you more audio improvement than any single gear upgrade. Start with 6 to 8 inches of distance, a 15-degree off-axis angle, a pop filter, and a low-cut filter engaged. Test, adjust in small increments, and trust your ears over any spec sheet. Your microphone technique is the one upgrade that costs nothing and works forever.