
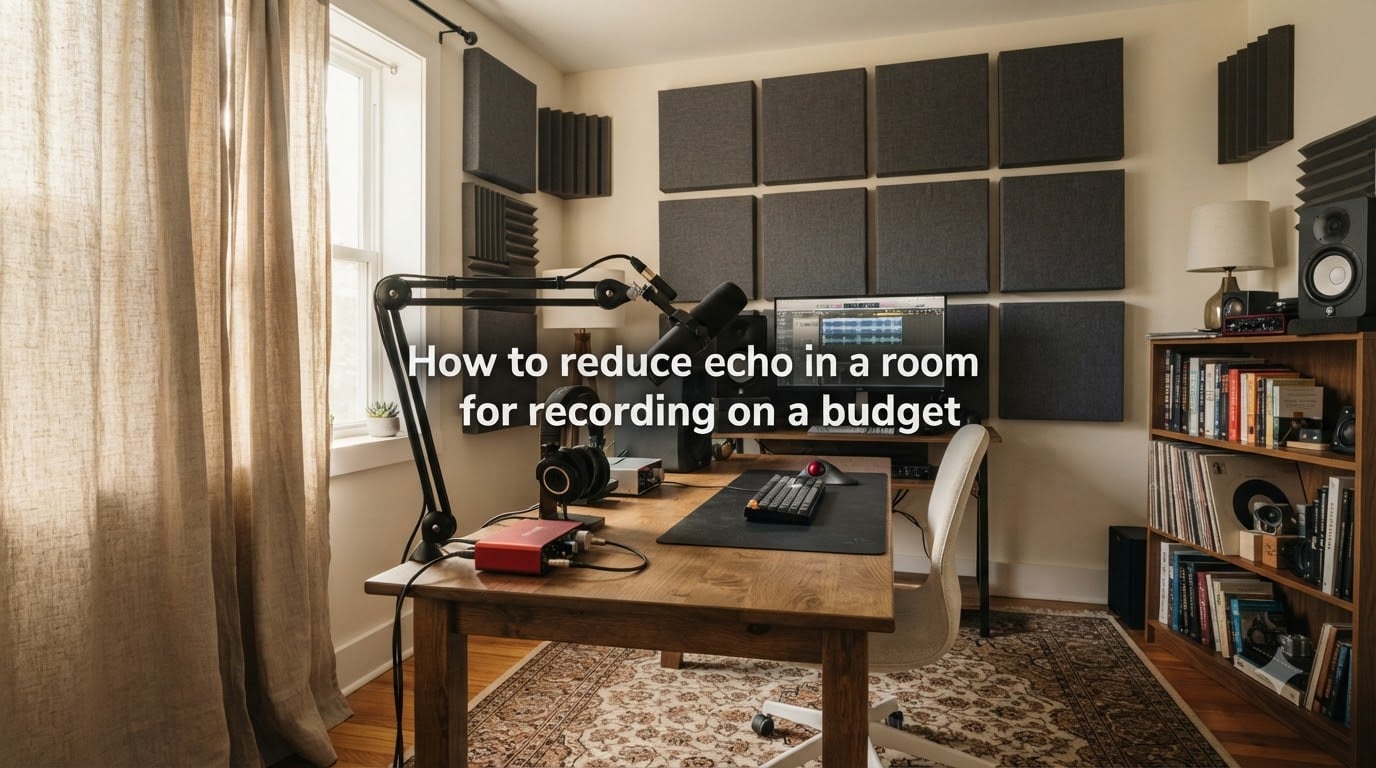
If you’ve ever recorded a podcast, voice-over, or song in an untreated room, you know the sound of hollow echo all too well. That “empty room” effect makes audio sound amateur, muddies your voice, and ruins what should have been a clean recording. The good news? You can reduce echo in a room for recording on a budget without buying expensive studio gear or hiring an acoustician.
I tested every method in this guide across two spare bedrooms, a home office with hardwood floors, and a basement with low ceilings. Some fixes cost nothing. Others run about $200. Every one of them produced an audible difference when I recorded before and after clips in the same spot.
This guide walks you through what’s actually causing the echo, the cheapest fixes that work, budget tiers from $50 to $200, and the recording-specific tweaks that help most. By the end, you’ll have a clear plan tailored to your space, your budget, and whether you rent or own.
Table of Contents
- What Causes Echo in a Room for Recording?
- Free Methods to Reduce Echo Right Now
- Budget Treatment Tiers: $50, $100, and $200 Plans
- Floor Treatment: Rugs, Carpets, and Pads
- Wall Treatment Options Under $100
- Soft Furnishings, Curtains, and Bookshelves
- Ceiling Treatment and Bass Traps on a Budget
- Rent-Friendly Solutions That Won’t Damage Walls
- Recording-Specific Tips: Mic Placement and Software Fixes
- Common Mistakes to Avoid When Treating Your Room
- Frequently Asked Questions
- The Bottom Line: Your Action Plan
What Causes Echo in a Room for Recording?
Echo is what happens when sound waves leave your mouth (or instrument), bounce off hard surfaces, and return to your microphone slightly delayed. The delay is short enough that your brain hears it as one smeared sound rather than a distinct repeat, but long enough to make recordings sound hollow and unprofessional.
Hard, flat, parallel surfaces are the worst offenders. Bare drywall, hardwood floors, glass windows, and bare ceilings reflect up to 99% of the sound that hits them. Soft, porous, or irregular surfaces absorb that energy instead.
Echo vs Reverberation: What’s the Difference
Echo and reverberation get used interchangeably, but they’re slightly different. Echo is a distinct repeat (usually above 50 milliseconds of delay). Reverberation is the dense wash of reflections that builds up in any enclosed space.
When people complain about their room “echoing” on recordings, they almost always mean too much reverberation. Either way, the fix is the same: add absorption so reflections die down faster.
Reflection Points Explained
Reflection points are the spots on your walls, floor, and ceiling where sound from your mouth bounces directly back to your microphone. You can find them with the mirror trick: sit where you record, have a friend slide a mirror along the wall, and mark every spot where you can see your speaker or microphone in the reflection.
Those marks are your priority treatment zones. Treating reflection points delivers far more audible improvement than randomly placing panels around the room.
Free Methods to Reduce Echo Right Now
Before spending a cent, here are the no-cost moves that produce real results. I tried these first because they cost nothing and they reveal how much of your echo problem is layout-related, not equipment-related.
Reposition Your Recording Setup
Where you put your desk and microphone matters more than most people realize. Moving just three feet away from a bare wall can cut audible echo noticeably because the reflected sound has to travel farther and loses energy.
Move your recording position away from walls – aim for at least 12 to 18 inches of clearance from any hard surface behind the mic
Avoid setting up directly in a corner, where two walls meet at 90 degrees and create a powerful reflection zone
Point the “dead” side of your microphone (the back) toward the worst reflective wall, so it captures less of the bounce
Close the closet door behind you – open closets act as echo chambers because clothes absorb sound while the hard walls reflect it
Use What You Already Own
Walk around your house and look for soft, dense items you can temporarily move into your recording space. One Reddit user summed it up perfectly: a sofa plus two heavy drapes can drop perceived echo noticeably.
Throw a thick comforter or moving blanket over a closet rod behind you
Pull a large area rug from another room onto the floor under your desk
Bring in an overstuffed armchair or beanbag to soak up reflections
Hang a tapestry, quilt, or even thick winter coats on hooks behind your mic
Open drawers and doors full of clothes can absorb sound if positioned near reflection points
None of these are permanent, but they’re free, and the difference shows up clearly in recordings.
Budget Treatment Tiers: $50, $100, and $200 Plans
Here’s where most guides fail you. They list ten random products with no idea how they fit together. I’m going to lay out three realistic plans, based on actual prices I checked this week, so you know exactly what your money buys at each level.
The $50 Budget Plan
At this level, you’re upgrading from free fixes to actual acoustic materials without breaking the bank. The $50 plan focuses on your two biggest problem surfaces: the wall directly behind your microphone and the floor.
One 8×10 area rug from a discount store (about $30)
Two packs of 2-inch acoustic foam (12 panels each, about $15 total)
Command strips or 3M hooks to mount the foam without damaging walls
Place the foam on the wall behind your mic at head height. Lay the rug under your desk. That’s it. You’ll cut mid and high frequency reflections significantly, and your recordings will sound noticeably tighter.
The $100 Budget Plan
The $100 plan adds proper absorption depth and addresses the wall in front of you, not just behind.
One large area rug with a thick pad (about $40)
Four DIY acoustic panels made from Rockwool or OC 703 mineral wool (about $30 in materials, including wood frames and fabric)
Two heavy curtains or blackout drapes for your windows (about $25)
Two panels go behind you, one goes on the ceiling directly above your desk (the ceiling cloud), and one goes on the wall in front of you. The curtains close over any windows during recording.
The $200 Budget Plan
At $200, you’re building a properly treated small home studio with coverage across all four walls plus the ceiling.
Full-room rug with quality pad (about $60)
Six to eight DIY Rockwool panels (about $50)
Two bass traps for the corners behind your desk (about $40 in materials)
Heavy curtains, a bookshelf filled with books, and a thick couch moved into the space
By $200 you’ve covered reflection points, addressed the corners where low frequencies pile up, and added diffusion through the bookshelf’s irregular surface. This is what most podcasters and voice-over artists actually need.
Floor Treatment: Rugs, Carpets, and Pads
Your floor is often the largest single reflective surface in the room. If you have hardwood, laminate, or tile, sound bounces off it and travels right back up to your microphone. Floor treatment is the cheapest, most visible improvement you can make.
An 8×10 rug covers most desk setups and costs around $30 to $60 at discount stores. Don’t skip the rug pad – the pad adds thickness and absorption that the rug alone can’t deliver. A good pad can double the acoustic benefit.
If a full rug isn’t in the budget, even a small rug placed directly under your desk and chair catches most of the reflections your mic actually picks up. Runners work well for narrow spaces.
Wall Treatment Options Under $100
Walls are the next priority after the floor. You have three budget options, each with different strengths.
DIY Acoustic Panels with Rockwool
This is the method the pros recommend and the cheapest path to real studio-grade absorption. Rockwool (also sold as OC 703 or Safe’n’Sound) is a mineral wool insulation rated for acoustic use. One Reddit audio engineer put it best: just buy some rockwool and DIY some proper acoustic treatment. It is very easy to do, can be done for about $30USD per panel.
A typical 2-foot by 4-foot panel uses one batt of Rockwool, a simple wood frame, and a fabric covering (burlap or breathable speaker cloth). Total cost: $25 to $35 per panel. Mount them across two studs or on heavy-duty Command strips for renter-friendly installation.
Acoustic Foam Alternatives
Acoustic foam is lighter, thinner, and cheaper per panel than Rockwool, but it absorbs less energy. Foam works well for mid and high frequencies but doesn’t touch bass. At 2 inches thick, a 12-pack runs about $15 to $25.
Foam is also the most renter-friendly option because it’s lightweight and mounts easily with adhesive strips without falling off. Skip 1-inch foam if you can – it’s mostly cosmetic and barely absorbs anything.
Fabric-Wrapped Panels
If you want absorption that also looks intentional, wrap a Rockwool panel in decorative fabric and frame it. These look like art pieces or modern wall hangings. Costs run $40 to $60 per panel for the finished look, but they double as decor.
Soft Furnishings, Curtains, and Bookshelves
Furniture you already own can absorb sound if it’s the right kind. Overstuffed couches, thick cushions, and dense upholstered chairs all work as broadband absorbers. Hard wood or metal chairs do almost nothing.
Heavy curtains and drapes absorb more than you might think, especially over windows. Glass is one of the most reflective surfaces in any room. Even a thin curtain helps; a thick triple-weave curtain helps a lot.
Bookshelves filled with books are the original acoustic diffuser. The irregular spines and varying depths break up sound waves instead of reflecting them back cleanly. A full bookshelf on the wall behind your mic can act as a free diffuser panel.
Ceiling Treatment and Bass Traps on a Budget
Most home recordists ignore the ceiling, but it’s a major reflection surface when your mic is anywhere near it. A single panel or two hung above your desk (called a ceiling cloud) addresses this directly.
To build one cheaply, wrap a Rockwool batt in fabric and suspend it from the ceiling with two eye hooks and picture wire. Total cost: about $30 to $40 for materials. Place it directly above your recording position, between your mic and the ceiling.
Bass traps go in the corners where two walls meet (or where walls meet the ceiling). Low frequencies pile up in corners and create a boomy, muddy sound. You can build two corner bass traps from rolled-up Rockwool wrapped in fabric for about $40 total.
Rent-Friendly Solutions That Won’t Damage Walls
If you rent, you can’t drill, nail, or permanently modify walls. Every fix above still works, but you’ll need to change how you mount things.
3M Command Strips and large Command hooks hold surprisingly heavy loads. The large picture-hanging strips hold up to 16 pounds each, which covers most acoustic foam and even lightweight Rockwool panels. They come off cleanly with no residue when you move out.
Freestanding absorption is another option. A bookshelf laid on its side, filled with books and weighted down, acts as a freestanding panel. So does a rolling garment rack draped with moving blankets.
Tension rods let you hang curtains without drilling brackets. Press-fit floor-to-ceiling poles hold fabric-wrapped panels as room dividers. None of these touch the walls.
Recording-Specific Tips: Mic Placement and Software Fixes
This is where home studio guides usually stop, but it’s actually where the biggest gains are. Your microphone placement and a few software tricks can mask echo that even decent acoustic treatment misses.
Microphone Placement Strategy
Distance from your mouth matters more than microphone brand for cutting echo. The further the mic is from your mouth, the more room sound it picks up. Pulling the mic closer boosts your voice relative to the room reflections.
The 4-to-12-inch rule works for most condenser and dynamic mics. Get closer than that and you get plosives and proximity effect (bass boost). Go farther and you capture more room sound.
Direction matters too. Cardioid mics reject sound from the rear, so point the back of the mic toward your worst reflective wall. This single tweak can cut audible echo dramatically without changing anything else.
Software Solutions for Echo Reduction
If your room is still a bit echoey after treatment, software can help. Modern noise and reverb reduction plugins use AI to separate your voice from room reflections.
iZotope RX Voice De-noise removes background noise and some room tone
Adobe Podcast (free browser tool) cleans up voice recordings using AI
Accusonus ERA De-reverb specifically targets reverb and echo on vocal tracks
Auphonic (web-based, has a free tier) processes podcasts automatically
Adobe Audition and Audacity both include noise reduction modules that can help
Software fixes aren’t magic, but they buy you 2 to 4 dB of perceived room reduction – enough to make an untreated room sound acceptable for most podcasts and video calls.
Common Mistakes to Avoid When Treating Your Room
Treating a room wrong wastes money and time. These are the mistakes I see most often.
Treating only one wall – reflections bounce off untreated surfaces and undermine your investment
Buying 1-inch foam – it’s almost purely cosmetic and barely absorbs anything audible
Ignoring the corners – low-frequency buildup in corners is the main cause of “boomy” sound
Over-treating the room – if your recordings sound dead and lifeless, remove some absorption
Mounting panels wrong – panels at head height behind you and in front of you matter more than decoration elsewhere
Forgetting the floor – a bare floor reflects sound right back up to your microphone
Skipping a test recording – always record before and after each change to confirm it’s helping
Frequently Asked Questions
How to reduce echo in a room for cheap?
The cheapest way to reduce echo in a room for recording is to use items you already own first. Move your recording position away from bare walls, place a thick comforter or moving blanket behind you, and lay down any area rug you can find under your desk. From there, an $8 to $15 pack of 2-inch acoustic foam mounted with Command strips on the wall behind your microphone will produce a clear audible improvement at almost no cost.
How can I reduce sound echo in my room?
To reduce sound echo, add soft, porous materials to your hard reflective surfaces. Walls need absorption (foam, fabric panels, or Rockwool), floors need rugs with pads, windows need heavy curtains, and corners need bass traps. Even rearranging your furniture so a couch or bookshelf sits between your microphone and the worst reflective wall can cut echo noticeably without spending money.
How to reduce echo when recording audio?
When recording audio, get your microphone as close to your mouth as practical (4 to 12 inches is typical) and angle the back of a cardioid mic toward the worst reflective surface. Close closet doors behind you, turn off fans and HVAC, and treat the wall directly behind the mic with at least two inches of absorption at head height. Software tools like Adobe Podcast or iZotope RX can clean up remaining echo in post.
How to acoustically treat a room cheaply?
To acoustically treat a room cheaply, build DIY Rockwool panels for about $25 to $35 each instead of buying commercial panels. Cover the floor with a discount area rug and pad. Hang heavy curtains over windows. Place two bass traps in the corners behind your recording position. You can build a properly treated small room for $150 to $200 with these materials.
What absorbs echo in a room?
Soft, dense, porous materials absorb echo. This includes heavy curtains, thick rugs with pads, upholstered furniture, acoustic foam, mineral wool (Rockwool or OC 703), fabric-wrapped panels, books on shelves, and even clothing. Hard, flat surfaces like bare drywall, glass, hardwood, and tile reflect almost all the sound that hits them and contribute to echo.
How do I stop my room from echoing when recording?
Stop your room from echoing during recording by closing closet doors, muting notifications, and turning off any fans. Position your microphone 4 to 12 inches from your mouth and aim the dead side toward your worst wall. Treat the wall directly behind you with absorption at head height. Record a test clip, listen, and adjust placement before each session.
The Bottom Line: Your Action Plan
Reducing echo in a room for recording on a budget comes down to three steps. First, move your setup and use what you already own to find your free wins. Second, treat your floor and the wall behind your mic with a rug and a few panels – this is where $50 to $100 buys the most improvement. Third, fine-tune with mic placement and software cleanup for a final layer of polish.
Pick the budget tier that matches your wallet, follow the priority order (floor first, then the wall behind your mic, then everything else), and you’ll have a room that records clean enough for podcasts, YouTube, voice-over work, and most music production. Most importantly, record before and after every change. Your ears are the only equipment that matters.