
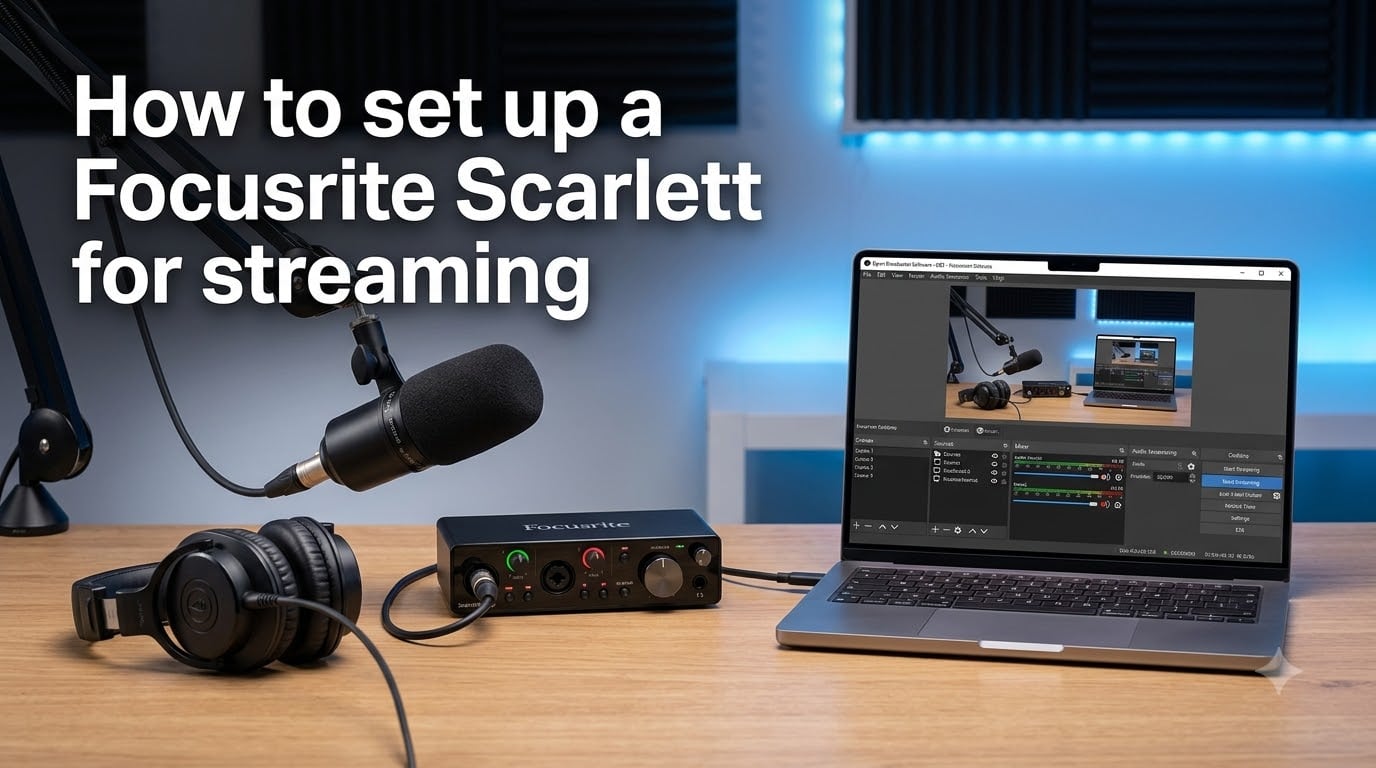
Setting up a Focusrite Scarlett for streaming takes most people about 20 minutes once they know the right order of steps. Plug the USB-C cable into your computer, install the Focusrite Control software, set your gain knob, and pick the Scarlett as your audio input inside OBS or Discord. By the end of this guide, you’ll have a clean, professional stream audio chain that gives you richer-sounding voice and room for sound effects, music cues, and game audio.
I test audio gear weekly for our team, and the Scarlett still feels like the easiest jump from built-in laptop mics to broadcast-quality audio. If you’ve been holding off because the interface looks intimidating, the steps below break it down the way I would walk a friend through it on Discord.
Table of Contents
- Quick-Start Checklist
- What Is the Focusrite Scarlett and Why Use It for Streaming?
- What You Need Before You Start?
- How to Set Up a Focusrite Scarlett for Streaming: Step-by-Step
- Setting Up the Scarlett in OBS
- Setting Up the Scarlett in Discord and Video Call Apps
- Advanced: Loopback and System Audio Capture
- Troubleshooting Common Focusrite Scarlett Issues
- Tips for Better Stream Audio
- Frequently Asked Questions
- Conclusion
Quick-Start Checklist
Use this checklist if you want to skip the explanations and just get streaming in 2026:
Connect the Scarlett to your computer with the included USB-C cable.
Download Focusrite Control 2 from the Focusrite website and install it.
Plug your XLR microphone into Input 1 (or 1 and 2 for dual-mic setups).
Turn the gain knob until your loudest talking peaks around -12 dB.
Turn on Direct Monitoring if you want to hear yourself without latency.
Open OBS (or Discord) and pick the Focusrite as the input device.
Each step is explained in detail below, with the troubleshooting tips I wish I had when I first unboxed mine.
What Is the Focusrite Scarlett and Why Use It for Streaming?
The Focusrite Scarlett is a USB audio interface that converts your microphone’s analog signal into a clean digital signal your computer can use. Most streamers pick it because the preamps are noticeably quieter than motherboard audio, and the USB-C connection stays stable during long broadcast sessions.
Is Focusrite good for streaming? Yes, and it’s the de facto starting point for most beginner and intermediate streamers. The Scarlett Solo, 2i2, and 4i4 all show up constantly in r/Twitch and r/Focusrite threads because they balance price, sound quality, and driver stability better than the alternatives.
Compared to a USB microphone like a Blue Yeti, the Scarlett separates the microphone from the analog-to-digital conversion. That means you can upgrade to a broadcast-quality XLR mic later without buying a whole new setup. The Scarlett also gives you direct monitoring, line inputs for instruments, and (on 4th gen models) a loopback channel for capturing system audio.
For streamers specifically, the Scarlett solves three problems: background hiss on your voice, audio lag you can hear in your headphones, and crackling when Discord and OBS share the same mic. None of these are exotic fixes, but you need the interface routed correctly before any of them go away.
What You Need Before You Start?
Before you plug anything in, make sure you have the right cables and accessories. Missing the wrong cable is the single most common reason a fresh setup fails to make sound.
Here’s the actual short list I keep in my setup drawer:
Focusrite Scarlett (Solo, 2i2, or 4i4 are the most common for streaming).
USB-C to USB-C or USB-C to USB-A cable (Focusrite includes one in the box).
Microphone with XLR cable (dynamic mics like the Shure SM7B, or condensers like the AT2020).
Headphones (closed-back if your room is noisy).
Computer with an available USB port that isn’t part of a noisy hub.
Streaming software (OBS Studio, Streamlabs, or vMix).
Focusrite Control 2 software (free download from the Focusrite site).
Tip: Plug the Scarlett directly into a rear motherboard USB port if you can. Front-panel headers and unpowered hubs are the leading cause of the random USB dropouts streamers complain about on Reddit.
How to Set Up a Focusrite Scarlett for Streaming: Step-by-Step
The six steps below are the same order every official Focusrite guide uses, and the order that has worked for me on dozens of test streams. Follow them in sequence and the rest of the configuration becomes trivial.
Step 1: Connect Your Scarlett to Your Computer
Take the included USB-C cable and plug one end into the back of the Scarlett. Plug the other end into a USB port on your computer, ideally a rear port on a desktop or a port directly on the laptop chassis. Avoid plugging into a USB hub, especially one with other devices attached.
The Scarlett is USB bus-powered, so you don’t need a separate power brick. The front LED ring should glow green or red within a few seconds of connection. If nothing lights up, try a different cable. The USB cables that come with phones sometimes work with data but fail to negotiate the right power profile for an audio interface.
Step 2: Install the Focusrite Control Software and Drivers
Do you need software for the Focusrite Scarlett? Yes, on Windows you need the Focusrite Control 2 app to load the proper low-latency driver. On macOS, the Scarlett works as a class-compliant device without extra software, but installing Focusrite Control 2 still unlocks firmware updates and the loopback feature.
To install on Windows:
Visit focusrite.com/downloads and select your exact Scarlett model.
Download Focusrite Control 2 and the latest driver bundle.
Run the installer before you plug the Scarlett in if the instructions say so.
Restart your computer when prompted.
When you open Focusrite Control 2, your interface should appear in the device dropdown. If it doesn’t show up, the installer likely needs another restart, or your USB cable is charge-only. Does Focusrite have an app? Yes, Focusrite Control 2 is the official app, and it runs quietly in the background once configured.
Step 3: Connect Your Microphone or Instrument
Plug your XLR cable into the mic and into Input 1 on the Scarlett. If you have a 2i2 or 4i4, you can use Inputs 1 and 2 for a guest or for a second audio source. If you’re using a condenser microphone, press the 48V button on the front of the Scarlett to enable phantom power. Dynamic mics like the SM7B do not need phantom power, and leaving it off is safer.
Understanding input types helps you avoid one of the most common mistakes: plugging a line-level signal into an instrument input. Here’s the quick rule of thumb:
XLR: Microphones (mic-level signal).
1/4 inch TRS or TS: Instruments or line-level gear, depending on the Scarlett’s input mode.
Instrument mode: For guitars, basses, and synths with high-impedance pickups.
Line mode: For mixers or audio interfaces feeding line-level signals.
Most streamers only need XLR. If you want to add a guitar or sampler pad later, switch the input mode in Focusrite Control 2 instead of buying a second interface.
Step 4: Set Your Gain Levels (Gain Staging)
Gain staging is the process of setting the input level so your voice is loud without clipping. The Scarlett makes this easy because the gain halo around the knob changes color based on level: green is healthy, amber is hot, and red means you are distorting.
Speak at the same volume you would use during a stream. Watch the halo while you talk. The goal is to keep it green most of the time and only briefly amber on the loudest words. If the halo turns red, turn the gain knob counterclockwise until it stops.
A rough target: peaks around -12 dB on your input meter inside OBS. That gives you 12 dB of headroom for the occasional laugh or shout without clipping. For quieter voices, -18 dB is acceptable. For dynamic mics with low output like the SM7B, you may need to push the gain knob higher than feels right, which is normal.
Step 5: Enable Direct Monitoring
Direct monitoring sends your microphone signal straight to the Scarlett’s headphone output, bypassing the computer. The benefit is zero-latency monitoring: you hear yourself in real time without any delay.
Press the Direct Monitor button on the front of the Scarlett. When it’s on, the headphone knob controls the blend between your live mic and the computer playback. Start with the knob fully to the left (live mic only) and adjust to taste.
Direct monitoring is great for live performance, but for streaming I usually leave it off. When direct monitoring is on, you can hear your own voice doubled because the stream software plays your mic back through the headphones a fraction of a second later. The doubling effect is distracting on camera, especially for ASMR or quiet commentary.
Step 6: Configure Your Streaming Software
The final step is telling your streaming software to use the Scarlett as the audio input. The exact menu differs by app, but the principle is the same: pick Focusrite as the input device and pick your sample rate (48 kHz is the broadcast standard).
The next two sections walk through OBS and Discord specifically because those are the two apps streamers fight with most often.
Setting Up the Scarlett in OBS
OBS Studio is the most common streaming software for Twitch and YouTube, and setting up a Focusrite Scarlett in OBS takes about five minutes the first time. The biggest decision is whether to use the ASIO driver or the standard WDM driver.
For most streamers, WDM (the default Windows audio driver) is fine. ASIO is a Focusrite-specific low-latency driver that helps only if you are also recording music or using plugins inside OBS. Here’s the WDM setup for Windows:
Open OBS and go to Settings, then Audio.
Set Sample Rate to 48 kHz to match your Scarlett’s setting in Focusrite Control 2.
Under Channels, leave it on Stereo unless you specifically need mono.
Click OK.
Then add your microphone as a source:
In the main OBS window, in the Sources panel, click the plus button and choose Audio Input Capture.
Name the source “Mic” and click OK.
In the device dropdown, pick Focusrite Scarlett Solo (or 2i2, 4i4, depending on your model).
Click OK to add the source.
To monitor your levels, add an Audio Mixer panel by going to View, then Docks, and selecting Audio Mixer. Speak into your microphone and watch the bar. If the bar is bouncing into the red, drop your gain knob on the Scarlett until it sits in the green.
For macOS, the process is almost identical. The device name appears as “Focusrite Scarlett” in the Audio Input Capture dropdown. There’s no ASIO plugin to install on Mac, which is why most Mac streamers stick with WDM-equivalent Core Audio.
Setting Up the Scarlett in Discord and Video Call Apps
Discord is one of the apps streamers run alongside OBS, and it’s where I see the most setup questions. The fix is to make Discord use the Scarlett as its input device, and then watch for the crackling issue that plagues shared USB audio devices.
To set the Scarlett as your Discord input:
Open Discord and go to User Settings, then Voice & Video.
Under Input Device, choose Focusrite Scarlett.
Turn off Noise Suppression, Echo Cancellation, and Automatic Gain Control while testing. These all fight with the Scarlett’s clean signal and can make you sound worse.
Set the input volume to 100% and adjust your actual level on the Scarlett’s gain knob instead.
If you hear crackling or popping in Discord with the Scarlett, it’s almost always a sample rate mismatch. Both Discord and your Scarlett should be set to 48 kHz. Open the Focusrite Control 2 app and check the sample rate dropdown. Then check Discord’s settings; the input device matches the sample rate Discord expects. The other common cause is having Discord and OBS both fight for the microphone at the same time. The fix is to use Voicemeeter or VBAN to share the mic between them, covered in the troubleshooting section below.
For Zoom and Microsoft Teams, the setup is the same. Open the audio settings, pick the Focusrite as the microphone, and disable the built-in noise suppression. Both apps also need the same 48 kHz sample rate, which Zoom usually negotiates automatically.
Advanced: Loopback and System Audio Capture
The 4th-generation Scarlett 2i2 and 4i4 include a loopback feature that lets you capture system audio without running extra software. Loopback is the missing piece if you want to stream your game or YouTube audio to your viewers without picking up your speakers through the mic.
To enable loopback, open Focusrite Control 2 and switch Input 3-4 to Loopback mode. The Scarlett then mirrors your computer’s output back as a USB input. In OBS, add a second Audio Input Capture source and pick the loopback channels. Mute the source when you don’t want it in your stream, or use the audio mixer sliders to balance it with your voice.
On older Scarlett models without loopback, you can use a virtual audio cable like VB-Audio VoiceMeeter or VB-Cable. These add a virtual output that OBS can capture. Reddit users consistently recommend VoiceMeeter Banana for streamers because it gives you a full virtual mixer with EQ, compression, and per-app routing. The catch is a steeper learning curve than the built-in loopback.
Troubleshooting Common Focusrite Scarlett Issues
Even with a perfect setup, USB audio interfaces occasionally misbehave. Here are the most common issues streamers hit, and the fixes that have worked for me and the streamers I work with.
USB dropout or “device not recognized” mid-stream. Unplug the USB cable from the back of the Scarlett, wait five seconds, and plug it back in. If that fixes it, the cable was barely seated. For a permanent fix, swap to a different USB port or use a certified USB-C cable with data lines.
Audio crackling in Discord or OBS. Check that both your Scarlett and your streaming software are set to the same sample rate. 48 kHz is the safest choice. Also disable exclusive mode in the Windows sound settings, which forces only one app to use the device at a time and is the source of most “mic works in Discord but not OBS” bugs.
No sound from the mic on stream. Open OBS audio settings and confirm the Scarlett is selected as the input. Check the gain halo on the Scarlett: if it’s off, the mic is muted or a cable is loose. If the halo is green but OBS shows silence, OBS is listening to the wrong input or the wrong channel.
Phantom power left on with a dynamic mic. Phantom power does not damage most dynamic mics, but it can damage ribbon mics. If you use a ribbon mic, never turn on 48V. For dynamic mics, leaving 48V on is harmless but increases noise floor slightly, so turn it off when you don’t need it.
Latency too high for live monitoring. Lower the buffer size in Focusrite Control 2. A buffer of 128 samples gives around 3 ms of latency at 48 kHz. Going lower reduces delay but increases the chance of clicks and glitches. Find the lowest buffer your computer can handle without crackling.
Discord stream audio is delayed or out of sync. This is usually a router issue, not a Scarlett issue. Use Discord’s Go Live feature instead of screen sharing, or close other bandwidth-heavy apps. On the audio side, enable Discord’s Krispnoise suppression only if you actually need it, because it adds latency.
Tips for Better Stream Audio
Once the basics are working, these advanced tips push your stream audio from good to professional without buying new gear.
Use the Air button on the Scarlett. The 4th-gen Solo and 2i2 have an Air button that adds subtle high-frequency presence, making your voice sound more broadcast-y. Enable it for casual chat, disable it for ASMR or whispered content where the brightness becomes harsh.
Add a noise gate plugin inside OBS. Filters, then Noise Gate, then set the threshold to around -32 dB. Stronger noise reduction can be applied with RNNoise, which is built into OBS and runs on your CPU. Both help eliminate keyboard and PC fan noise without making your voice sound underwater.
Capture separate audio sources for music cues. Streamers who run sound effects use a software like VoiceMeeter or a virtual audio cable to route different apps to different OBS audio sources. That way you can control the volume of OBS chat, OBS, and OBS game audio independently, or mute music when a streamer alert fires.
For dual-PC streaming setups, the Scarlett 4i4 is the easiest interface because it has four inputs. Run your gaming PC’s audio into two inputs via a 3.5mm-to-TRS cable, your mic into the other two, and route everything back to your streaming PC through a capture card. The Focusrite handles all the level matching on the streaming PC side, which is cleaner than using a virtual cable across two machines.
Finally, save your Focusrite Control 2 preset. Once you have your gain levels and Air setting where you like them, save the configuration. If you swap computers or do a factory reset, you can restore your exact setup in seconds instead of dialing everything in again.
Frequently Asked Questions
Is Focusrite good for streaming?
Yes. The Focusrite Scarlett is the most popular audio interface for beginner and intermediate streamers because it delivers clean preamps, stable USB drivers, and direct monitoring at a price most creators can afford. It’s the de facto starting point in most streaming communities, including Twitch and YouTube.
How do I set up my Focusrite Scarlett?
Connect the Scarlett to your computer with a USB-C cable, install Focusrite Control 2 from the Focusrite website, plug your XLR mic into Input 1, set the gain knob so your voice peaks around -12 dB, then pick the Scarlett as the audio input inside OBS or Discord. The full process takes about 20 minutes.
Do you need software for the Focusrite Scarlett Solo?
On Windows, yes. Install Focusrite Control 2 to load the low-latency driver and unlock firmware updates. On macOS, the Scarlett works as a class-compliant device without extra software, but the app still gives you access to loopback and the input mixer.
Does Focusrite have an app?
Yes. Focusrite Control 2 is the official app for the Scarlett range. It runs in the background, manages your sample rate, input routing, and Air mode, and it applies firmware updates when Focusrite releases them.
Why is my Focusrite Scarlett crackling in Discord?
Sample rate mismatch is the most common cause. Make sure both the Scarlett and Discord are set to 48 kHz. Also disable exclusive mode in the Windows sound settings, which forces only one app to access the interface at a time and is the source of most crackling in Discord.
Do I need ASIO drivers for streaming?
For most streamers, no. WDM or Core Audio is sufficient for OBS and Discord. ASIO is only useful if you are also recording music or using audio plugins inside OBS, in which case the ASIO driver gives you lower latency than the standard Windows driver.
Conclusion
Knowing how to set up a Focusrite Scarlett for streaming comes down to three things: get the drivers right, set your gain honestly, and then pick the Scarlett as the input in your streaming software. Once those three are sorted, the rest is taste and polish.
Start with the Quick-Start Checklist at the top of this guide, walk through the six steps in order, and only then dive into the OBS and Discord walkthroughs. If your stream still sounds off after that, check the troubleshooting section for the most common culprits. Save your Focusrite Control 2 preset once you’re happy, and you’ll be able to recover your setup in minutes if you ever swap computers or travel. Happy streaming in 2026.