
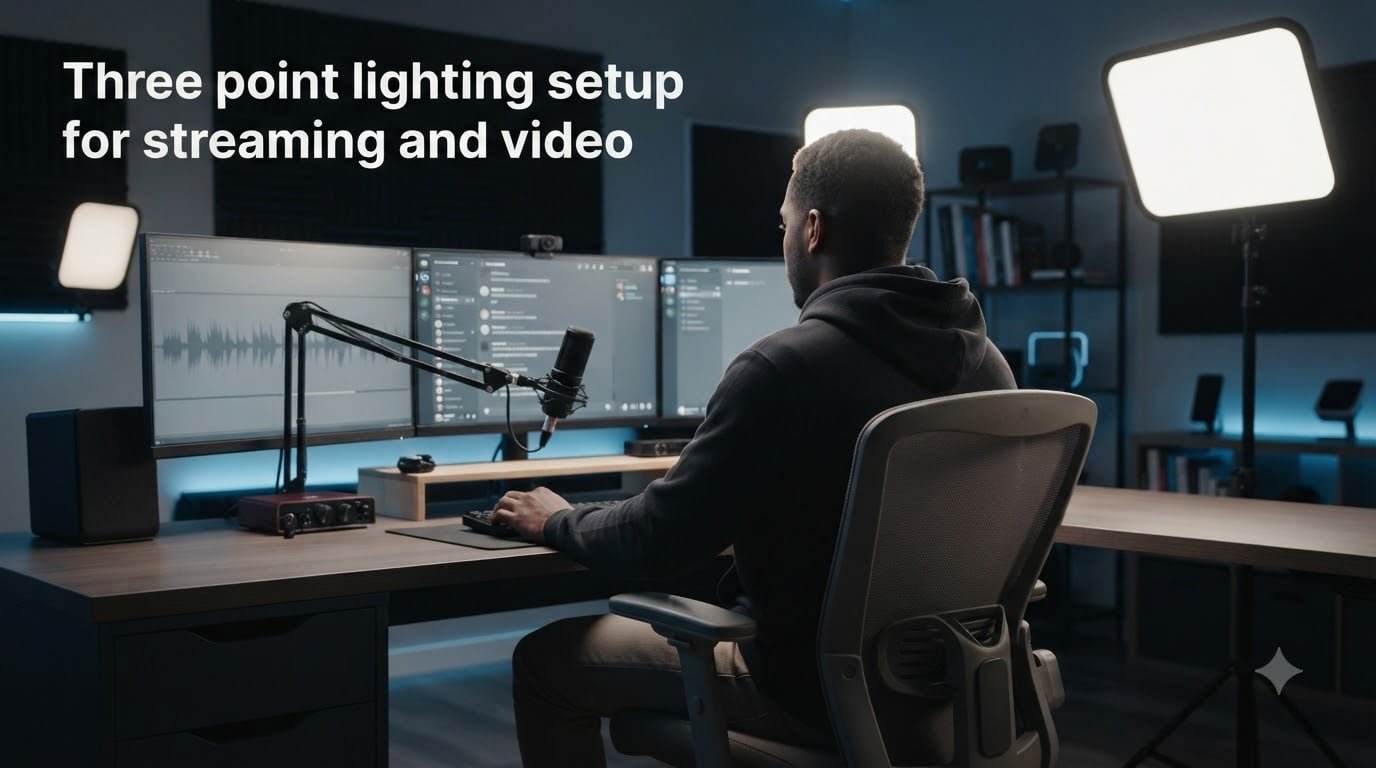
When I started streaming from my bedroom three years ago, my videos looked flat and washed out. Viewers kept telling me I looked like a witness in a security camera. The fix wasn’t a better camera or a faster upload speed. It was a three point lighting setup for streaming and video that changed everything overnight.
This guide walks you through the same technique professional broadcasters, YouTubers, and filmmakers have used for decades. You will learn the role of each light, exact angles to position them, common mistakes to avoid, and budget-friendly alternatives. By the end, you will have a clear plan to make your stream or video look polished without spending a fortune.
Table of Contents
- What Is Three-Point Lighting?
- The Key Light: Your Primary Light Source
- The Fill Light: Softening the Shadows
- The Backlight: Creating Separation and Depth
- How to Set Up Three-Point Lighting: Step-by-Step
- Benefits of Three-Point Lighting for Streaming
- Best Practices and Tips for Different Setups
- Troubleshooting Common Three-Point Lighting Problems
- Three-Point Lighting vs Ring Light and 4-Point Lighting
- Budget vs Professional Equipment Considerations
- Frequently Asked Questions
- What is the best lighting setup for live streaming?
- How do I set up a three-light setup for video?
- How much does a three-point lighting setup cost?
- What is the best lighting setup for YouTube videos?
- What is a 3 point lighting setup?
- How do I prevent glare on glasses when streaming?
- Can I use natural window light as one of the lights?
- Conclusion: Your Next Steps
What Is Three-Point Lighting?
Three-point lighting is a lighting technique that uses three separate light sources positioned around a subject to create depth, control shadows, and produce a polished, professional look on camera. The three lights are called the key light, the fill light, and the backlight, each with a specific job that supports the others.
The technique dates back to early Hollywood, when cinematographers needed a repeatable way to light actors consistently across scenes. It is still the foundation of studio lighting today because it solves three problems at once: harsh shadows, flat appearance, and lack of separation from the background.
For streamers, YouTubers, podcasters, and remote workers on Zoom, three-point lighting is the fastest path to looking professional. It works whether you use a webcam, a mirrorless camera, or just your laptop. The lights matter more than the camera in most home setups.
The Key Light: Your Primary Light Source
The key light is the strongest and most important light in your three-point lighting setup for streaming and video. It is the main source of illumination on your face and shoulders, and it sets the mood of your entire shot.
Position the key light about 45 degrees to one side of your camera, slightly above eye level. A common starting distance is three to four feet from your face. The exact distance depends on the size of your light and how soft you want the shadows.
The key light does most of the work, so it should be the brightest of the three. A softbox, LED panel, or even a bright window on your side can serve this role. If you wear glasses, angle the key light slightly above your line of sight to reduce glare that bounces into the lens.
Choosing Your Key Light Type
Soft, diffused key lights produce flattering results and are easier on the eyes. Hard, direct lights create dramatic shadows but feel harsh on skin. For most streamers and vloggers, a diffused LED panel or a softbox is the best starting point.
Reddit creators often recommend the Westcott Rapid Box XL as an affordable softbox that mounts on a standard LED light. RGB tube lights like the Amaran T2C also work well and let you change colors for branded scenes.
The Fill Light: Softening the Shadows
The fill light sits opposite the key light and fills in the shadows the key light creates on the far side of your face. Without it, the unlit side looks too dark and the contrast feels unnatural.
The standard rule is that the fill light should be about half the intensity of the key light. If your key light is at 100 percent brightness, your fill light should be around 50 percent. This creates a balanced ratio that flatters most faces without looking flat.
Position the fill light at the same 45-degree angle on the opposite side of the camera, roughly the same distance as the key light. Some creators use a white reflector or bounce board instead of a second light to save money. A piece of foam board from a craft store works surprisingly well.
Adjusting the Fill Ratio
A 2:1 ratio between key and fill creates a natural, professional look. A 4:1 ratio creates a more dramatic, moody look that works for cinematic content. Going below 1:1 flattens your face and removes all depth, which is the most common mistake beginners make.
If you only have one light and a window, place the window on one side of your face and let the wall opposite bounce light back as a natural fill. This single-light trick can hold you over until you add more gear.
The Backlight: Creating Separation and Depth
The backlight (sometimes called the rim light or hair light) sits behind you and points toward the back of your head and shoulders. Its job is to create a thin rim of light around you that separates you from the background.
Position the backlight directly behind you, slightly higher than your head, angled down toward your shoulders. It should be about the same intensity as the key light. If the backlight is too strong, it creates an outline that looks unnatural. If it is too weak, you blend into the wall behind you and lose all depth.
This single light is what makes a shot look three-dimensional instead of flat. Without it, even great key and fill lighting can feel like a mugshot because your head merges with the background.
When to Skip or Modify the Backlight
If you have dark hair and a dark background, you might need a stronger backlight to create visible separation. If you have light hair and a bright background, you might lower the backlight or skip it entirely. Some creators replace the backlight with two smaller lights on either side behind them for a more even rim effect.
How to Set Up Three-Point Lighting: Step-by-Step
Follow these steps in order to dial in your three point lighting setup for streaming and video. Total setup time is about 15 to 30 minutes once you have your gear ready.
Step 1: Set Up Your Camera and Background First
Place your camera at eye level and decide where you will sit. Your background should be at least three feet behind you so the backlight has room to create separation. Lock down your framing before you bring in any lights.
Step 2: Position the Key Light
Place your key light on a stand or clamp, 45 degrees to the left or right of the camera, slightly above eye level. Start about three feet from your face. Turn it on and check the camera preview.
Step 3: Add the Fill Light
Place the fill light on the opposite side of the camera at the same 45-degree angle. Set it to about half the brightness of the key light. If you use a reflector, prop it on a chair or stand just outside the camera frame on the shadow side.
Step 4: Position the Backlight
Place the backlight directly behind you, slightly above head height, angled toward the back of your head and shoulders. Match the key light intensity and check that you see a clean rim of light around your hair and shoulders.
Step 5: Adjust for Color Temperature
All three lights should match in color temperature, ideally 5600K for daylight balance or 3200K for tungsten. Mixing temperatures creates an orange or blue tint that looks unprofessional. Most modern LED panels let you lock color temperature.
Step 6: Test, Record, and Tweak
Record a 30-second test clip and review it. Watch for harsh shadows, glare on glasses, color shifts, and flat spots. Adjust distances and angles in small steps. Walk away for ten minutes and review with fresh eyes if something feels off.
Benefits of Three-Point Lighting for Streaming
Three-point lighting solves problems that single-light or natural-light setups cannot. The first benefit is consistent subject illumination. No matter the time of day or weather outside, you look the same on every stream.
The second benefit is shadow reduction. The fill light softens the dark side of your face so you do not look like a noir villain. The third benefit is separation from the background. The backlight makes it obvious where you end and your room begins, which keeps the viewer focused on you.
The fourth benefit is depth and dimensionality. A single front light flattens your face. Three-point lighting gives your cheeks, jawline, and shoulders shape and contour, which reads as professional on camera. Viewers may not notice why, but they will sense that your stream looks more expensive than the average webcam setup.
Best Practices and Tips for Different Setups
Small room setups require shorter light stands and careful placement. Keep lights at least one foot from walls to prevent color casts and unwanted reflections. In a tight space, use a clamp light on a shelf instead of a tall stand.
Cinematic looks favor a 4:1 key-to-fill ratio, a strong backlight, and slightly underexposed exposure. Bright YouTube looks favor a 2:1 ratio, a softer backlight, and brighter overall exposure. Decide the mood you want before you start tweaking.
Color temperature matters more than most beginners realize. Mixing 5600K daylight with 3200K tungsten creates an unflattering orange tint on skin. Pick one temperature and stick to it across all three lights. Most LED panels let you dial in a precise Kelvin value.
Natural light can substitute for the key light if you face a window and turn off your room lights. However, natural light changes throughout the day and disappears at night. If you stream after sunset, plan for a full artificial setup.
Troubleshooting Common Three-Point Lighting Problems
Glare on glasses is the most common complaint. Move your key light higher and angle it down more, so it does not reflect straight into your lens. Anti-reflective coated lenses help. If you cannot eliminate glare, switch to a softer, larger light source.
Harsh shadows on the wall behind you mean your key light is too close or too small. Move it back or use a larger diffuser. If the shadow has sharp edges, the light source is small relative to your subject.
Color shifts between key, fill, and backlight usually mean mismatched bulbs. Check the Kelvin rating on each light. Cheap LED panels sometimes drift in temperature when dimmed, so test at the brightness level you plan to use.
Flat, lifeless footage means your fill light is too strong. Lower it below 50 percent of the key light. You want some shadow on the dark side of your face for depth.
Overblown highlights on skin mean your key light is too close or too bright. Pull it back a foot or dim it slightly. Your camera cannot recover blown highlights, so exposure is more important than resolution.
Three-Point Lighting vs Ring Light and 4-Point Lighting
Ring lights are popular with beauty vloggers because they create a circular catchlight in the eyes. They are essentially a key light wrapped around the lens. They do not provide fill or backlight on their own, so you still need additional lights for a true three-point setup.
Four-point lighting adds a second backlight behind the subject for a more even rim. It is useful for podcasts with two people on camera, or for fashion shoots where the subject needs to be lit from multiple angles. For most streamers, three points is the right balance of effort and result.
Budget vs Professional Equipment Considerations
A budget three-point lighting setup for streaming and video can cost under 100 dollars using a combination of clip-on LED panels, foam board reflectors, and repurposed desk lamps. The technique matters more than the gear at this level.
A mid-range setup between 200 and 500 dollars uses dedicated LED panels with adjustable color temperature and intensity, plus a softbox for the main light. This is the sweet spot for most full-time streamers.
Professional setups above 1000 dollars use high-output COB lights, large softboxes, and DMX control for precise dimming. You only need this level if you produce broadcast-quality content or shoot commercial video.
No matter your budget, the three-point technique is the same. Position the lights at the same angles, match the color temperatures, and dial in the ratios. Good lighting is geometry and balance, not expensive gear.
Frequently Asked Questions
What is the best lighting setup for live streaming?
The best lighting setup for live streaming is three-point lighting. Position a key light at a 45-degree angle to one side, a fill light at half intensity on the opposite side, and a backlight behind you for separation. This combination creates professional results for any budget.
How do I set up a three-light setup for video?
Set up a three-light setup for video by first locking down your camera position. Place the key light at 45 degrees to one side of the camera, the fill light at the opposite 45-degree angle at half intensity, and the backlight behind you angled toward your head and shoulders.
How much does a three-point lighting setup cost?
A three-point lighting setup can cost anywhere from under 100 dollars for a budget build with clip-on LEDs and foam board reflectors, to over 1000 dollars for professional COB lights and large softboxes. Most streamers find the 200 to 500 dollar range delivers excellent results.
What is the best lighting setup for YouTube videos?
The best lighting setup for YouTube videos is three-point lighting with soft, diffused sources. Use a 2:1 key-to-fill ratio for a bright, friendly look, or a 4:1 ratio for a more cinematic feel. Match all three lights to the same color temperature for consistent skin tones.
What is a 3 point lighting setup?
A 3 point lighting setup uses three light sources to illuminate a subject: a key light as the main illumination, a fill light to soften shadows on the opposite side, and a backlight to separate the subject from the background. It is the standard technique used in film, television, and streaming.
How do I prevent glare on glasses when streaming?
Prevent glare on glasses when streaming by raising your key light above eye level and angling it down. Use a larger, softer light source, and tilt your head slightly. Anti-reflective lens coatings also help, and adjusting the fill light position can redirect any remaining glare.
Can I use natural window light as one of the lights?
Yes, you can use natural window light as the key light in a three-point setup. Face the window at a 45-degree angle and use a white wall or reflector as natural fill, then add a single artificial backlight. Note that window light changes throughout the day and disappears at night.
Conclusion: Your Next Steps
You now have a complete plan for a three point lighting setup for streaming and video that fits any budget. Start by placing a single key light at 45 degrees and see how much your stream improves. Add a fill light when you can, then a backlight to complete the look.
The technique is the same whether you spend 100 dollars or 1000 dollars. Position the lights at 45 degrees, match color temperatures, dial in a 2:1 ratio, and adjust based on what you see in the camera. Once you lock it in, your stream will look more polished than 90 percent of creators using better cameras and worse lighting.
For more on building a complete streaming setup, explore our other guides at Free Stream Hosting. The right lighting is the single biggest upgrade you can make to your content, and it pays off on every video you ever record.