
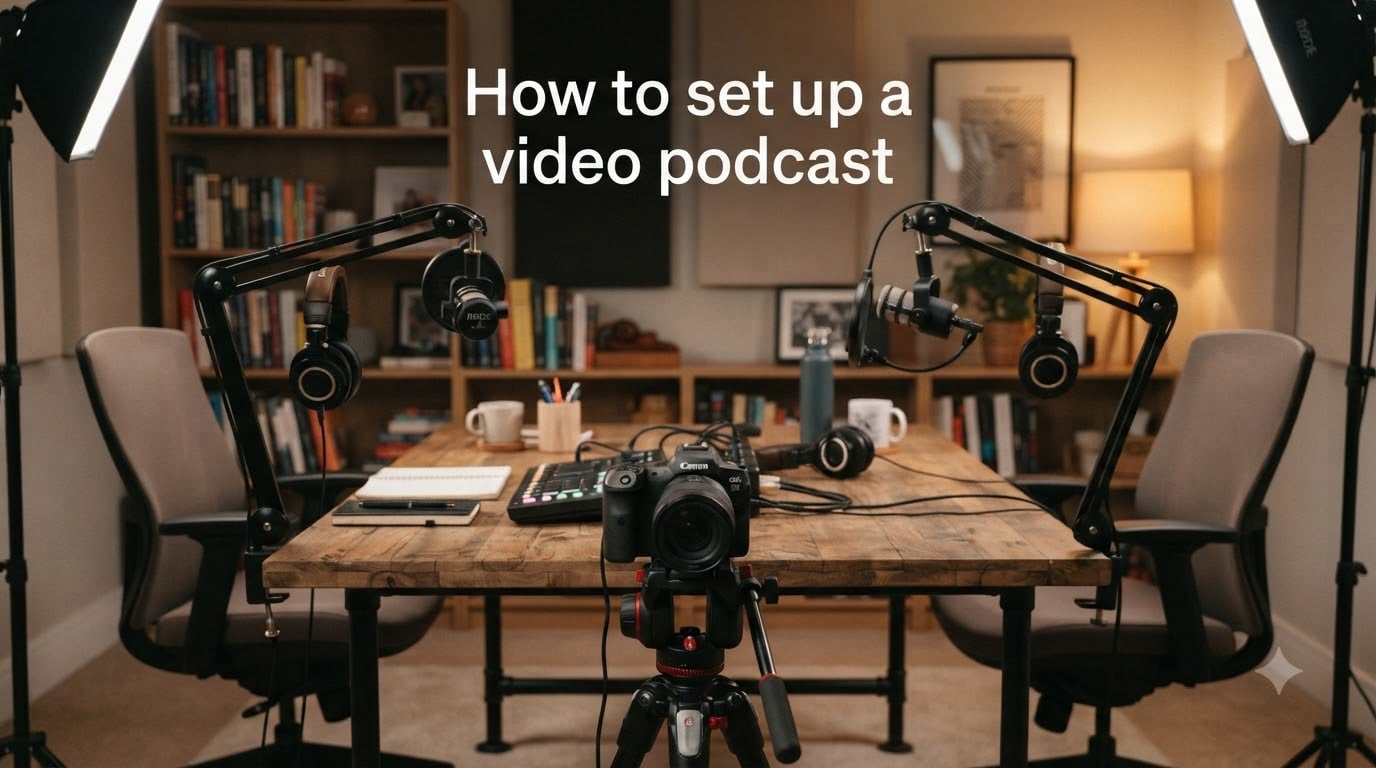
Learning how to set up a video podcast is one of the smartest moves a creator can make this year. Audio-only shows still work, but adding a camera to your recording sessions opens the door to YouTube, Spotify Video, LinkedIn clips, and short-form social content drawn from the same episode. I’ve helped friends launch shows from spare bedrooms and dining rooms, and the difference between a forgettable debut and a sticky first episode almost always comes down to setup choices made before you ever press record.
This guide walks you through the entire process. You’ll learn what gear you actually need, how to arrange a room for clean audio and video, which software handles recording and editing well, and how to budget across three realistic tiers. By the end, you’ll have a clear plan for your own setup, whether you’re flying solo, sitting across from a co-host, or bringing in remote guests.
Table of Contents
- What Is a Video Podcast and Why Start One?
- Essential Video Podcast Equipment You Need
- Choosing the Right Camera for Your Video Podcast
- Picking a Microphone That Sounds Professional
- Setting Up Your Podcast Lighting
- Best Recording Software for Video Podcasting
- Choosing Your Podcast Studio Location
- Step-by-Step Setup Process for Your Video Podcast
- Multi-Camera and Remote Recording Workflows
- Video Podcast Setup Budget Tiers
- Common Mistakes to Avoid When Setting Up
- Frequently Asked Questions
- Final Thoughts on Building Your Video Podcast Setup
What Is a Video Podcast and Why Start One?
A video podcast is a podcast that records both audio and video at the same time. You publish the full video to platforms like YouTube while still uploading the audio-only version to Apple Podcasts, Spotify, and other audio directories. The format exploded between 2023 and 2026 because creators realized one recording session could feed a week’s worth of content: the long episode, short reels, quote graphics, and email clips.
You should care about video podcasting if you want stronger audience connection. Studies of creator platforms have repeatedly shown that video increases watch time and subscriber conversion compared with audio alone. It also positions you better for sponsors, who pay premium rates for visual inventory. If you teach, coach, interview, or sell through your voice, video is no longer optional; it’s the new baseline.
There’s another practical reason: hardware is cheap now. A workable video podcast setup in 2026 can cost under $200 if you already own a laptop, and a polished one runs between $800 and $1,500. Compare that with the audio-only days of $5,000 studios, and the barrier to entry has collapsed.
Essential Video Podcast Equipment You Need
Every video podcast setup rests on five pillars: a camera, a microphone, lighting, an audio interface or mixer, and recording software. Skip any one of them and the production quality drops noticeably. Here’s the equipment list at a glance:
Camera: Webcam, smartphone, or mirrorless/DSLR (one per host)
Microphone: USB or XLR, one per speaker
Lighting: At minimum one key light, ideally a 3-point kit
Audio interface or mixer: Preamps to feed mics into your computer
Recording software: Captures local audio and video separately
Headphones: Closed-back, one per host for monitoring
I always tell new podcasters to start with audio first. Viewers will forgive grainy video, but they will not forgive echo, hum, or a host who sounds like they’re in a tin can. Buy the best microphone you can afford, then layer the camera and lights on top. Gear uniformity matters too. If one mic sounds bright and the other sounds muddy, your episode feels off even when listeners can’t articulate why.
Choosing the Right Camera for Your Video Podcast
Your camera choice depends on budget, number of hosts, and how polished you want to look in 2026. Three tiers cover almost everyone.
Smartphone or Webcam (Under $200)
A modern iPhone, Pixel, or recent Samsung paired with a $25 tripod delivers genuinely good 1080p video. Modern webcams like the Insta360 Link or Elgato Facecam push image quality higher with auto-framing and clean color. This tier works perfectly for solo shows and even two-person interviews when you angle a phone or webcam at each host.
Lock exposure and white balance manually if your camera allows it. Auto settings will shift mid-conversation as you move, and the resulting flicker is distracting in editing.
Mid-Range Mirrorless and Camcorders ($500 to $1,500)
The Sony A6400, Canon R50, and Panasonic G7 are perennial favorites. They shoot clean 4K, accept interchangeable lenses, and have clean HDMI output for capture cards. For two-person interviews, one camera per host gives you perfect framing and lets you cut between angles in post.
Pair any of these cameras with a $30 to $60 capture card from Elgato or AVerMedia. The card feeds uncompressed video into your recording software, which makes a real difference for color grading and cropping.
Cinema and Studio Cameras ($2,000+)
If you run a production company or sponsor-funded show, full-frame cameras like the Sony A7 IV or Canon R6 Mark II produce broadcast-level results. Most independent podcasters never need this tier. Spend the money on better audio and lighting instead.
Picking a Microphone That Sounds Professional
Microphones matter more than cameras. Here’s how to choose the right one for your setup.
USB vs XLR Microphones
USB microphones plug straight into your computer and include a built-in preamp. They’re plug-and-play, portable, and ideal for solo creators or anyone recording remotely. The Samson Q2U, Shure MV6, Rode NT-USB, and Blue Yeti are all reliable picks under $200.
XLR microphones require an audio interface or mixer to connect. They sound slightly cleaner, scale better when you add more hosts, and give you finer control over gain and EQ. Popular XLR options include the Shure SM7B, Rode Procaster, Electro-Voice RE20, and Rode PodMic. Pair them with a Focusrite Scarlett interface or a Rodecaster Pro II if you can stretch the budget.
Here’s the simple rule I share with new podcasters. If you have one host and one computer, buy USB. If you have two or more hosts recording into one system, buy XLR with a mixer. If you record in two different locations and want consistency, USB often wins on portability.
Dynamic vs Condenser Microphones
Dynamic microphones reject background noise, which makes them perfect for untreated rooms. Condenser microphones capture more detail but pick up every keyboard click, refrigerator hum, and passing car. For home podcast studios, dynamic is almost always the safer choice. The Shure SM7B and Rode PodMic are dynamic. Most USB starter mics are also dynamic.
Whatever you buy, use a pop filter or foam windscreen. Plosives from words like “podcast” and “podcasting” will distort your audio without one. They cost $8 and save you hours in post.
Setting Up Your Podcast Lighting
Lighting does more for video quality than resolution. A 1080p camera under good light looks better than a 4K camera in a dim room. Here’s the framework I teach.
Three-Point Lighting Explained
Three-point lighting uses three sources to model the face naturally:
Key light: The main source, placed 45 degrees to one side of the host at roughly eye level. This shapes the face.
Fill light: Softer and dimmer than the key, placed opposite at 45 degrees. It lifts shadows without flattening the look.
Back or rim light: Behind the host, pointing at the back of their head and shoulders. It separates them from the background.
Budget 3-point LED kits from Neewer, Aputure, or Godox run between $120 and $350 and last for years. Color temperature around 5600K (daylight) gives a clean, modern look that matches most ring lights.
Budget Lighting Alternatives
One large window facing your host replaces a key light for free. A white poster board on the opposite side of the face acts as a passive fill. A cheap ring light ($25 to $40) placed behind the host at an angle becomes a rim light. Many successful podcasts launched with exactly this setup.
Avoid overhead room lights. They cast harsh shadows under the eyes and make subjects look tired. Always position your main source at or slightly above eye level, never directly above.
Best Recording Software for Video Podcasting
Recording software determines how cleanly you can capture, edit, and publish your show. These are the tools I recommend based on your workflow.
For Solo Recordings
OBS Studio (free) records unlimited scenes and sources at full quality. It handles webcam, screen capture, and audio routing once you learn the interface. Descript (paid) records video and gives you a transcript you can edit like a Word document, which is a game-changer for many creators.
For Multi-Camera In-Studio Recordings
Rodecaster Pro II combines an audio mixer, video switcher, and recorder in one box. You plug in cameras via HDMI, mics via XLR or USB, and it records everything to an SD card. Ecamm Live, vMix, and StreamYard cover similar ground with different strengths. Ecamm is ideal for Mac users. StreamYard shines for browser-based remote shows.
For Remote Guest Recordings
Riverside.fm and SquadCast record each guest locally in their browser, which means audio and video quality stays high even if someone’s internet drops. Zoom works in a pinch, but its cloud compression can flatten your production value. If you bring on remote guests regularly, dedicated remote recording software pays for itself quickly.
Choosing Your Podcast Studio Location
Your room shapes your sound and your image as much as any piece of gear. Look for a space that’s quiet, has hard surfaces you can soften, and offers a clean background within camera distance.
The CAMP Method for Setup
Creators often apply the CAMP framework (Composition, Ambient, Modify, Podcast) when planning a studio space:
Composition: Apply the rule of thirds. Place the host’s eyes on the upper third line of the frame and leave headroom above.
Ambient: Choose natural light or set up LEDs to match the mood you want.
Modify: Soften the room with rugs, curtains, bookshelves, and acoustic panels. Hard parallel walls create flutter echoes that ruin audio.
Podcast: Test a five-minute recording in the space and listen back with headphones before committing.
Acoustic Treatment on Any Budget
Walk-in closets full of clothes make surprisingly great recording spaces for free. So do rooms with beds, curtains, and rugs. If your space sounds too live, hang moving blankets on the walls behind your microphone. For a permanent fix, $40 to $100 worth of acoustic foam panels from Amazon dramatically reduces echo.
Position your microphone so the back of the capsule faces the noisiest part of the room. That rejection pattern is your friend, and getting it right takes minutes but pays off for years.
Step-by-Step Setup Process for Your Video Podcast
Now that you know the gear, here’s how to bring it all together. Follow these steps in order and you’ll record a clean first episode in a single afternoon.
Step 1: Plan Your Format and Episode Length
Decide how many people will be on camera, whether you want remote guests, and how long episodes run. Most video podcasts land between 30 and 60 minutes. Your format drives every gear choice that follows.
Step 2: Choose and Prepare Your Room
Pick the quietest room you have access to. Test it at the time of day you plan to record, since traffic, HVAC, and neighbor noise shift by hour. Soften hard surfaces and clear the background of clutter. A bookshelf, plants, or a clean wall all work well.
Step 3: Position Your Camera and Lighting
Mount your camera at eye level on a tripod. Set up your key light at 45 degrees, fill light opposite, and rim light behind. Adjust color temperature to match across all sources so skin tones look natural.
Step 4: Connect and Test Your Microphones
Place each mic on a boom arm or desk stand about four to six inches from the host’s mouth, slightly off-axis to reduce plosives. Run a 30-second test recording. Listen with closed-back headphones and check for hum, hiss, echo, or distortion. Adjust gain until peaks sit around -12 dB on your recording software meter.
Step 5: Configure Your Recording Software
Set up scenes in OBS, Ecamm, or Rodecaster Video with each camera as its own source. Confirm audio is routed to the correct track per host. Enable local recording if your software supports it, which gives you a backup even if your streaming software crashes.
Step 6: Run a Full Test Episode
Record five to ten minutes of conversation before your real session. Watch it back with both eyes and ears. Check framing, lighting, audio levels, and any background distractions. Adjust and test again until everything looks right.
Step 7: Record, Back Up, and Edit
Hit record on every device. Back up raw files to two separate drives immediately. Edit in Descript, Premiere Pro, Final Cut, or DaVinci Resolve. Export your final video at 1080p or 4K and your audio at 128 kbps MP3 for podcast directories.
Multi-Camera and Remote Recording Workflows
Once you’ve nailed a single-camera setup, scaling up is mostly about managing multiple video and audio feeds without losing sync.
Multi-Camera Podcast Setup
Run one camera and one microphone per host. Each camera connects to a capture card or a video switcher like the Rodecaster Video or ATEM Mini. The switcher lets you cut between angles live while recording clean feeds to an SD card. Add a small monitor so each host can see their framing without crowding the camera.
Timecode Synchronization
If you record each camera and audio source separately, sync them in post using a clapper, a loud hand clap, or a timecode generator. Devices like the Tentacle Sync or Atomos UltraSync keep every recorder locked to the same clock, which saves hours when you have four or more feeds to align.
Recording Remote Guests
For guests joining from another city, send them a Riverside or SquadCast link and ask them to record locally on their end. Use a second tool like Zoom for real-time conversation and direction. After the call, you download each guest’s high-quality local file and combine everything in your editor. This double-records the conversation and protects quality even when someone’s Wi-Fi struggles.
Video Podcast Setup Budget Tiers
Here’s how the gear stacks up at three realistic price points for 2026. Use the tier that matches your launch plans.
Starter Setup (Under $200)
Smartphone or $100 webcam
$60 to $100 USB dynamic microphone
$25 ring light or window light
Free OBS Studio for recording
Closed-back headphones you already own
This setup delivers surprisingly professional audio and decent video for solo creators. Many full-time YouTubers started here.
Intermediate Setup ($200 to $1,000)
Two USB or entry-level XLR microphones ($150 to $300 total)
Two $80 to $150 webcams or a single mirrorless camera with capture card
$120 to $200 LED panel kit
Audio interface or entry-level mixer ($150 to $250)
Descript or Ecamm Live for editing and recording
This is the sweet spot for two-person shows that want to look and sound polished without a major investment.
Pro Setup ($1,000 to $5,000+)
Two or more mirrorless cameras with prime lenses
Two or more XLR microphones (Shure SM7B, Rode PodMic)
Rodecaster Pro II or similar mixer/recorder
Full 3-point LED lighting kit
Dedicated recording computer and capture cards
Acoustic panels and a treated room
At this tier you’re producing broadcast-quality content for paying sponsors. Most independent podcasters don’t need to go this far to grow a loyal audience.
Common Mistakes to Avoid When Setting Up
I’ve watched dozens of new creators hit the same walls. Here’s how to skip the worst ones.
Skimping on audio. Bad video loses a few viewers. Bad audio loses everyone. Spend at least half your budget on mics and acoustic treatment.
Overbuying gear before launching. Your tenth episode matters more than your perfect pre-launch setup. Start with the starter tier, publish four episodes, then upgrade based on real feedback.
Ignoring backups. Hard drives fail. SD cards corrupt. Cloud uploads drop. Always record locally and on at least one backup drive. Add a second internet connection if you stream live.
Forgetting consistency. Match camera models when you can. Mismatched colors and skin tones make multi-cam footage jarring. Match microphone models too, so every host sounds similar.
Recording without headphones. Closed-back headphones on every host catch issues that speakers can’t hear in real time, like background hum, clipping, or echo. They cost $30 and prevent $300 of editing pain.
Frequently Asked Questions
What equipment do I need for a video podcast?
At minimum, you need a camera (webcam, smartphone, or mirrorless), a microphone per host, lighting, headphones, and recording software. A starter setup with all five can cost under $200 in 2026.
How do I create a video podcast for free?
Use your smartphone as the camera, record audio into your computer’s built-in microphone or a borrowed USB mic, light yourself with a window or free lamp, and record with free software like OBS Studio. You can launch a complete video podcast at zero cost beyond what you already own.
What is the best software for video podcasting?
Riverside.fm and SquadCast are best for remote guests because they record locally in each browser. OBS Studio is the best free option for in-studio multi-cam recording. Descript is the best editor for creators who want a transcript-based workflow. Ecamm Live leads for Mac users who want streaming and recording in one app.
Can a podcast be a video?
Yes. A video podcast is simply a podcast that records video alongside audio and publishes both versions. You upload the audio to Apple Podcasts and Spotify, and the video to YouTube, Spotify Video, or your own site. The two formats feed each other and grow your audience faster than either alone.
Final Thoughts on Building Your Video Podcast Setup
Learning how to set up a video podcast in 2026 comes down to a few key decisions: pick gear that matches your format, treat your room before you treat your rack, and start recording before you feel ready. The creators who grow fastest are the ones who publish consistently, then refine their setup based on what their audience actually responds to.
Start with the starter tier if this is your first show. Run four episodes, gather listener feedback, and invest in upgrades where they matter most. Within six months you’ll have a setup you could not have imagined on day one, and a back catalog of video podcasts doing the heavy lifting for your brand every single day.