
You are mid-stream, chat is engaged, and then you see it: the dreaded dropped frames counter climbing in OBS. I have been there, and so have thousands of streamers who hit the same wall. The frustration doubles when your internet seems fine but OBS keeps dropping frames anyway.
Here is the thing most guides miss: the OBS dropped frames fix that works for you depends entirely on whether the root cause is your network or your hardware. Applying network fixes to a hardware problem wastes hours and solves nothing. This guide walks you through a definitive diagnostic workflow so you can pinpoint the cause and apply the right fix.
Our team analyzed forum threads from r/obs, r/Twitch, and the official OBS Project forum to identify the fixes that actually work for real streamers. We also cross-referenced OBS official documentation and tested solutions across different hardware setups. Whether you stream on Twitch, YouTube, or Facebook Live, the steps below will help you get to zero dropped frames.
By the end, you will know exactly how to read the OBS stats window, run a quick diagnostic to identify network versus hardware causes, and apply targeted fixes. No more guessing, no more throwing settings at the wall to see what sticks.
Table of Contents
- What Are Dropped Frames in OBS?
- Dropped Frames vs Lagged Frames vs Skipped Frames
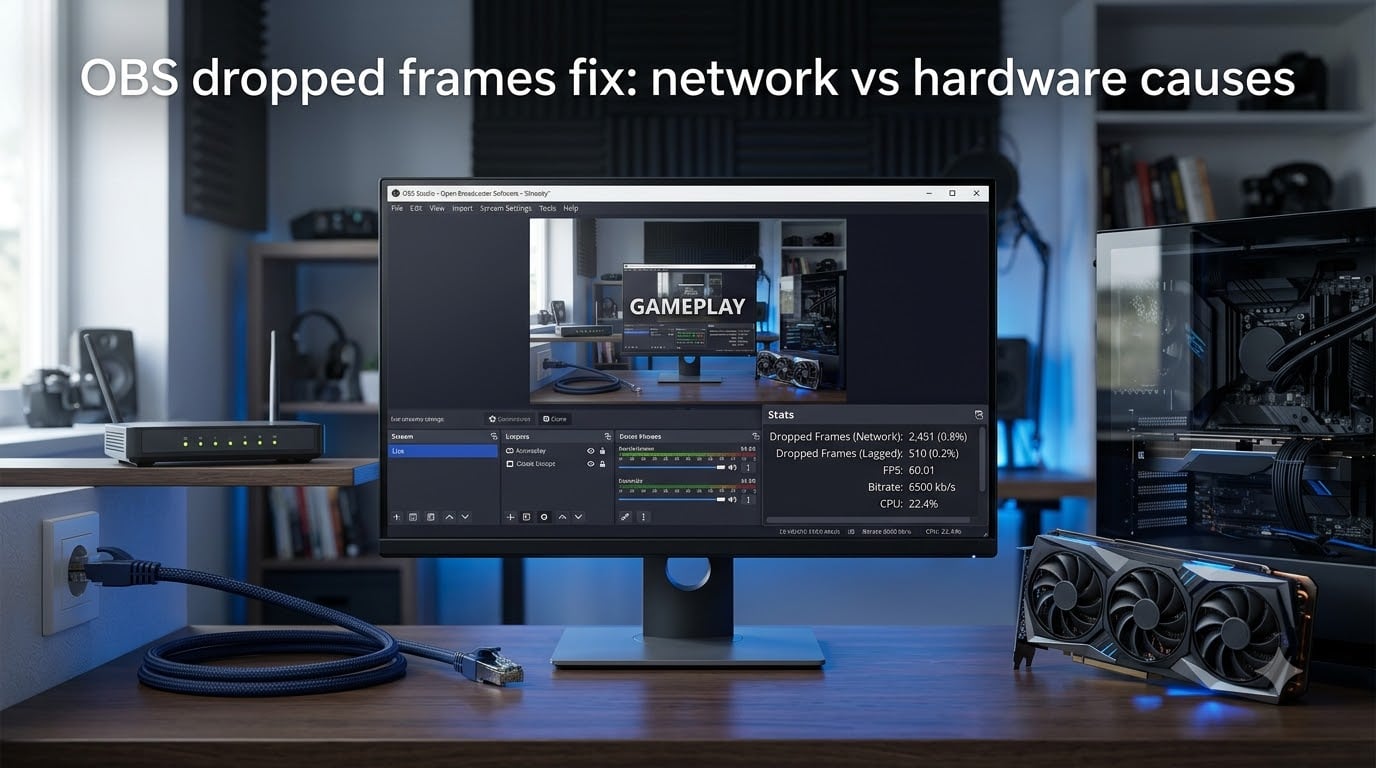
- How to Read the OBS Stats Window to Diagnose Frame Drops?
- How to Diagnose: Is It Your Network or Your Hardware?
- OBS Dropped Frames Fix: Network Causes
- OBS Dropped Frames Fix: Hardware Causes
- When to Contact Your ISP vs Upgrade Your Hardware?
- Frequently Asked Questions
- Conclusion
What Are Dropped Frames in OBS?
Dropped frames in OBS happen when the software cannot send your encoded video data to the streaming server fast enough. OBS encodes each frame of your gameplay or camera feed in real time and transmits it to platforms like Twitch or YouTube over your internet connection. When that transmission pipeline gets interrupted, OBS discards frames to keep the stream from falling further behind.
This is different from your game dropping frames. OBS dropped frames affect what your viewers see, not what you see on your monitor. Your local gameplay might look buttery smooth while your stream stutters and buffers for everyone watching.
As for what counts as acceptable: under 1% dropped frames is the target. Anything between 1% and 5% will cause noticeable stutter for viewers. Above 5%, your stream becomes genuinely painful to watch, with frequent buffering and frozen frames. If you are seeing double-digit percentages, something is seriously wrong and needs immediate attention.
The OBS community and official documentation are clear on one point: dropped frames are almost always a network issue, not a problem with OBS itself. The OBS forum moderators repeat this constantly. But that does not mean hardware is never to blame, which is why a proper diagnosis matters.
Dropped Frames vs Lagged Frames vs Skipped Frames
OBS tracks three distinct types of frame issues, and mixing them up leads to wasted troubleshooting time. Each one points to a different root cause, so knowing which one you have is step one of any OBS dropped frames fix.
Dropped frames appear in the Stats window under “Dropped Frames” and “Network.” These are frames that OBS successfully encoded but could not send to the streaming server. The data left your encoder but never arrived at the ingest server. This is a network problem, period.
Lagged frames show up under “Frames Lagged Due to Rendering Lag.” These frames could not be rendered by OBS in time because your GPU was too busy. Your graphics card was overloaded, usually by your game or by OBS running effects like scene transitions, browser sources, or filters. This is a GPU rendering problem.
Skipped frames appear under “Frames Skipped Due to Encoding Lag.” OBS rendered the frame but your encoder (whether x264 on your CPU or NVENC on your GPU) could not compress it in time. This is an encoder overload problem. Your CPU or GPU encoder is being asked to do more than it can handle at your chosen bitrate and preset.
Here is the shortcut: if only your network frames are dropping, your hardware is fine and your connection is the problem. If you see lagged or skipped frames climbing alongside dropped frames, you have a hardware bottleneck that also needs addressing.
Open the OBS Stats window now (View > Stats) and check which counters are climbing. That single observation narrows your troubleshooting path dramatically.
How to Read the OBS Stats Window to Diagnose Frame Drops?
The OBS Stats window is your single most important diagnostic tool. Press View in the top menu, then select Stats. Keep this window visible while you stream or record so you can watch the numbers in real time.
The Stats window shows several columns. Focus on these four: Frames Dropped, Frames Lagged Due to Rendering Lag, Frames Skipped Due to Encoding Lag, and the percentage column next to each. The raw count tells you the scale of the problem, while the percentage tells you the severity.
Next to the dropped frames counter, OBS shows whether the drops are tagged as network-related. This tag is your biggest clue. When OBS marks dropped frames as network drops, it means the encoder finished its job and the frames were ready to send, but the connection to the ingest server failed to deliver them in time.
Check the “Stream” section of the Stats window for two more numbers: your current bitrate and your target bitrate. If your actual bitrate is bouncing wildly while your target stays steady, you are seeing network instability in action. A healthy stream shows a bitrate that stays within a few hundred kbps of the target.
Also look at the “Megabytes Sent” counter. If it stops increasing during a burst of dropped frames, your data is not leaving your computer at all. That points to a local network issue, firewall blocking, or a saturated upload connection. If megabytes sent keeps climbing while frames still drop, the issue is between you and the server, meaning packet loss somewhere on the route.
Run this check for 60 seconds during an active stream. The pattern you see in those 60 seconds tells you everything you need to know about where to focus your OBS dropped frames fix.
How to Diagnose: Is It Your Network or Your Hardware?
This is the question every frustrated streamer eventually asks, and most guides skip it entirely. Our diagnostic workflow takes about five minutes and gives you a definitive answer.
Step 1: Open OBS Stats and start your stream for at least 30 seconds. Watch the three counters: dropped frames, lagged frames, and skipped frames.
Step 2: Check which counter is climbing. If only dropped frames are increasing and they are tagged as network drops, your hardware is doing its job. Skip to the network fixes section below.
Step 3: If lagged frames are also climbing, your GPU is overloaded. This is a rendering issue, not a network issue. Lower your output resolution, disable heavy OBS sources like browser sources and filters, or cap your frame rate.
Step 4: If skipped frames are climbing, your encoder is overloaded. Switch from x264 software encoding to NVENC hardware encoding if you have an NVIDIA GPU. If you already use NVENC, lower your encoder preset or reduce your bitrate.
Step 5: If you see dropped frames with zero lagged or skipped frames and your internet speed test looks good, the issue is likely server selection or route quality. Try a different ingest server using the TwitchTest tool recommended by OBS forum users.
Step 6: If dropped frames spike at specific times of day, especially evenings, you are dealing with ISP congestion or peak-hour throttling. This is one of the most common explanations for “my internet is fine but OBS keeps dropping frames.”
One Reddit user from r/obs summarized the diagnostic perfectly: dropped network frames are never caused by OBS itself. They are caused by your connection, your hardware path to the server, or your ISP. If OBS were the culprit, everyone would have the same problem regardless of their setup.
OBS Dropped Frames Fix: Network Causes
If your diagnosis points to network issues, the fixes below address the most common causes in order of impact. Work through them top to bottom, testing after each one.
Step 1: Switch to a Wired Ethernet Connection
Wi-Fi is the number one cause of dropped frames in OBS, and it is also the easiest fix. Even on a fast wireless network, latency spikes and packet loss happen constantly due to interference, channel congestion, and distance from the router. Ethernet eliminates these variables entirely.
Plug your streaming PC directly into your router with a Cat 5e or Cat 6 cable. If running a long cable is impractical, consider a powerline adapter as a middle ground. It will not match a direct Ethernet connection, but it beats Wi-Fi for stability.
Forum users on r/Twitch consistently report that switching from Wi-Fi to Ethernet drops their frame loss to zero overnight. This single change resolves more OBS dropped frames issues than every other fix combined.
Step 2: Run an Upload Speed Test
Download speed means nothing for streaming. What matters is upload speed, and many internet plans severely throttle it. Run a speed test at Speedtest.net or Fast.com and look specifically at the upload number.
For stable streaming, your upload speed should be at least double your streaming bitrate. If you stream at 6000 kbps (6 Mbps), you need at least 12 Mbps of consistent upload bandwidth. Headroom matters because other devices on your network compete for that same upload pipe.
Run the test multiple times throughout the day, especially during your usual streaming hours. If your upload speed drops significantly in the evening, you are dealing with ISP congestion. No amount of OBS tweaking will fix that.
Step 3: Switch Streaming Servers
OBS connects to an ingest server operated by your streaming platform. If that specific server is overloaded or has a poor route from your location, frames drop even with a perfect connection. The default auto-selection does not always pick the best server for you.
For Twitch streamers, download the TwitchTest tool from the OBS community resources. It pings every Twitch ingest server from your connection and reports latency, jitter, and quality scores. Pick the server with the highest quality rating, not just the lowest ping.
In OBS, go to Settings > Stream and manually select the server that TwitchTest identified as best. This fix alone resolves frame drops for streamers whose auto-selected server was on a congested route.
Step 4: Enable Dynamic Bitrate
Dynamic Bitrate is the single most recommended fix on the OBS forum, and for good reason. When enabled, OBS automatically reduces your streaming bitrate during network congestion instead of dropping frames. Your stream quality dips temporarily, but viewers do not experience buffering or frozen video.
To enable it, go to Settings > Advanced > Network and check “Dynamically change bitrate to manage congestion.” This feature requires OBS 25.0 or later, so make sure you are running a current version of OBS Studio.
Reddit users from r/obs describe Dynamic Bitrate as a quick fix that should be the first thing you try. It does not solve the underlying network problem, but it prevents dropped frames from ruining your stream while you investigate further.
Step 5: Check Firewall and Antivirus Settings
Windows Defender Firewall and third-party antivirus software can throttle or block OBS network traffic without any visible warning. OBS uses TCP port 1935 for RTMP streaming, and some security software inspects that traffic aggressively, adding latency that causes frame drops.
Open your firewall settings and add OBS as an allowed application for both private and public networks. If you use third-party antivirus with a network inspection feature, try disabling it temporarily during a test stream to see if frame drops stop.
The Streamlabs team specifically mentions LAN adapter resets as a fix for persistent network frame drops. If you recently changed network adapters or installed VPN software, reset your network adapter through Windows Network settings to clear stale configurations.
Step 6: Restart Your Router and Modem
This sounds too simple to work, but it genuinely does. Routers and modems accumulate connection state issues over time, especially if they have been running for weeks without a reboot. Packet loss and latency creep in gradually.
Unplug both your router and modem, wait 30 seconds, plug the modem back in first, wait for it to fully connect, then plug the router back in. Run a test stream afterward. If frame drops disappear, your networking hardware was the bottleneck.
If the problem returns within a few days, your router may need a firmware update or replacement. Older routers struggle with sustained upload traffic, which streaming demands continuously for hours.
OBS Dropped Frames Fix: Hardware Causes
If your Stats window shows lagged or skipped frames alongside dropped frames, your hardware is the bottleneck. The fixes below target encoder and rendering overload, which are the two hardware-related causes of frame drops.
Step 1: Switch to a Hardware Encoder (NVENC)
The x264 software encoder uses your CPU to compress video. On systems with a dedicated GPU, this is almost always the wrong choice for live streaming. The NVIDIA NVENC encoder handles compression on a dedicated chip on your GPU, freeing your CPU for gameplay and OBS rendering tasks.
Go to Settings > Output and set Output Mode to Advanced. Under the Streaming tab, set Video Encoder to “NVIDIA NVENC H.264” (or HEVC if your platform supports it). If you use an AMD GPU, select “AMD Hardware Encoder” instead.
Reddit users confirm that switching from x264 to NVENC eliminates skipped frames almost immediately on systems with modern NVIDIA GPUs. Even older GTX-series cards have a separate NVENC chip that does not compete with your gameplay for GPU resources.
Step 2: Lower Your Output Resolution
If your encoder cannot keep up, reducing the amount of data it needs to process is the fastest fix. Lowering your output resolution directly reduces the workload on both your encoder and your GPU.
For 1080p streams at 60 FPS, try dropping to 720p at 60 FPS first. If skipped frames disappear, your hardware was overloaded. You can also keep your base resolution at 1080p in Settings > Video and set a lower output resolution like 936p, which many Twitch streamers use as a compromise between quality and performance.
The downscaled image looks nearly identical to viewers on mobile devices and tablets, which is where most stream viewership happens. The performance gain is substantial.
Step 3: Cap Your Frame Rate
Uncapped frame rates cause GPU usage to spike unpredictably, which directly causes rendering lag in OBS. If your game runs at 200 FPS, your GPU is working flat out, leaving almost no headroom for OBS to render your scene overlays, alerts, and camera.
Cap your game frame rate in-game or through your GPU control panel to match your stream frame rate. If you stream at 60 FPS, cap your game at 60 or slightly above. This frees GPU resources for OBS rendering and eliminates lagged frames.
Competitive streamers who need high game FPS for input latency often use a dual-PC setup to separate gaming from encoding. If you stream and game on a single PC, capping your frame rate is the pragmatic tradeoff.
Step 4: Close Background Applications
Every application running alongside OBS competes for CPU, GPU, and network resources. Browser tabs with video, game launchers running in the background, cloud sync tools, and even Discord hardware acceleration all eat into the resources OBS needs.
Open Task Manager (Ctrl+Shift+Esc) and sort by CPU usage and GPU usage. Close anything non-essential before you start streaming. Pay special attention to anything uploading data in the background, like cloud backup software or large downloads, since those compete for your upload bandwidth.
Step 5: Check CPU and GPU Usage
While streaming, monitor your CPU and GPU usage using Task Manager or a hardware monitoring tool like HWiNFO. If your CPU hits 95% to 100% usage during your stream, you have CPU overload, which causes skipped frames with x264 encoding.
If your GPU sits at 95% to 100% usage, your game is consuming all available graphics power and OBS cannot render frames in time, causing lagged frames. The solution is either lowering in-game graphics settings, capping frame rate, or lowering OBS output resolution.
A healthy single-PC streaming setup shows GPU usage at 80% to 90% and CPU usage below 80%. If you cannot hit those numbers, your hardware is the limit and no setting change will fully solve it.
Step 6: Adjust Encoder Preset
NVENC offers several quality presets that trade encoding workload for image quality. The “P6: Slower (Better Quality)” preset is a common default, but if you are seeing skipped frames, drop to “P4: Faster” or “P5: Medium.”
For x264 users, the “veryfast” preset is the standard for live streaming. If you need more encoding headroom, drop to “faster” or “fast.” The visual quality difference is minimal at typical streaming bitrates, but the CPU savings are significant.
Also check your rate control setting. CBR (Constant Bitrate) is required by Twitch and recommended for most platforms. If you accidentally set VBR (Variable Bitrate), your encoder works harder during high-motion scenes, which can trigger skipped frame spikes.
When to Contact Your ISP vs Upgrade Your Hardware?
After working through every fix above, some streamers still see frame drops. At that point, the question becomes whether your ISP or your hardware is the remaining bottleneck.
Contact your ISP if your upload speed test consistently shows less than double your streaming bitrate, if speeds drop significantly during evening hours, or if packet loss appears on a wired connection. Ask specifically about upload bandwidth guarantees and whether your plan includes data prioritization during peak hours.
Forum users note that ISP-related issues are often the hardest to solve because they are outside your control. If you have done everything right on your end, a persistent upload problem may require switching ISPs or upgrading to a business-class plan with better upload guarantees.
Upgrade your hardware if your CPU or GPU consistently maxes out during streams even after lowering settings, if your system is more than four or five years old, or if you cannot use NVENC because you lack a dedicated GPU. The single most impactful upgrade for streaming is adding a dedicated NVIDIA GPU, even a mid-range model, because the NVENC encoder handles the heaviest workload.
As one OBS forum user put it: even after upgrading your CPU and GPU, frame drops persist if your network is the actual problem. Make sure your diagnosis is correct before spending money on hardware.
Frequently Asked Questions
How can I fix dropped frames in OBS on my network?
Switch to a wired Ethernet connection, run an upload speed test to confirm you have at least double your streaming bitrate in available upload, try a different ingest server using TwitchTest, and enable Dynamic Bitrate in OBS Settings u0026gt; Advanced u0026gt; Network. Restarting your router and modem also resolves many connection-related frame drops.
Why does OBS make my FPS drop?
OBS uses your GPU to render scenes and overlays, which competes with your game for graphics resources. If your GPU hits near 100% usage, OBS cannot render frames in time, causing lagged frames. Cap your game frame rate, lower in-game graphics settings, or reduce your OBS output resolution to free GPU headroom.
What is the main cause of frame drops?
The main cause of dropped frames in OBS is network instability, specifically insufficient upload bandwidth, Wi-Fi packet loss, congested ingest servers, or ISP throttling during peak hours. Hardware causes like encoder overload are the second most common reason, producing skipped and lagged frames rather than network drops.
Why is my stream suddenly dropping frames?
Sudden frame drops usually indicate either a change in network conditions (ISP congestion, router issue, background uploads) or a change in your system load (new background process, game update increasing GPU demand). Check OBS Stats to see if the drops are tagged as network or encoding, then restart OBS and your networking equipment as a first step.
Why is OBS dropping frames with good internet?
Good download speed does not guarantee good upload speed, which is what streaming requires. Even with fast internet, dropped frames can be caused by Wi-Fi instability, an overloaded or distant ingest server, firewall throttling, peak-hour ISP congestion, or packet loss on the route between you and the streaming platform. Run an upload-specific speed test and use TwitchTest to check server quality.
What is an acceptable dropped frames percentage in OBS?
Under 1% dropped frames is the target for a clean stream. Between 1% and 5% causes noticeable stutter for viewers. Above 5% produces frequent buffering and frozen video. If you consistently see above 5%, you need to either fix your network connection or reduce your streaming bitrate and resolution.
Conclusion
The fastest OBS dropped frames fix starts with reading your Stats window correctly. Dropped frames point to network causes, lagged frames point to GPU rendering overload, and skipped frames point to encoder overload. Knowing which counter is climbing cuts your troubleshooting time from hours to minutes.
For network-caused drops, switch to Ethernet, test your upload speed, enable Dynamic Bitrate, and try a different ingest server. For hardware-caused drops, switch to NVENC encoding, lower your output resolution, cap your frame rate, and close background applications.
Start with the diagnostic workflow, apply the targeted fixes for your specific issue, and test after each change. Most streamers resolve their dropped frames within the first two or three steps. If nothing works after exhausting every fix, the issue is either ISP-related or a hardware upgrade is in your future.
Your viewers deserve a smooth stream. Take five minutes to run the diagnostic, and you will know exactly where to focus your effort.