
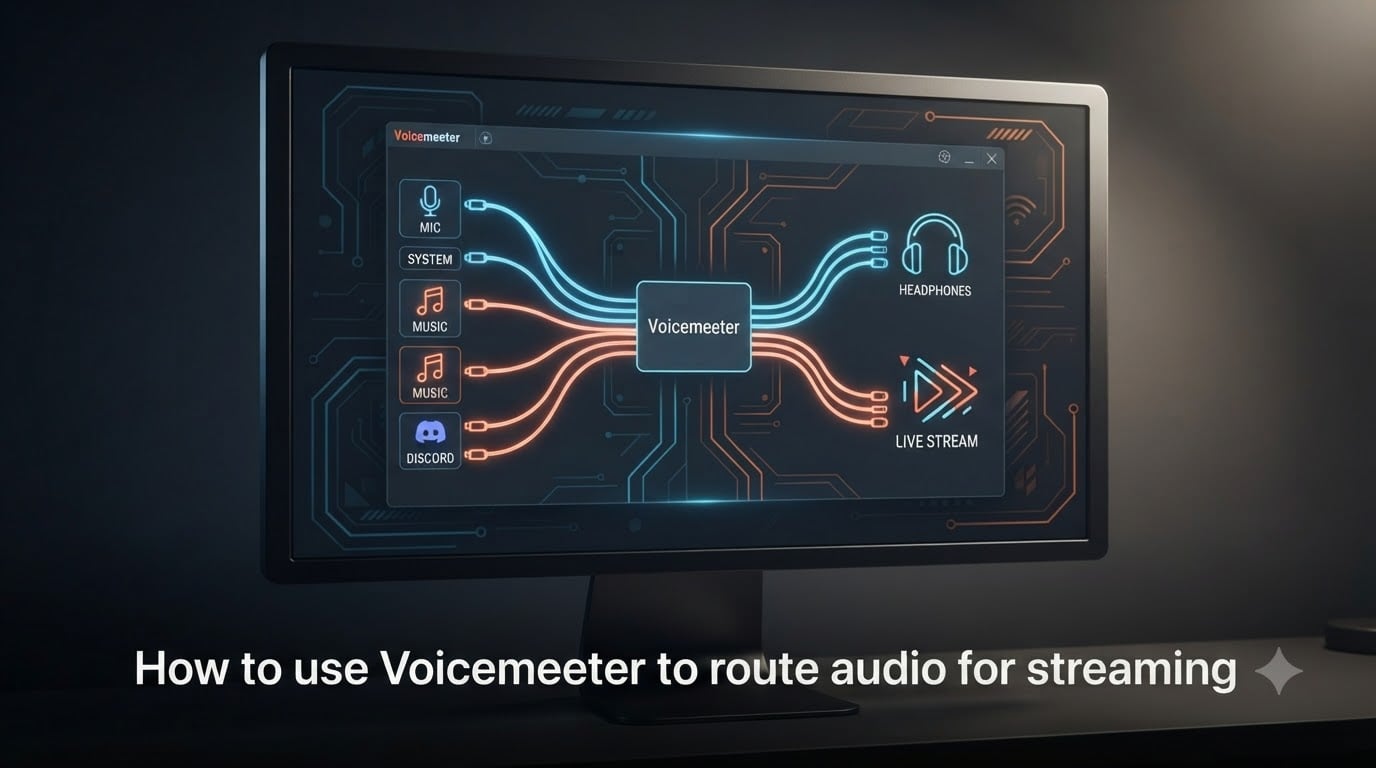
If you have ever tried to split your game audio, Discord chat, music, and microphone into separate streams using nothing but Windows, you already know how painful it gets. That is exactly why so many creators search for how to use VoiceMeeter to route audio for streaming.
I have spent more weekends than I care to admit wrestling with audio routing for my own streams. VoiceMeeter is the tool that finally made it click for me, and I want to walk you through the exact setup I use. By the end of this guide, you will know how to install VoiceMeeter, route every common audio source, push it all into OBS, and fix the issues that catch most new users.
Let me start with the basics so we are on the same page.
Table of Contents
- What Is VoiceMeeter and Why Streamers Use It?
- Download and Install VoiceMeeter
- Configure Windows Sound Settings for VoiceMeeter
- Understanding the A1, A2, B1, and B2 Routing Buttons
- How to Route Your Microphone Through VoiceMeeter
- Route Desktop Audio and Music Through VoiceMeeter
- Connect VoiceMeeter to OBS for Streaming
- Separate Discord, Music, and Game Audio Into Different Channels
- Troubleshooting Common VoiceMeeter Streaming Issues
- Frequently Asked Questions
- Final Thoughts on VoiceMeeter for Streaming
What Is VoiceMeeter and Why Streamers Use It?
VoiceMeeter is a free virtual audio mixer made by VB-Audio. Think of it as a black box that sits between Windows and your applications. Your apps send their audio into the box, you mix and process it inside the box, and the box sends the result to your headphones, your speakers, and your streaming software.
The “black box” analogy is the simplest way I can describe VoiceMeeter routing. Once you see audio as something that flows in and out of a virtual mixer, the rest of the setup just clicks.
VB-Audio actually ships three versions of the program, and beginners often install the wrong one. Here is how they differ:
VoiceMeeter (the original): 3 inputs, 2 outputs. Good for simple mic + desktop audio setups.
VoiceMeeter Banana (recommended for most streamers): 5 inputs, 5 outputs, plus built-in EQ, gate, and compression on every channel.
VoiceMeeter Potato (advanced): 8 inputs, 8 outputs, with VBAN networking, aux buses, and per-channel sidechain ducking.
If you are setting up streaming for the first time, grab Banana. It has every feature you need today, plus room to grow into Potato-level routing later without re-learning the interface.
Download and Install VoiceMeeter
Installing VoiceMeeter only takes a couple of minutes. Follow these steps exactly so nothing breaks on the way in.
Step 1: Go to vb-audio.com and download the VoiceMeeter Banana installer (or Potato if you want the advanced version). Make sure you grab the full installation package, not just the upgrade patch.
Step 2: During install, leave the default installation folder. The installer will also drop two virtual audio devices into Windows: VoiceMeeter Input and VoiceMeeter Output. You will see them in your sound settings later.
Step 3: Reboot your computer. VoiceMeeter installs low-level audio drivers, and Windows often refuses to recognize them until a restart.
Step 4: Launch VoiceMeeter from the Start menu. If the engine reports “Running” in the top right, you are ready to move on. If it says “Not Running,” right-click the system tray icon and choose “Run Engine.”
A quick warning: do not skip the reboot. Most “VoiceMeeter is not picking up desktop audio” issues trace back to skipped restarts after install.
Configure Windows Sound Settings for VoiceMeeter
Before you touch a single slider in VoiceMeeter, you need to point Windows at the new virtual devices. This is the step most new streamers skip and then spend hours wondering why their stream has no audio.
Step 1: Open the Windows Sound Control Panel (right-click the speaker icon in your taskbar, then choose “Sound settings” or “Playback devices”).
Step 2: Under the Output section, set your default playback device to “VoiceMeeter Input.” This is the virtual cable that feeds all your desktop audio into VoiceMeeter.
Step 3: Under the Input section, set your default recording device to “VoiceMeeter Output.” Apps that need a “microphone” (Discord, OBS, Zoom, browser-based chat) will now pull from VoiceMeeter instead of your real mic.
Step 4: Click “Device properties” on your real microphone and disable “Listen to this device.” Otherwise, you will get a nasty echo loop the moment you start streaming.
That is the whole Windows side of the setup. From here on, you work inside the VoiceMeeter interface.
Understanding the A1, A2, B1, and B2 Routing Buttons
The single biggest source of confusion in VoiceMeeter is the row of little buttons under each input strip. Once you understand what they do, the rest of the program makes sense.
A1, A2, A3 (and A4/A5 on Potato) send audio to physical output devices. A1 is usually your headphones, A2 is your speakers, and so on.
B1, B2, B3 send audio to virtual outputs that apps see as microphones. B1 is the one OBS will pull from for your stream.
So when a streamer says “press B1 next to your mic,” they mean “send this audio to the virtual output that OBS is listening to.” Pressing A1 means “send this audio to my headphones so I can hear it.”
The trick is that you can press multiple buttons at once. If you press A1 + B1 on your microphone, you hear yourself in your headphones AND OBS hears you in the stream. That is the entire core of VoiceMeeter routing in one sentence.
How to Route Your Microphone Through VoiceMeeter
Your real microphone is a hardware input. VoiceMeeter lists it as “Hardware Input 1” by default. Here is how to get your voice into both your headphones and OBS.
Step 1: In VoiceMeeter, click the “Select Input Device” dropdown on Hardware Input 1 and pick your microphone (for example, “Microphone (Realtek Audio)” or your USB interface).
Step 2: Click the A1 button on Hardware Input 1 so you hear your mic in your headphones.
Step 3: Click the B1 button on Hardware Input 1 so OBS picks your voice up.
Step 4: Adjust the gain slider (the small fader under the button row) until the green meter sits in the yellow zone when you speak normally. Red means you are clipping.
If you own a condenser mic, switch the pre-fader section from “OFF” to “ON” and turn on the +20 dB phantom power switch. This is also where you enable the gate, compressor, and EQ that come built into Banana.
Route Desktop Audio and Music Through VoiceMeeter
Desktop audio is what makes VoiceMeeter routing worth the effort. Once your system plays to “VoiceMeeter Input,” every sound your PC makes becomes a routable source.
Step 1: Click the “Select Input Device” dropdown on the first virtual input strip. Pick “VoiceMeeter Input.”
Step 2: Press A1 to hear your desktop audio in your headphones.
Step 3: Press B1 if you want your viewers to hear your desktop audio in the stream too.
That covers most apps. The exception is apps that bind directly to a hardware output and ignore Windows defaults (a few games and music players do this). For those, you have three options:
Set the app’s audio output to “VoiceMeeter Input” inside its own settings menu.
Enable Windows Sonic or your sound card’s loopback to mirror the hardware output into a virtual device.
Use the paid VoiceMeeter Potato aux buses to create fully isolated mixes.
For Spotify specifically, open Spotify Settings, scroll to Audio Quality, and change the output device to VoiceMeeter Input. You will now see it appear on its own channel in VoiceMeeter if you set it up on a separate strip.
Connect VoiceMeeter to OBS for Streaming
OBS sees VoiceMeeter’s B1 output as a regular microphone. The setup takes about a minute.
Step 1: Open OBS, go to Settings, then Audio. Set the “Mic/Auxiliary Audio” device to “VoiceMeeter Output.”
Step 2: In the main OBS interface, find the Audio Mixer panel. You will see one bar that represents the entire VoiceMeeter B1 bus.
Step 3: To capture desktop audio separately from your mic (so you can mute game sound on stream while keeping it in your headphones), add an “Audio Output Capture” source for each individual application. Right-click in Sources, choose Add, then Audio Output Capture, and pick the specific app.
Step 4: For Discord, set Discord’s input device to “VoiceMeeter Output” and your Discord friends will only hear what you route to B1 — which means you can keep music playing in your headphones without bleeding into the call.
If your stream has no audio after this, the cause is almost always that OBS is still pointing at your real microphone instead of “VoiceMeeter Output.” Go back to Settings, Audio, and double-check the dropdown.
Separate Discord, Music, and Game Audio Into Different Channels
This is the level of routing that makes VoiceMeeter shine. The basic trick is to give every audio source its own virtual input strip and its own B-button.
Step 1: Install the free VoiceMeeter Audio Device (VAIO) extras if you want more virtual inputs than the default three. Banana exposes two VAIO strips you can route to.
Step 2: Route Discord to B2, Spotify to B3, and your game to B1. Press the corresponding button on each input strip.
Step 3: In OBS, add separate “Audio Output Capture” sources for each application. Now you can mute Spotify in the stream without muting it for your viewers, lower game audio when you talk, or kick Discord off the stream entirely during sponsor reads.
This is also where VoiceMeeter’s ducking feature pays for itself. Turn on the sidechain gate on your mic strip, point it at your desktop audio channel, and your game/music will automatically drop 6-10 dB the moment you start talking. No more fighting sliders live.
Troubleshooting Common VoiceMeeter Streaming Issues
Most VoiceMeeter problems fall into a small set of repeatable causes. I have hit every one of these myself, so here is the quick checklist I run before pulling my hair out.
VoiceMeeter is not capturing desktop audio: Your default Windows playback device is probably still set to your real speakers instead of “VoiceMeeter Input.” Re-check the Windows Sound settings.
Audio is crackling or stuttering: Open VoiceMeeter’s Menu, then System Settings / Engine, and bump the internal latency from 256 to 512 samples. Restart the engine after every change.
My friends on Discord hear my game audio: You sent your desktop audio to B1, but Discord is also listening to B1. Either send Discord to its own B-button, or mute the desktop audio in OBS while leaving it on in your headphones.
VoiceMeeter is using too much CPU: Drop the sample rate from 48000 Hz to 44100 Hz, disable the Reverb and Delay effects you are not using, and close any DAW you have open in the background.
There is a delay between my mic and my game audio: That is buffer latency, not VoiceMeeter’s fault. Lower the engine buffer size to 128 samples and make sure your ASIO driver is enabled if you own an audio interface.
If none of those fixes work, the VB-Audio forum has a dedicated VoiceMeeter section with volunteers who actively answer setup questions within hours.
Frequently Asked Questions
Can I use Voicemeeter with OBS for streaming?
Yes. Set OBS’s Mic/Auxiliary Audio device to VoiceMeeter Output in OBS Settings, then route the audio sources you want viewers to hear to the B1 button inside VoiceMeeter. OBS will pick them up automatically.
How do I play Spotify through VoiceMeeter?
Open Spotify Settings, go to Audio Quality, and change the output device to VoiceMeeter Input. In VoiceMeeter, route that virtual input to A1 for your headphones and B1 for your stream.
Is VoiceMeeter Banana enough for streaming?
Yes. VoiceMeeter Banana gives you five inputs, five outputs, per-channel EQ, compression, and gating, which covers everything most Twitch and YouTube streamers need. Move up to Potato only if you need eight buses, VBAN networking, or aux sidechain routing.
How do I get two audio outputs in VoiceMeeter?
Press both A1 and A2 on the input you want to split. A1 typically sends audio to your headphones and A2 sends audio to your speakers or a second device, so the same source plays on both at once.
Why is VoiceMeeter not capturing desktop audio?
Your Windows default playback device is probably still set to your physical speakers. Open the Windows Sound settings and change the default output to VoiceMeeter Input, then restart your browser or app for the change to apply.
Does VoiceMeeter use a lot of CPU?
On a modern CPU it uses less than two percent per channel at 48 kHz. Disable the reverb and delay effects you are not using, drop the sample rate to 44100 Hz if you do not need high-res audio, and keep your buffer size at 256 or higher to avoid extra CPU spikes.
Final Thoughts on VoiceMeeter for Streaming
Learning how to use VoiceMeeter to route audio for streaming feels like a lot at first, but the payoff is permanent. Once your routing is dialed in, you can swap games, change Discord roles, or add a new mic without rebuilding your audio path from scratch.
Start with the basics in this guide, run a test stream with a friend listening in Discord, and only then start adding sidechain ducking, EQ presets, or VBAN networking. The black box model holds up no matter how complex your stream becomes.
If you want to keep going, the VB-Audio documentation covers every button in VoiceMeeter in more depth, and the r/VoiceMeeter subreddit is the friendliest place I have found for sharing presets with other streamers.