
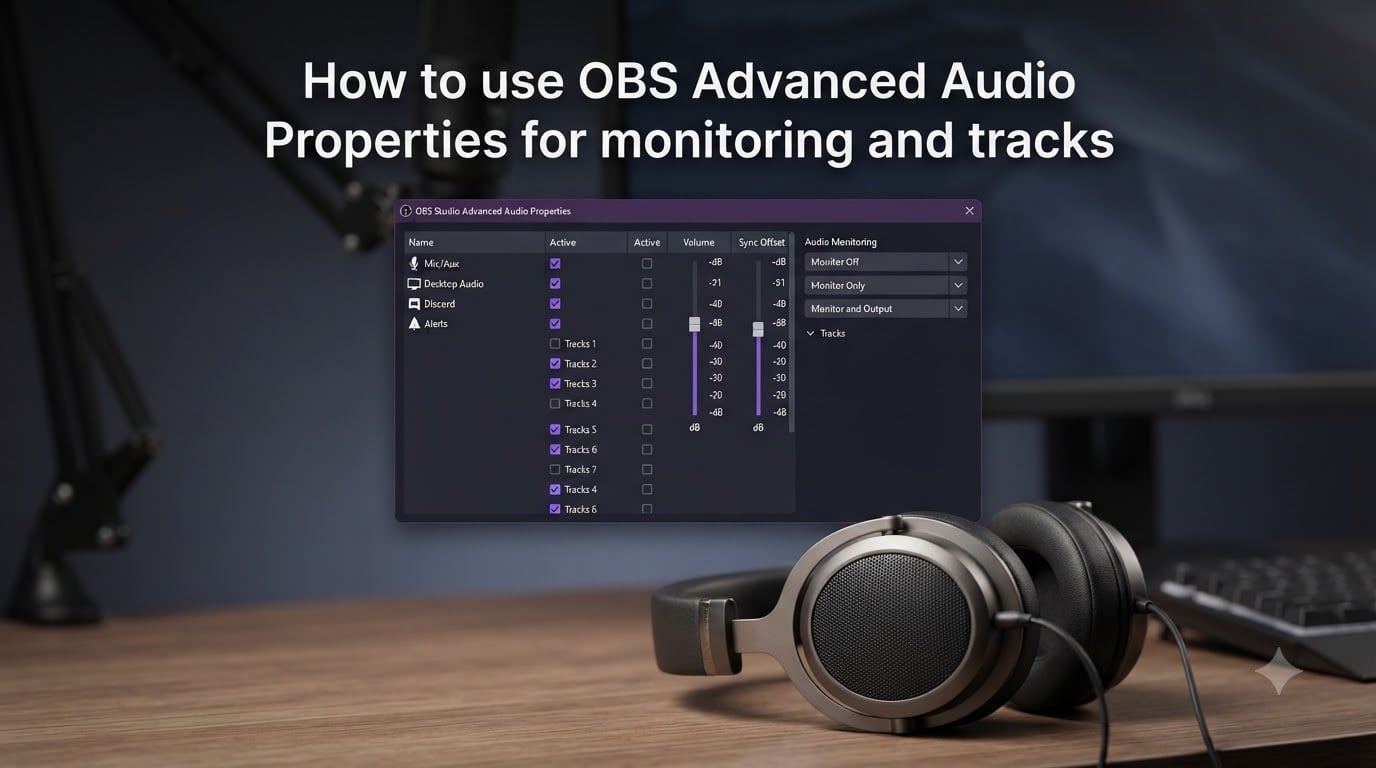
If you have ever recorded a stream or podcast with OBS Studio and found all your audio crammed onto a single track, you already know the frustration of trying to separate your microphone from game audio in post-production. That frustration ends the moment you learn how to use OBS Advanced Audio Properties for monitoring and tracks. This one panel gives you control over which sources you hear through your headphones, which tracks they record to, and how every audio signal is balanced.
I spent months fumbling with OBS audio routing before I realized the Advanced Audio Properties window was the answer to almost every problem I had. Whether you want to monitor your microphone latency-free, split audio into separate tracks for editing, or fix a lip-sync offset, this guide walks you through every setting step by step.
Table of Contents
- What Is OBS Advanced Audio Properties?
- How to Open Advanced Audio Properties in OBS?
- Understanding Audio Monitoring: Monitor Off, Monitor Only, and Monitor and Output
- Assigning Sources to Audio Tracks (1-6)
- Volume, Balance, and Sync Offset Settings Explained
- Practical Multi-Track Recording Workflow
- Recommended Audio Levels and Mixer Zones
- Troubleshooting Common OBS Audio Monitoring Problems
- Problem: I Cannot Hear My Microphone Through OBS
- Problem: All Audio Records on One Track Instead of Separate Tracks
- Problem: Browser Source Audio Will Not Monitor
- Problem: Audio Is Out of Sync With Video
- Problem: Advanced Audio Properties Is Not Showing
- Problem: Monitored Audio Has an Echo or Double Sound
- Frequently Asked Questions
- Final Thoughts on OBS Advanced Audio Properties
What Is OBS Advanced Audio Properties?
OBS Advanced Audio Properties is a configuration panel inside OBS Studio that lets you control how each individual audio source is monitored, recorded, and routed. Every microphone, desktop audio capture, browser source, and media file in your scene appears as a row in this panel.
For each source you can set a volume level, left-right balance, sync offset, monitoring behavior, and which of the six available audio tracks it sends its signal to. Think of it as the mixing board for everything OBS captures.
The panel matters for two big reasons. First, it enables multi-track recording so you can isolate your microphone, game audio, Discord chat, and music onto separate tracks for later editing. Second, it controls audio monitoring, which determines whether you can hear a source through your headphones while you stream or record.
Without this panel, OBS dumps everything into a single stereo mix and you lose the ability to adjust individual sources after the fact. That is fine for casual streaming, but it becomes a serious limitation the moment you want professional-quality audio control.
How to Open Advanced Audio Properties in OBS?
Accessing the panel is straightforward, but the exact method has shifted across OBS versions. In OBS 32.1.0 and later, here is how you get there.
Step 1: Open OBS Studio and make sure at least one audio source is active in your current scene. This could be a microphone, desktop audio, or a browser source.
Step 2: Locate the Audio Mixer panel, which sits at the bottom of the OBS window by default. It shows volume faders for every active audio source.
Step 3: Click the small cogwheel icon (the gear button) at the top of the Audio Mixer panel. In older OBS versions this was a single gear. In current versions it appears as a dedicated button labeled with a gear symbol.
Step 4: Select “Advanced Audio Properties” from the dropdown menu that appears. The panel opens as a new window with tabs at the top.
Alternative method: You can also go to the top menu bar and click Edit, then select Advanced Audio Properties from the list. This works in virtually all OBS versions.
Once the window opens you will see two tabs at the top: one for your current scene sources and one showing all sources across all scenes. Each row represents one audio source with its full set of controls.
Understanding Audio Monitoring: Monitor Off, Monitor Only, and Monitor and Output
The Audio Monitoring column in Advanced Audio Properties is where you decide what you hear versus what your audience hears. This is the single most important column in the panel, and it has three options.
Monitor Off (default): The source plays to your stream or recording output but you do not hear it through OBS. Use this for sources you already hear through another application, like desktop audio that already comes through your speakers or headphones.
Monitor Only: You hear the source through your headphones via OBS, but it does not go to your stream or recording output. This is perfect for listening to a browser source, previewing a media file, or monitoring a guest microphone without it bleeding into your broadcast.
Monitor and Output: You hear the source through your headphones and it also goes to the stream or recording. This is the right choice for your own microphone, because you want to monitor your own voice and also broadcast it to viewers.
Here is a quick way to think about the difference. Monitor Off means your audience hears it but you do not. Monitor Only means you hear it but your audience does not. Monitor and Output means everyone hears it.
A common mistake is leaving all sources on Monitor Off, which means you cannot hear anything through OBS. If your monitoring setup feels silent, check this column first. Every source you want to hear needs to be set to Monitor Only or Monitor and Output.
Browser sources deserve a special note here. Before you can monitor audio from a browser source (like a Spotify widget or a browser-based soundboard), you must also enable the “Control audio via OBS” option in the source properties. Without that checkbox, OBS has no access to the audio signal and monitoring will not work regardless of your Advanced Audio Properties settings.
Assigning Sources to Audio Tracks (1-6)
OBS supports up to six audio tracks in a single recording. Each track can hold any combination of sources, and each source can be assigned to multiple tracks simultaneously. This is what makes multi-track recording possible.
Step 1: Open Advanced Audio Properties and look at the right side of each source row. You will see six checkboxes labeled 1 through 6.
Step 2: Check the box for each track you want that source to record to. Track 1 is checked by default for every source, which is why all audio ends up mixed together if you never change anything.
Step 3: Go to Settings, then click the Output tab. Switch Output Mode to Advanced (this unlocks the multi-track controls). Under the Recording tab, you will see an Audio Track section with checkboxes for tracks 1 through 6. Only the tracks you check here will actually be saved to the recording file.
Step 4: If you stream and record simultaneously, check the Streaming tab as well. The streaming output usually uses a single track, so you want your main mix on Track 1 while your separated sources go on Tracks 2 through 6.
Here is a practical track layout I use for podcast recording. Track 1 gets every source (the full mix for streaming). Track 2 gets only my microphone. Track 3 gets the co-host microphone. Track 4 gets Discord audio. Track 5 gets intro music. This setup lets me independently adjust each voice in my editing software later.
For gaming streams the approach is similar. Track 1 carries everything for the live stream. Track 2 gets the microphone. Track 3 gets game audio. Track 4 gets Discord or voice chat. When you open the recording in Audacity, DaVinci Resolve, Premiere Pro, or Reaper, each track appears as its own isolated audio channel.
One important detail: multi-track recording only works with compatible container formats. OBS supports multi-track audio with MKV and MP4 containers, but you need to make sure your selected format allows it. MKV is the safest choice and also happens to be the format OBS recommends for its resilience against crashes.
Volume, Balance, and Sync Offset Settings Explained
Beyond monitoring and track assignment, Advanced Audio Properties gives you three additional per-source controls that are easy to overlook but extremely useful.
Volume Control
The Volume column shows a percentage value for each source, defaulting to 100 percent. This works exactly like the volume fader in the main Audio Mixer panel. Drag the slider or type a value to adjust how loud that source is in your overall mix. You can boost a quiet source above 100 percent if needed, though pushing too high risks clipping and distortion.
Balance Control (Left and Right)
The Balance column controls the stereo position of each source, ranging from -100 (fully left) to +100 (fully right). At 0, the source is centered equally in both channels. This is the setting no competitor explains and many streamers never touch.
Balance is useful for several scenarios. In a two-person podcast you might pan the host slightly left and the guest slightly right, giving listeners a sense of spatial separation. For gaming streams you can pan game audio while keeping your microphone centered so your voice always sounds directly in front of the viewer. For music production captured through OBS, balance lets you position instruments across the stereo field.
To set balance, click the field next to a source and type a value from -100 to 100, or drag the slider. Small adjustments go a long way. A value of -20 shifts the source noticeably to the left without making it feel off-center.
Sync Offset
Sync Offset is a time-based correction measured in milliseconds that lets you nudge a source earlier or later to fix lip-sync or audio delay issues. If your microphone audio arrives slightly behind or ahead of your video, this is where you fix it.
Setting it is simple. Click the Sync Offset field next to any source and type a value in milliseconds. A positive value delays the audio (it plays later). A negative value advances it (it plays earlier). Most sync corrections fall in the range of -500 ms to +500 ms.
Common scenarios where sync offset saves the day include Bluetooth headphones with inherent audio lag, capture card setups where game video arrives a few frames behind the audio, and virtual audio cables that introduce processing delay. Start with small increments like 50 ms, test the result, and adjust until the audio lines up perfectly with the video.
Practical Multi-Track Recording Workflow
Let me walk you through a complete setup that puts everything together. I will use a podcast-and-gaming hybrid scenario because it exercises every feature of Advanced Audio Properties.
The setup: You have a microphone for your voice, desktop audio for game sound, a Discord call with a co-host, and a browser source playing background music.
Step 1: Add all four sources to your scene in OBS. Make sure each one shows a volume fader in the Audio Mixer.
Step 2: Open Advanced Audio Properties. For your microphone, set monitoring to “Monitor and Output” so you hear yourself and viewers hear you too. Assign it to Tracks 1 and 2.
Step 3: For desktop audio (game sound), set monitoring to “Monitor Off” since you already hear it through your system. Assign it to Tracks 1 and 3.
Step 4: For the Discord audio, set monitoring to “Monitor Only” so you can hear your co-host through OBS without double-audio. Assign it to Tracks 1 and 4.
Step 5: For the browser music source, make sure “Control audio via OBS” is checked in the source properties. Set monitoring to “Monitor Only” if you want to preview it, or “Monitor Off” if you already hear it elsewhere. Assign it to Tracks 1 and 5.
Step 6: Go to Settings, Output, Advanced mode. Under Recording, check Tracks 1 through 5. Under Streaming, make sure Track 1 is selected as the streaming track. This ensures your live stream gets the full mix while your local recording keeps everything separated.
Step 7: Set your recording format to MKV. Start recording. When you are done, open the file in your editing software and you will see five separate audio tracks, each fully isolated and ready for independent processing.
If you ever need to convert your MKV file to MP4 for editing software compatibility, OBS has a built-in remux tool. Go to File, Remux Recordings, and it converts instantly without quality loss.
Recommended Audio Levels and Mixer Zones
Getting levels right is just as important as routing them correctly. The OBS volume meter uses a three-color zone system to help you keep audio in the right range.
Green zone (approximately -40 dB to -15 dB): This is the safe zone. Your audio is audible and clean with plenty of headroom. Microphone audio should sit comfortably here, generally peaking around -20 dB to -12 dB during normal speech.
Yellow zone (approximately -15 dB to -6 dB): This is the caution zone. Audio is getting loud and approaching the ceiling. Occasional peaks into yellow are normal for dynamic content, but sustained yellow means you should lower the source volume.
Red zone (above -6 dB): This is the danger zone. Audio in the red is clipping, which means the signal exceeds what OBS can represent digitally. Clipping causes harsh distortion that cannot be fixed in post-production. If you see red, reduce the volume immediately.
A practical approach is to set your microphone level so that normal speaking volume peaks around -12 dB. This leaves headroom for louder moments without clipping. For game audio and music, aim for peaks around -18 dB so they sit comfortably beneath your voice in the mix.
The volume fader in Advanced Audio Properties gives you fine-grained control. Use it alongside the meters in the main Audio Mixer to dial in each source until the balance sounds right. Small adjustments of 5 to 10 percent make a noticeable difference.
Troubleshooting Common OBS Audio Monitoring Problems
Even with everything configured correctly, audio issues still pop up. Here are the most common problems and their fixes, drawn from real discussions in the OBS community forums and Reddit.
Problem: I Cannot Hear My Microphone Through OBS
This is the number one complaint. The fix is almost always in the Audio Monitoring column of Advanced Audio Properties. Open the panel, find your microphone source, and change its monitoring setting to “Monitor and Output” if you want both yourself and viewers to hear it, or “Monitor Only” if you only want to hear it yourself.
If the setting is correct but you still hear nothing, go to Settings, Audio, and check that the correct monitoring device is selected under “Advanced” for the monitoring output. OBS sends monitored audio to this device, so if it points to the wrong output you will hear silence.
Problem: All Audio Records on One Track Instead of Separate Tracks
If your tracks are not separating, two things are likely wrong. First, check that you have unchecked Track 1 for sources you want isolated. If every source still has Track 1 checked, they all end up mixed there. Second, verify that Output Mode is set to Advanced in Settings, Output, and that the specific tracks you assigned are checked under the Recording tab.
Also confirm your container format supports multi-track audio. Switch to MKV if you are using a format that only supports a single track.
Problem: Browser Source Audio Will Not Monitor
Browser sources have an extra requirement. Right-click the browser source, select Properties, and scroll down to find the “Control audio via OBS” checkbox. Enable it. Without this, OBS cannot access the browser audio signal and monitoring stays silent no matter what you set in Advanced Audio Properties.
Problem: Audio Is Out of Sync With Video
Use the Sync Offset field in Advanced Audio Properties to correct timing. Positive values delay audio, negative values advance it. Test in small increments. For capture card delay, start around +100 ms and adjust. For Bluetooth headphone lag, you may need +200 ms or more.
Problem: Advanced Audio Properties Is Not Showing
If you cannot find the option at all, make sure you are running a recent version of OBS Studio. The panel has existed for years, but very old versions might lack it or place it differently. Update to the latest OBS release. If the cogwheel button in the Audio Mixer is missing, try the Edit menu route instead.
Problem: Monitored Audio Has an Echo or Double Sound
This happens when you hear a source through both OBS monitoring and your operating system. If desktop audio is set to “Monitor and Output” and you also hear it through your speakers directly, you get a doubling effect. Change the source to “Monitor Off” since you already hear it through your system, or mute the system audio and rely solely on OBS monitoring.
Frequently Asked Questions
How to use OBS audio monitoring?
Open Advanced Audio Properties by clicking the gear icon in the Audio Mixer panel. Find the Audio Monitoring column for each source and choose Monitor Off (audience hears it, you do not), Monitor Only (you hear it, audience does not), or Monitor and Output (everyone hears it). Your microphone should typically be set to Monitor and Output.
How to open advanced audio properties in OBS?
Click the cogwheel button at the top of the Audio Mixer panel at the bottom of the OBS window, then select Advanced Audio Properties. You can also open it from the top menu bar by clicking Edit, then Advanced Audio Properties. Both methods work in all recent OBS versions.
What should my OBS audio settings be?
Set your microphone to peak around -12 dB in the green zone, with game audio and music around -18 dB. Use Monitor and Output for your microphone, Monitor Off for desktop audio you already hear, and Monitor Only for sources you want to preview privately. Record in MKV format with Advanced output mode for multi-track support.
How to use OBS audio tracks?
Open Advanced Audio Properties and use the track checkboxes (1 through 6) on each source row to assign it to specific tracks. Then go to Settings, Output, switch to Advanced mode, and check the tracks you want included in your recording under the Recording tab. Track 1 is typically your full mix for streaming, while tracks 2 through 6 hold isolated sources for editing.
Final Thoughts on OBS Advanced Audio Properties
Mastering how to use OBS Advanced Audio Properties for monitoring and tracks transforms OBS from a basic streaming tool into a capable audio production environment. The three monitoring modes give you total control over what you hear versus what your audience hears. The six-track system lets you isolate every source for clean post-production editing. Volume, balance, and sync offset add the finishing touches that make your audio sound professional.
Start with a simple setup: put your microphone on Monitor and Output, assign it to Track 2 alongside the full mix on Track 1, and record in MKV with Advanced output mode. Once that workflow feels natural, add more tracks for game audio, Discord, and music. The panel is powerful, but the basics take only minutes to configure and the payoff lasts every single recording session.