
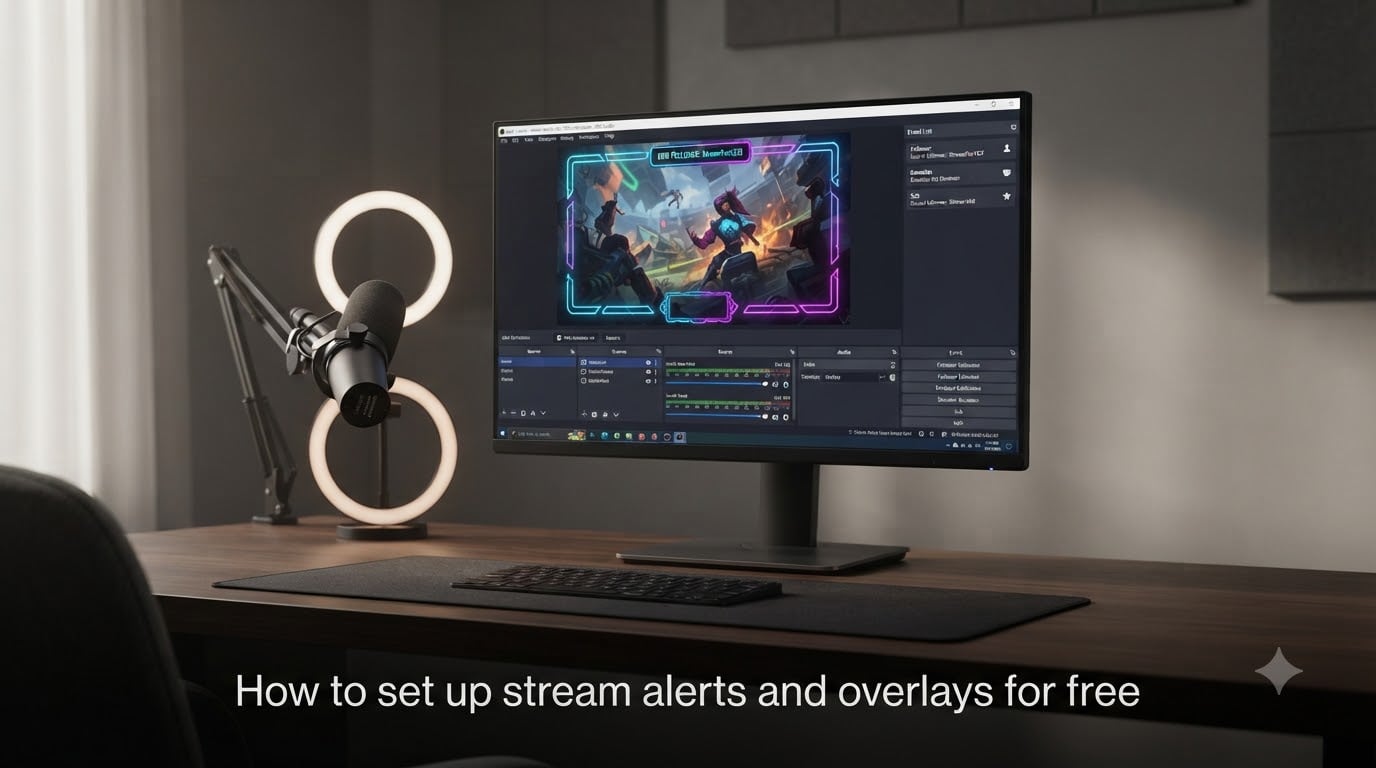
If you want your stream to look polished and engaging without spending money, learning how to set up stream alerts and overlays for free is the single most impactful thing you can do. Alerts let your viewers know when someone follows, subscribes, or donates. Overlays give your broadcast a professional look with webcam frames, chat boxes, and animated graphics.
I have helped dozens of small streamers go from a bare OBS Studio window to a fully branded stream using entirely free tools. The process is simpler than most people think, and you can complete a full setup in under an hour.
This guide walks you through everything from choosing the right free platform to installing browser sources, customizing alert sounds, and fixing common issues. Whether you stream on Twitch, YouTube Gaming, or Kick, the steps below apply universally. No paid software, no design skills required.
By the end, you will have a professional stream layout with follower notifications, donation alerts, and visual overlays that make viewers want to stick around.
Table of Contents
- What Are Stream Alerts and Overlays?
- Why You Need Alerts and Overlays for Your Stream?
- Top Free Tools for Stream Alerts and Overlays
- Step-by-Step: Setting Up Alerts in OBS Studio
- Step-by-Step: Adding Overlays to Your Stream
- Customizing Your Alerts (Sounds, Images, Text)
- Free vs Premium: What You Need to Know
- Best Practices for Alert Timing and Design
- Troubleshooting Common Overlay Issues
- Platform-Specific Tips (Twitch, YouTube, Kick)
- Frequently Asked Questions
- Conclusion
What Are Stream Alerts and Overlays?
Stream alerts are on-screen notifications that trigger when a viewer takes an action like following your channel, subscribing, donating, or raiding your stream. They typically include animated graphics, custom text, and sound effects that celebrate the moment. When someone follows you, a banner pops up with their username and a congratulatory sound plays.
Overlays are the visual elements that surround your gameplay or camera feed throughout the entire stream. These include webcam frames, chat boxes, event lists, goal bars, and starting-soon screens. Think of overlays as the frame around your content and alerts as the fireworks that go off inside it.
Both work together through browser sources in streaming software like OBS Studio. A browser source is simply a web page embedded inside your stream scene. Services like StreamElements and Streamlabs host your alerts and overlays as web pages, and you paste a URL into OBS Studio to display them.
One important distinction: overlays stay visible throughout your stream, while alerts appear briefly when an event happens. You need both for a complete, professional setup.
Why You Need Alerts and Overlays for Your Stream?
Alerts and overlays directly impact viewer retention and community growth. When a new follower sees their name pop up on screen with a custom sound, they feel recognized. That small moment of recognition encourages them to stick around, chat, and eventually subscribe or donate.
I have seen streamers double their engagement metrics simply by adding follower alerts and an event list widget. Viewers want to participate, and visible notifications create a feedback loop that drives more interaction. Without alerts, viewers who follow or donate often wonder if the streamer even noticed.
Overlays make your stream look legitimate. A clean webcam frame, a recent events list, and a branded color scheme signal that you take streaming seriously. Viewers associate visual quality with content quality, even if the gameplay is identical.
Here is what alerts and overlays accomplish for free:
First, they celebrate viewer actions like follows, subs, bits, and raids in real time. Second, they display interactive widgets such as chat overlays, donation goals, and loyalty point trackers. Third, they create a consistent visual brand that makes your channel memorable.
The best part is that every feature I just described is available at no cost through StreamElements, Streamlabs, and community-driven overlay creators.
Top Free Tools for Stream Alerts and Overlays
Choosing the right tool matters because it affects how much customization you get and how easy the setup process is. I compared the four most popular free platforms so you can pick the one that fits your needs.
StreamElements is the top choice for streamers who use OBS Studio as their broadcasting software. Everything runs through browser sources, so nothing is installed locally. You log into the dashboard, pick a theme, and paste a single URL into OBS Studio. The free tier includes unlimited alerts, an event list, chat box, donation goals, and text-to-speech. StreamElements also offers cloud-hosted overlay themes called SuperThemes that bundle your entire overlay setup into one browser source.
Reddit users on r/Twitch frequently recommend StreamElements for mid-range streamers who want good customization without complexity. The cloud-based approach means your overlay settings sync across devices, so if you switch computers, your layout comes with you.
Streamlabs offers both a browser-source Alert Box and a full desktop application called Streamlabs Desktop. The Alert Box works exactly like StreamElements: you configure alerts on the website, then paste a widget URL into OBS Studio. Streamlabs Desktop is an all-in-one streaming app built on OBS core code that integrates overlays as native sources. The free tier includes follow, sub, donation, and raid alerts, plus themed overlay packages. Streamlabs also has an AI-powered Game Pulse widget that reacts to in-game events.
One caveat: Streamlabs pushes its Ultra subscription heavily, and some overlay themes are locked behind the paywall. However, the core alert functionality is completely free with no usage limits.
Nerd or Die provides downloadable overlay packages with a pay-what-you-want model, meaning you can enter zero dollars and download full overlay packs for free. These packs include webcam frames, alert graphics, stinger transitions, and OBS Studio scene collection files that auto-arrange your sources. Nerd or Die also offers game-specific overlays for titles like Call of Duty and Overwatch. The quick-install files make setup incredibly fast for beginners.
Own3D offers a mix of free and premium overlay packages. Their free OBS overlay section includes starter packs with animated alerts and scene templates. Own3D also provides a desktop app that installs overlays directly into OBS Studio in a few clicks. The free selection is smaller than Nerd or Die, but the quality is professional-grade.
Kudos.tv specializes in free animated overlay packs for Twitch. You download a ZIP file, extract it, and import the included JSON file into OBS Studio through Scene Collection and then Import. The process takes about two minutes and gives you a fully themed stream layout with matching alerts.
If you want the fastest setup with the most features at no cost, go with StreamElements. If you prefer a desktop app, use Streamlabs Desktop. If you want downloadable graphics you can modify, Nerd or Die is the best option.
Step-by-Step: Setting Up Alerts in OBS Studio
Setting up alerts in OBS Studio requires a free account on either StreamElements or Streamlabs. The process is identical in concept: you generate a widget URL from the platform, then add it as a browser source in OBS Studio. Here is the complete walkthrough using StreamElements as the example.
Step 1: Create a free StreamElements account. Go to streamelements.com and sign in using your Twitch or YouTube account. StreamElements will request access to read your channel data, which is necessary for alerts to trigger on events like follows and subscriptions.
Step 2: Open the AlertBox widget. In the StreamElements dashboard, navigate to the left sidebar and click on Widgets, then select AlertBox. This is your central hub for configuring every type of alert. The default AlertBox already handles follows, subscriptions, cheers, raids, and tips.
Step 3: Customize your alert settings. Click on each alert type to modify its appearance. You can change the graphic, the sound effect, the text template, the font, the colors, and the animation duration. For a clean look, keep alerts on screen for five to seven seconds. Choose sound effects that are audible but not jarring.
Step 4: Copy the widget URL. At the top of the AlertBox page, you will see a shareable link. Copy this URL. This single link contains all your alert configurations.
Step 5: Add a browser source in OBS Studio. Open OBS Studio and select the scene where you want alerts to appear. Right-click in the Sources panel, choose Add, then select Browser. Name it something clear like AlertBox. Click OK.
Step 6: Paste the URL and set dimensions. In the browser source properties, paste the widget URL you copied. Set the width to 800 and the height to 600 as a starting point. Check the box to refresh the browser when the scene becomes active so your alerts always start fresh. Click OK.
Step 7: Position and test the alert. Drag the browser source to where you want alerts to appear on your screen, typically centered at the top or above your webcam. To test it, go back to the StreamElements AlertBox page and click the test button for each alert type. You should see the alert appear in your OBS Studio preview.
If the alert does not appear, check that the browser source is not hidden, confirm the URL is correct, and make sure your stream scene is active in OBS Studio. You only need to do this setup once per scene collection.
Step-by-Step: Adding Overlays to Your Stream
Overlays work differently from alerts because they are visual elements that stay on screen continuously. There are two approaches: using a web-based overlay from StreamElements or Streamlabs, or importing a downloaded overlay package from a site like Nerd or Die or Kudos.tv.
Method 1: Web-Based Overlay from StreamElements
This is the fastest approach. In the StreamElements dashboard, go to Overlays and click Create New Overlay. Choose a theme from the gallery or start from a blank canvas. The overlay editor lets you drag and drop widgets like chat boxes, event lists, webcam frames, countdown timers, and donation goals onto a canvas.
Once your overlay looks right, click the share button at the top to get the overlay URL. In OBS Studio, add a new browser source and paste the URL. Set the width to 1920 and the height to 1080 for a full HD overlay. Click OK and the entire overlay appears as a single source in your scene.
The advantage of this method is that any change you make in the StreamElements editor instantly updates in OBS Studio. You can add a new widget during a stream without touching OBS Studio settings.
Method 2: Downloaded Overlay Package from Nerd or Die or Kudos.tv
Download a free overlay pack from nerdordie.com or kudos.tv. The pack will arrive as a ZIP file. Extract it to a folder on your computer. Inside, you will find PNG files for static elements, GIF or MP4 files for animations, a JSON scene collection file, and possibly sound files.
For the JSON import method, open OBS Studio and go to the top menu. Click Scene Collection, then click Import. Select the JSON file from your extracted overlay folder. OBS Studio will create a new scene collection with all the overlay sources pre-positioned and layered correctly. You may need to point OBS Studio to the folder where your graphics files are stored so it can find them.
For the manual method, add each element individually. Go to Sources, click Add, and select Image for static PNG overlays or Media Source for animated GIFs and MP4 files. Browse to the extracted folder and select each graphic. Arrange them by dragging layers in the Sources panel, with background elements at the bottom and foreground elements at the top.
Layering matters: your gameplay capture goes at the bottom, overlay graphics in the middle, and alerts on top. Webcam frames sit above the webcam capture source. Use the eye icon to toggle visibility while arranging.
Many streamers on r/streaming recommend the JSON import method because it saves time and handles layering automatically. If the overlay looks wrong after import, check that all file paths in the scene collection point to the correct folder on your computer.
Customizing Your Alerts (Sounds, Images, Text)
Default alert settings work fine, but customization is what makes your stream memorable. Both StreamElements and Streamlabs let you modify every aspect of your alerts without any paid features.
Changing Alert Graphics: In the StreamElements AlertBox settings, click the image upload area for each alert type. You can upload your own PNG or GIF files, or choose from the built-in library of free graphics. Keep file sizes under 2 megabytes to ensure smooth playback. Animated GIFs should loop cleanly with no harsh transitions.
Adding Sound Effects: Each alert type has a dedicated sound field. Upload MP3 or WAV files up to 1 megabyte. Choose sounds that match your stream personality. A subtle chime works for follows, while something more dramatic suits donations or subscriptions. Set the volume to around 30 to 50 percent of your microphone level so alerts do not overpower your voice.
Text-to-Speech: Both platforms offer free text-to-speech for donation and cheer alerts. You can choose from multiple voice options and set minimum donation amounts to trigger speech. Some streamers disable text-to-speech entirely because it can be abused by trolls. I recommend starting with it enabled for tips above a higher threshold.
Custom Text Templates: The text that appears on each alert uses variables like username and amount. Default templates say things like {username} just followed. You can rewrite these to match your channel tone. Keep text under 50 characters so it fits on screen without wrapping.
Animation Timing: Most alert platforms let you set how long the alert stays visible and how it transitions in and out. Fade transitions look clean. Slide-in animations add energy. Avoid settings that make alerts linger too long, since overlapping alerts create visual clutter.
Free vs Premium: What You Need to Know
The free tiers from StreamElements and Streamlabs are genuinely generous. You get unlimited alerts, core widgets, and basic overlay themes with no expiration. However, there are real differences between free and premium that are worth understanding before you invest time in a platform.
What You Get for Free: StreamElements provides unlimited alerts, an event list, chat box, donation goals, text-to-speech, loyalty points, and custom overlay creation at no cost. Streamlabs provides its Alert Box, follow and sub notifications, basic overlay themes, and the Streamlabs Desktop application for free. Nerd or Die and Own3D offer complete overlay packs at zero cost through their free sections.
What Premium Adds: Streamlabs Ultra unlocks premium overlay themes, removes the Streamlabs branding from your stream, adds multistream capability, and provides advanced widgets like AI-powered Game Pulse. StreamElements premium removes ads from the dashboard and adds priority support. Nerd or Die premium packs include more alert variations, additional color themes, and matching stream panel graphics.
The Honest Assessment: You can run a fully professional stream indefinitely on free tiers. I know streamers with thousands of concurrent viewers who still use the free version of StreamElements. Premium is worth it if you want access to a wider variety of pre-made themes or you stream to multiple platforms simultaneously.
One common frustration from forum discussions is that free overlay packs sometimes feel generic. If you want a truly unique look, you can either learn basic image editing in free tools like GIMP or Photopea, or commission a designer once you start earning from your stream.
Best Practices for Alert Timing and Design
Alert timing affects how professional your stream feels. If alerts pile up or play over each other, viewers get distracted from your content. Here are the settings I recommend based on testing across multiple stream setups.
Keep alerts on screen for five to seven seconds. Anything shorter and viewers miss the username. Anything longer and the next alert may overlap. Both StreamElements and Streamlabs let you set a queue so alerts play one at a time instead of stacking.
Limit the number of alert types you enable at once. Follows, subscriptions, donations, and raids are the core four. Adding bit alerts, gift sub alerts, and point redemptions creates too much noise for smaller channels. Enable additional alert types as your channel grows.
Position alerts where they do not obstruct gameplay. The top center of the screen is the standard placement. Avoid putting alerts over your face cam, minimap, or game UI elements. Test by watching a recording of your stream with alerts triggered.
Match your alert colors to your overlay theme. If your overlay uses a blue and white color scheme, your alerts should use the same palette. Inconsistent colors make even a well-designed overlay look messy.
Finally, keep sound volumes reasonable. Alerts at 50 percent microphone volume is a safe starting point. Viewers will tell you in chat if sounds are too loud, but most will just leave rather than complain.
Troubleshooting Common Overlay Issues
Even with a perfect setup, things occasionally break. These are the most common problems streamers encounter and how to fix each one.
Browser Source Shows a Black Screen: This usually means the URL is incorrect or the page failed to load. Right-click the browser source in OBS Studio, select Properties, and verify the URL. Click the refresh button inside the properties window. If the issue persists, check that your alert platform account is still connected to your streaming channel.
Alerts Are Not Triggering: Confirm that your streaming platform account is linked in the alert platform settings. On StreamElements, go to Settings and verify your channel is listed. On Streamlabs, check the Connections page. Also ensure your OBS Studio browser source has the correct width and height, as a zero-dimension source will not display content.
Alert Sound Is Distorted or Too Loud: Lower the volume in the individual alert settings on your platform dashboard. Browser sources output audio at full volume by default. If multiple sounds overlap, enable the alert queue so they play sequentially.
Overlay Elements Are Misaligned After Import: This happens when the JSON scene collection references file paths that do not exist on your computer. Go to each source in OBS Studio, open Properties, and re-link the image or media file to its correct location. This is a common issue when moving overlay files between folders.
Animated Overlays Are Lagging: Large GIF or MP4 files can strain your system. Reduce the file size of your animations, lower your OBS Studio output resolution slightly, or enable the performance mode for browser sources in OBS Studio settings under Advanced.
Platform-Specific Tips (Twitch, YouTube, Kick)
The basic alert and overlay setup process is the same across platforms, but each platform has unique features and quirks worth knowing about.
Twitch: Twitch offers the richest alert ecosystem. StreamElements and Streamlabs both support follow, subscription, cheer, raid, and donation alerts natively. Twitch also supports channel point redemptions, which you can configure as alert triggers. Bits alerts are Twitch-specific, so enable them if your viewers use that feature. Twitch raids are frequent, so set up a raid alert with a distinct sound so you can acknowledge incoming raids immediately.
YouTube Gaming: YouTube supports member, super chat, and super thanks alerts. When linking your YouTube account to StreamElements or Streamlabs, grant the necessary permissions for reading live stream events. YouTube new subscriber alerts require channel membership data, which may take a few minutes to sync after you go live. Test alerts before each stream since YouTube API changes can occasionally break integrations.
Kick: Kick is newer and third-party integration support is still growing. StreamElements added Kick support, allowing follow, subscription, and gift alert configurations. Because Kick’s API is still evolving, expect occasional delays in alert triggers. Check the StreamElements Discord for the latest updates on Kick integration features.
For multi-streaming, StreamElements is the better choice because its cloud-based system can handle multiple platform connections. Streamlabs Desktop focuses primarily on Twitch and YouTube, with Kick support added more recently.
Frequently Asked Questions
How to make a stream overlay for free?
You can make a free stream overlay using StreamElements, Streamlabs, or downloadable packs from Nerd or Die and Kudos.tv. Sign up for a free account, choose or design an overlay in the editor, then add it to OBS Studio as a browser source using the provided URL. No payment or design software is required.
Are stream overlays free?
Yes, stream overlays can be completely free. Platforms like StreamElements and Streamlabs offer full alert and overlay functionality at no cost. Sites like Nerd or Die and Own3D provide downloadable overlay packs for free through pay-what-you-want or free download sections.
Can I use Streamlabs overlays for free?
Yes, Streamlabs offers free overlays and alert widgets through its Alert Box feature and Streamlabs Desktop application. The free tier includes follow, sub, donation, and raid alerts, plus basic overlay themes. Premium themes are locked behind the Ultra subscription, but core functionality is free with no usage limits.
Is there a free animated stream overlay available?
Yes, free animated overlays are available from Nerd or Die, Kudos.tv, Own3D, and StreamElements. These packs include animated webcam frames, alert graphics, and stinger transitions. StreamElements also offers SuperThemes with bundled animated overlays that load through a single browser source URL.
How to set up stream overlays?
To set up stream overlays, create a free account on StreamElements or Streamlabs, design or select your overlay, copy the overlay URL, then open OBS Studio and add a browser source with that URL. Set the width to 1920 and height to 1080 for full HD overlays. Alternatively, download a pack from Nerd or Die and import the JSON scene collection file into OBS Studio.
How to setup stream alerts?
To set up stream alerts, sign up for StreamElements or Streamlabs, link your streaming account, open the AlertBox widget, customize your alert types, copy the widget URL, and add it as a browser source in OBS Studio. Test each alert type using the test button on the platform dashboard before going live.
What do streamers use for overlays?
Most streamers use StreamElements, Streamlabs, Nerd or Die, Own3D, or Kudos.tv for overlays. StreamElements and Streamlabs provide web-based overlay and alert widgets added through browser sources. Nerd or Die and Own3D offer downloadable graphics packs. OBS Studio is the most common broadcasting software used to display these overlays.
Where can I find the best stream overlays?
The best free stream overlays come from StreamElements for web-based overlays, Nerd or Die for downloadable packs, Streamlabs for integrated widget overlays, and Kudos.tv for animated Twitch overlays. Each offers free options with no payment required, and you can mix elements from multiple sources in a single OBS Studio scene.
Conclusion
Learning how to set up stream alerts and overlays for free takes about an hour and pays off every single time you go live. You now have the complete process: pick a free platform like StreamElements or Streamlabs, configure your alert types, add a browser source in OBS Studio, and layer your overlays for a polished look.
The tools are free, the setup is straightforward, and the impact on viewer engagement is immediate. Start with the basics: follower alerts, an event list, and a clean webcam frame. Add more widgets as you learn what your audience responds to.
If you found this guide helpful, check back for more streaming tutorials as we continue updating our content for 2026. Your stream deserves to look great, and now you have everything you need to make that happen at zero cost.