
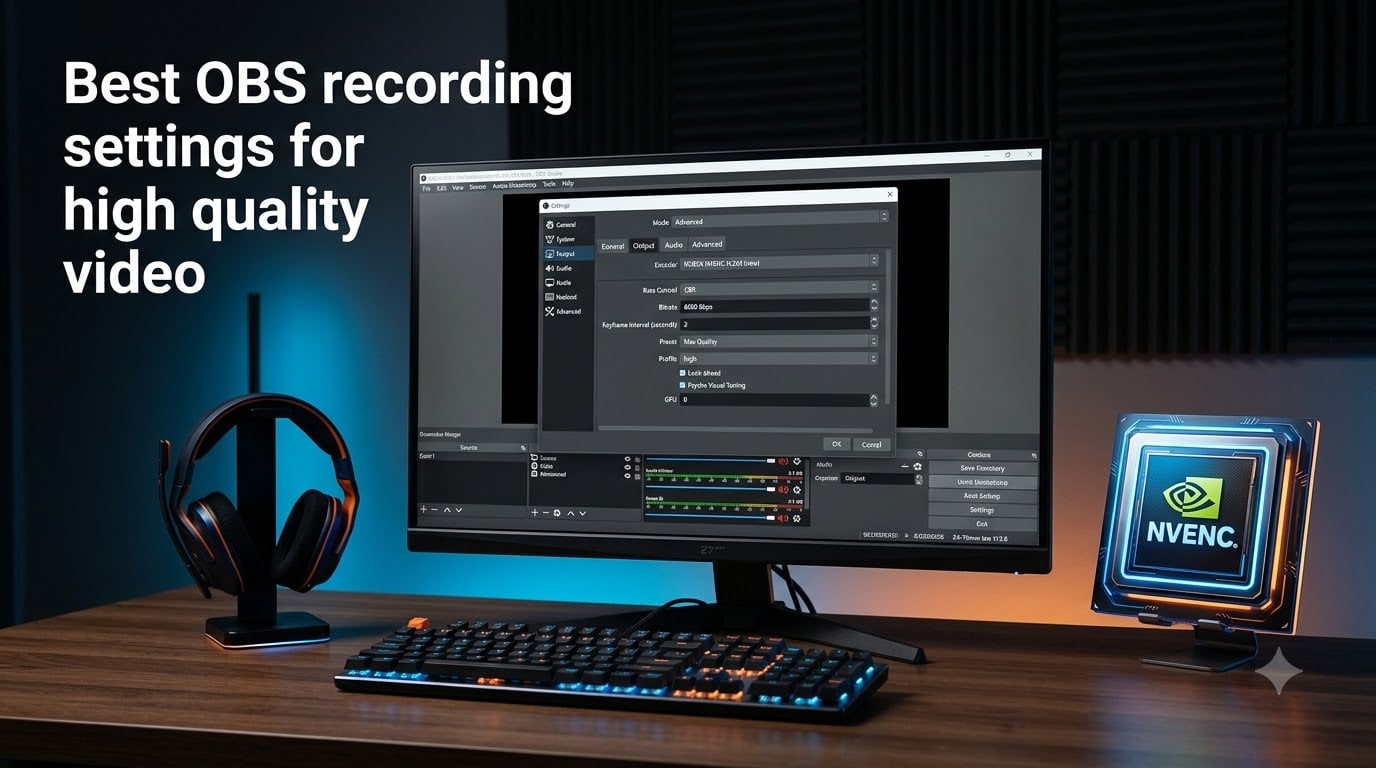
I have spent the last three years dialing in OBS recording settings for gaming captures, tutorial videos, and client screen recordings, and I can tell you this: the right configuration makes a bigger difference than your GPU or camera. The wrong bitrate or a mismatched base and output resolution can turn a 4K-capable setup into a blurry, dropped-frame mess.
In this guide, I will walk you through the OBS recording settings I actually use for high quality video in 2026. You will get specific values for encoder, bitrate, resolution, audio, file format, and color space, plus troubleshooting fixes for the issues that frustrate people most. By the end, you will know exactly what to change in OBS Studio and why each setting matters.
Table of Contents
- Quick OBS Recording Settings by Use Case
- How to Choose the Best Encoder in OBS: NVENC vs x264 vs AV1
- Best OBS Recording Settings for Resolution and Framerate
- How to Set Bitrate in OBS for Crisp Recordings?
- Keyframe Interval, Profile, and B-Frames in OBS
- Best OBS Audio Settings for Recording
- MKV vs MP4: How to Choose the Best Recording Format
- Color Format, Color Space, and Color Range Settings
- Storage and Disk Speed Requirements for OBS Recording
- How to Step Through OBS Settings (Walkthrough)
- OBS Recording Settings for Specific Use Cases
- Common OBS Recording Mistakes and How to Fix Them
- Frequently Asked Questions
- What are the best OBS recording settings for highest quality?
- How do I get 4K quality on OBS?
- What bitrate should I use for 1080p 60fps in OBS?
- Should I use 160 or 320 kbps audio in OBS?
- What is the best CQP value in OBS for high-quality recording?
- How do I record with OBS without losing quality?
- What is the best format to record in OBS, MKV or MP4?
- Why is my OBS recording blurry even with high bitrate?
- Final Thoughts on OBS Recording Settings for High Quality Video
Quick OBS Recording Settings by Use Case
Here is a snapshot of the best OBS recording settings I recommend for high quality video in 2026 across the most common scenarios. Skip to the detailed sections below if you want the full reasoning behind every value.
Gaming at 1080p 60fps: NVENC encoder, CQP 18, Max Quality preset, Lanczos, 1080p output, MKV
Gaming at 1440p 60fps: NVENC encoder, CQP 18, Max Quality preset, Lanczos, 1440p output, MKV
Gaming at 4K 60fps: NVENC HEVC or AV1, CQP 20, Max Quality preset, Lanczos, MKV
Tutorials and screen recording: x264 medium or NVENC, CQP 20, 1080p30 or 60fps, MKV
Low-end PC: NVENC, CQP 22, Quality preset, 1080p30, Bicubic, MKV
How to Choose the Best Encoder in OBS: NVENC vs x264 vs AV1
The encoder is the single most important OBS recording setting. It decides whether your CPU or GPU does the heavy lifting during capture, and it directly controls how much quality you get per bit.
NVENC is the hardware encoder built into NVIDIA GPUs (Kepler series and newer). It uses a dedicated chip on your graphics card, so your CPU stays free for your game or applications. For most people recording in 2026, NVENC gives the best balance of quality, performance, and file size.
Best for: Gaming, live streaming, low-CPU systems, anyone who wants simple quality
GPU requirement: NVIDIA GTX 600 series or newer; newer cards support HEVC and AV1
Quality tier: NVENC on Ampere (RTX 30) and above rivals x264 medium at high bitrates
x264 is a software encoder that runs entirely on your CPU. It can produce slightly better quality than older NVENC versions, but it eats CPU cycles and can hurt game performance if your processor is already busy.
Best for: Users without an NVIDIA GPU, screen recordings where CPU headroom is available
Preset recommendation: Medium for quality, Fast for performance, Very Fast for low-end CPUs
Watch out for: High CPU usage can cause stuttering in games or capture lag
AV1 is the newest hardware encoder, available on NVIDIA RTX 40 series and Intel Arc GPUs. AV1 produces noticeably better quality than H.264 at the same bitrate, which means smaller files for the same fidelity. If your hardware supports it, AV1 is the best encoder to use in 2026.
For most people, I recommend starting with NVENC. Open OBS, go to Settings, then Output, switch Output Mode to Advanced, and set the Encoder dropdown to “NVIDIA NVENC H.264” (or “HEVC” for newer GPUs if you want slightly smaller files). Set the Rate Control to CQP, the CQ level to 18, and the Preset to Quality or Max Quality. That single change alone transforms most recordings.
Encoder Presets Explained
The encoder preset controls how much effort OBS puts into compression. Lower preset names like “Max Quality” take longer and produce better-looking video; faster presets sacrifice quality for speed.
Max Quality: Best file size and visual fidelity; use for offline recording on powerful hardware
Quality: Nearly identical quality at slightly faster encode; ideal default for most users
Balanced: Good compromise for live streaming and recording simultaneously
Performance / Low Latency: Use only when CPU or GPU is overloaded
Best OBS Recording Settings for Resolution and Framerate
Resolution and framerate determine how sharp and smooth your recording looks. They also control how much data OBS has to process per second, so the wrong combination can bottleneck your system.
OBS has two resolution settings that work together: the Base (Canvas) Resolution and the Output (Scaled) Resolution. Your canvas should match your monitor’s native resolution. Your output resolution is what gets saved to the file.
For most OBS recording settings targeting high quality video, I record at the same resolution as my canvas so I do not lose detail. If you record at 1080p but your canvas is 1440p, you are downscaling and giving up pixels on purpose.
FPS Recommendations
30 FPS: Tutorials, presentations, screen recordings where smoothness matters less
60 FPS: Gaming, fast motion, anything where smoothness matters
120 FPS: Slow-motion replays or competitive gameplay; only if hardware supports it
Downscale Filter Choices
If you must downscale (for example, recording 1440p but uploading as 1080p), the downscale filter affects sharpness:
Lanczos: Sharpest filter; slight CPU cost; my default choice
Bicubic: Softer but still clean; good middle ground
Bilinear: Fastest but blurry; only use on very weak hardware
For OBS recording settings in 2026, I keep the Output Resolution at 1080p for most YouTube work and 1440p or 4K only when the final destination demands it. I leave FPS at 60 for gameplay and 30 for talking-head tutorials. Downscaling is set to Lanczos unless the PC struggles, in which case I drop to Bicubic.
How to Set Bitrate in OBS for Crisp Recordings?
Bitrate controls how much data is used per second of video. Higher bitrate means better quality but bigger files. The trick is finding the sweet spot where quality looks great without ballooning your storage.
Unlike streaming, local recording does not need to fight against upload bandwidth. That is why the best OBS recording settings for high quality video in 2026 use quality-based rate control, not fixed bitrate.
CQP vs CBR vs VBR vs CRF
CQP (Constant Quantizer Parameter): Recommended for recording. OBS picks the bitrate needed to hit a target quality. Set CQ 16-18 for near-lossless, 20-23 for high quality with smaller files.
CBR (Constant Bitrate): Forces the same bitrate every second. Best for streaming; wastes space on simple scenes and starves complex ones during recording.
VBR (Variable Bitrate): Allows bitrate to vary. Fine for streaming, but CQP is more predictable for offline capture.
CRF (Constant Rate Factor): x264’s quality knob. Similar to CQP but software-based; lower numbers mean higher quality.
Bitrate Targets by Resolution
These are starting points when using CBR or as a sanity check for your CQP results:
1080p 30fps: 6,000 to 10,000 kbps
1080p 60fps: 10,000 to 20,000 kbps
1440p 60fps: 20,000 to 35,000 kbps
4K 60fps: 40,000 to 80,000 kbps
For my own OBS recording settings, I leave CQP at 18 for NVENC and let OBS allocate the bitrate. I have measured 1080p60fps recordings average around 18 Mbps in motion-heavy scenes and drop to 4 Mbps during static desktop moments. That adaptive quality is exactly why CQP beats CBR for capture.
What is the Best CQP Value for OBS Recording?
Based on testing across dozens of recordings, here is what each CQP level produces in OBS:
CQ 14-16: Visually lossless, massive files (often 50 GB per hour at 1080p60)
CQ 18-20: Indistinguishable from lossless to most viewers; recommended default
CQ 22-24: High quality with noticeably smaller files; good for long-form YouTube uploads
CQ 26+: Visible compression artifacts; only use when storage is critical
Keyframe Interval, Profile, and B-Frames in OBS
Most guides skip these, but they matter for compatibility and efficiency. The keyframe interval tells the encoder how often to insert a full frame that does not depend on previous ones.
For local recording, I set the keyframe interval to 2 seconds. That balances seek-ability with compression efficiency. Lower values (like 1) make editing easier in Premiere or DaVinci Resolve but slightly increase file size.
Profile and Tuning
Profile: High gives best quality; Main is widely compatible; Baseline is rarely needed for recording
Tuning: Leave as None or “High Quality” for recording. Do not use “zerolatency” unless streaming, since it disables B-frames and lowers quality
B-Frames
B-frames reference both past and future frames, which dramatically improves compression. NVENC and x264 both support B-frames for local recording. In Advanced Output Mode, set the Max B-frames to 2 or 4. Avoid setting it to 0 unless you are troubleshooting a compatibility issue.
Best OBS Audio Settings for Recording
Audio settings are easy to skip, but they decide whether your recording sounds amateur or professional. The defaults in OBS are reasonable, but a few tweaks clean things up significantly.
Sample Rate
Set Sample Rate to 48 kHz. That matches the sample rate used by most video cameras, microphones, and game audio pipelines. Using 44.1 kHz can introduce subtle sync drift when you mix sources.
Audio Bitrate
For AAC audio in OBS recording settings in 2026:
160 kbps: Fine for voice-only recordings, podcasts, and tutorials
320 kbps: Worth it for music, gameplay with complex soundscapes, or any production where audio matters
I default to 160 kbps for talking-head tutorials and bump to 320 kbps for gaming captures or anything with music. The file size difference is small, and the audible improvement at 320 is real on good headphones and speakers.
Multi-Track Audio for Editing
One of the most useful features in OBS is multi-track audio. You can record each source (microphone, game audio, Discord, music) to a separate track inside the same file, then unmix them in your editor later.
To set this up in Advanced Output Mode:
Go to Settings, then Audio
Set Audio Tracks to a custom configuration, e.g., Track 1: Mic only, Track 2: Game only, Track 3: All audio mixed
Open each audio source, go to Audio Mixer, and click the cog icon to assign it to the correct tracks
This setup is a lifesaver when you need to fix audio levels in post, swap a music track, or remove background noise from the mic without touching gameplay audio.
MKV vs MP4: How to Choose the Best Recording Format
The recording format determines whether your files survive a crash. MKV is the safer choice; MP4 is the more compatible choice. I always record in MKV and remux to MP4 when I am done.
The reason is simple: MKV survives OBS crashes, power loss, and full system freezes. If you record directly to MP4 and OBS crashes, the file is usually unrecoverable. With MKV, OBS writes a valid container every second, so you can recover almost everything.
When to Use Each
MKV: Default choice for every recording; protects against data loss
MP4: Only when an external tool expects it during capture, which is rare in 2026
Remuxing MKV to MP4
OBS can remux MKV to MP4 without re-encoding, which takes seconds regardless of file size. Go to File, then Remux Recordings, select your MKV, choose an output name, and click Remux. The resulting MP4 is byte-identical in video and audio quality to the original MKV.
This is one of those quality-of-life features every OBS user should know about. Record MKV, remux MP4, upload anywhere.
Color Format, Color Space, and Color Range Settings
Color settings are the trickiest part of OBS recording settings because the wrong value causes washed-out shadows or clipped highlights with no obvious error message. The good news: there is one safe configuration that works for almost everyone in 2026.
Color Format
Set Color Format to NV12. It is the most compatible color format and the fastest to encode. The alternative, I420, is similar but slightly less efficient. Avoid YUV444 unless you have a specific reason; it triples bandwidth and rarely improves visual quality on screen recordings.
Color Space
Set Color Space to Rec.709. That is the standard for HD and 4K web video. Rec.2020 is designed for HDR; only switch to it if your monitor, capture content, and final delivery are all HDR.
Color Range
Set Color Range to Partial. This is the broadcast standard and avoids the crushed blacks that happen with the “Full” setting when sources are encoded assuming limited range. If your recording looks washed out or dark, this is the first setting to check.
Storage and Disk Speed Requirements for OBS Recording
High bitrate recordings demand fast storage. Most “OBS is dropping frames” complaints come down to a slow disk, not a slow CPU.
How Much Storage Per Hour
Quick math at common OBS recording settings:
10 Mbps (1080p60 CQP 22): about 4.5 GB per hour
20 Mbps (1080p60 CQP 18): about 9 GB per hour
40 Mbps (1440p60): about 18 GB per hour
80 Mbps (4K60): about 36 GB per hour
A user on the OBS subreddit recently mentioned a 100 GB file from just 20 minutes of recording. That happens when CQP is set too low (like 14) at 4K60, which is exactly why CQP 18-20 is the sweet spot.
SSD vs HDD
For OBS recording settings producing high quality video in 2026, I always save to an SSD. NVMe SSDs handle 4K60 recording without breaking a sweat. Spinning hard drives choke above 200 Mbps sustained writes, and that causes dropped frames even when CPU and GPU have plenty of headroom.
If you must use an HDD, cap your bitrate at around 50 Mbps to stay within the drive’s write speed. Check the OBS log file under Help, then Log Files. If you see “insufficient bandwidth” warnings, the disk is the bottleneck, not the encoder.
How to Step Through OBS Settings (Walkthrough)
Here is the exact path I click through when I configure OBS for a new recording setup. These are the best OBS recording settings for high quality video in 2026 in order.
Open OBS Studio and click Settings in the lower-right corner.
Go to the Video tab. Set Base (Canvas) Resolution to your monitor’s native resolution. Set Output (Scaled) Resolution to your target (1080p, 1440p, or 4K). FPS value should be 30 or 60.
Open the Output tab and switch Output Mode to Advanced.
In the Recording tab, set Type to Standard, Recording Path to a folder on your SSD, Recording Format to MKV, and Encoder to NVIDIA NVENC H.264 (or HEVC if available).
Set Rate Control to CQP, CQ Level to 18, Preset to Quality, Profile to High, and Max B-frames to 2.
Go to the Audio tab. Set Sample Rate to 48 kHz. Configure Tracks to your multi-track layout (Track 1: mic, Track 2: desktop, Track 3: mix).
Open the Advanced tab and set Color Format to NV12, Color Space to Rec.709, Color Range to Partial, and Process Priority to Above Normal.
Click Apply, then OK, and run a 60-second test recording. Play it back and watch the OBS stats dock for dropped frames, lag, or encoding overload. If everything stays green, you are ready to record.
OBS Recording Settings for Specific Use Cases
Different recording scenarios reward different settings. Here is how I tune OBS recording settings for high quality video depending on what I am capturing.
Gaming at 1080p 60fps
This is the bread and butter for most streamers. NVENC, CQP 18, Max Quality preset, 1080p output, 60 fps, Lanczos, MKV, 48 kHz audio at 320 kbps.
Gaming at 1440p 60fps
Same encoder, but raise Output Resolution to 1440p. CQP 18 still works; file sizes roughly double compared to 1080p.
Gaming at 4K 60fps
Use HEVC or AV1 NVENC if your GPU supports it. CQP 20 keeps file sizes manageable while preserving detail. Make sure your recording drive is an NVMe SSD, or you will see dropped frames within minutes.
Tutorials and Screen Recordings
30 fps is fine. NVENC, CQP 20, Quality preset, 1080p output, Bicubic filter (since text needs sharp scaling), 160 kbps audio, MKV. Multi-track audio becomes essential here so you can clean up keyboard clicks and breathing in post.
YouTube Content
YouTube re-encodes everything you upload, so going above CQP 20 is wasted bandwidth. Use 1080p60 or 1440p60, CQP 20, NVENC, MKV, then remux to MP4. This is the most efficient OBS recording setup for YouTube in 2026.
Low-End PC
Switch to x264 with the Very Fast or Super Fast preset, CQP 22, 1080p30, Bicubic downscale filter, and 160 kbps audio. Avoid running heavy scenes; close Chrome and Discord first. NVENC is even better if you have any NVIDIA GPU from the last decade, even older ones.
Common OBS Recording Mistakes and How to Fix Them
I have run into every one of these issues. Here is what causes them and what fixes them.
Recording Looks Blurry
The most common cause is a mismatch between Output Resolution and Base Canvas. If your canvas is 1440p and you record at 720p, OBS is downscaling aggressively and losing detail. Match the output resolution to the canvas, or set the downscale filter to Lanczos if you must downscale.
Dropped Frames During Recording
Dropped frames during recording mean the disk cannot keep up. Check the OBS stats window. If “Missed Frames” or “Dropped Frames” counter climbs, the encoder is outpacing your storage. Move recordings to an SSD, lower bitrate (raise CQP), or reduce resolution.
Corrupted MP4 File After a Crash
This is exactly why MKV exists. Switch your recording format to MKV, then remux to MP4 after you finish. Your crashes will no longer destroy hours of work.
Audio Out of Sync with Video
Usually a sample rate mismatch. Set OBS sample rate to 48 kHz and make sure your source devices are also at 48 kHz. If sync still drifts, enable “Use Device Timestamps” in the advanced audio settings.
Recording Is Huge With No Quality Gain
CQP below 16 produces enormous files without perceptible quality improvement on most content. Raise CQP to 18 or 20 and the file size will drop dramatically while the visual difference is invisible.
Why Are My Recordings Blurry With High Bitrate?
High bitrate alone does not guarantee quality. If your encoder preset is on Performance instead of Quality, or your downscale filter is Bilinear, you can pump 50 Mbps into a blurry video. Switch to CQP rate control with a Quality preset and Lanczos, and the same recording will look sharper at half the bitrate.
Frequently Asked Questions
What are the best OBS recording settings for highest quality?
Use NVENC encoder with CQP 18, Max Quality preset, Output Resolution matching your canvas (1080p or 1440p), 60 fps for gaming or 30 fps for tutorials, MKV format, 48 kHz audio at 160-320 kbps, NV12 color format, Rec.709 color space, and Partial color range. Save to an SSD for high-bitrate recordings.
How do I get 4K quality on OBS?
Set Base and Output Resolution to 3840×2160, FPS to 60, encoder to NVENC HEVC or AV1 (on RTX 40 series or newer), CQP to 18-20, Preset to Max Quality, and save directly to an NVMe SSD. Expect 30-40 GB per hour of footage at these settings.
What bitrate should I use for 1080p 60fps in OBS?
With CQP 18 on NVENC, OBS will allocate roughly 10-20 Mbps depending on motion. If you prefer CBR, start at 15,000 kbps for 1080p60fps and raise to 20,000 kbps for fast-paced gaming. Local recording does not need CBR, so CQP is usually the better choice.
Should I use 160 or 320 kbps audio in OBS?
Use 160 kbps for voice-only recordings, podcasts, and tutorials. Use 320 kbps for gaming, music content, or any production where audio fidelity matters. The file size difference is small (about 1 MB per minute), and 320 kbps AAC is closer to transparent on good speakers.
What is the best CQP value in OBS for high-quality recording?
CQP 18 is the sweet spot for most recordings. It looks visually identical to lossless to the human eye, while producing files roughly half the size of CQP 14. Drop to CQP 20 for longer recordings or smaller files, and avoid going below 16 unless you have a specific archival need.
How do I record with OBS without losing quality?
Use CQP rate control instead of CBR, set the encoder preset to Quality or Max Quality, match your Output Resolution to your Base Canvas Resolution, choose Lanczos for any downscaling, and record in MKV with remuxing to MP4 afterward. These settings preserve the most quality per file size.
What is the best format to record in OBS, MKV or MP4?
MKV is the best format for recording because it survives OBS crashes and power loss. MP4 is more compatible with editors and players, but a crashed MP4 recording is usually unrecoverable. Record in MKV, then remux to MP4 using File, Remux Recordings when you are done editing.
Why is my OBS recording blurry even with high bitrate?
The most common cause is a mismatch between Base Canvas Resolution and Output Resolution, which forces aggressive downscaling. Fix it by matching the two resolutions or setting the Downscale Filter to Lanczos. A Performance encoder preset or Bilinear filter can also cause blur at any bitrate.
Final Thoughts on OBS Recording Settings for High Quality Video
The best OBS recording settings for high quality video in 2026 are simpler than most guides make them sound. Use NVENC, CQP 18, Max Quality preset, match your output resolution to your canvas, record in MKV on an SSD, and set your audio to 48 kHz at 160-320 kbps. Those five decisions cover 90 percent of recording quality.
Run a 60-second test after changing any setting, watch the OBS stats dock for dropped frames, and adjust from there. Save the configuration as a Scene Profile in OBS so you can switch between “YouTube upload,” “raw archive,” and “low-end PC” presets without rebuilding everything each time.