
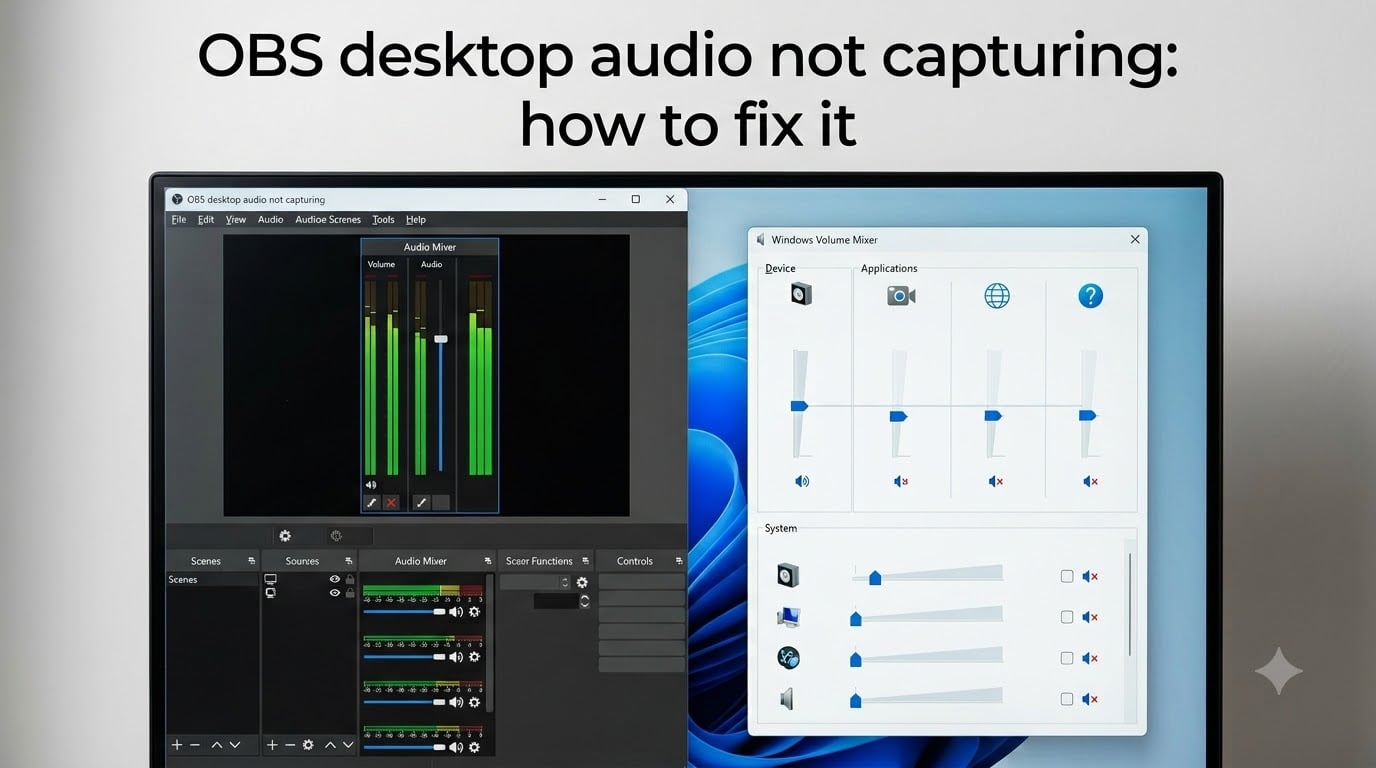
You hit record, deliver a great stream, and then discover your desktop audio is completely silent in the playback. I’ve been there. After helping dozens of streamers troubleshoot this exact issue, I can tell you that OBS desktop audio not capturing is one of the most common — and most frustrating — problems in content creation.
The good news is that nearly every case comes down to a small set of causes: a muted app in the volume mixer, a wrong audio device selected in OBS, monitoring settings that block recording, a sample rate mismatch, or a driver conflict after a system update.
This guide walks through how to fix OBS desktop audio not capturing step by step. I’ll start with the fastest checks, then move into deeper settings. I’ll also explain why each fix works, because understanding the cause helps you solve it faster next time.
Whether you’re on Windows 10, Windows 11, or macOS, the methods below cover the fixes that actually work based on community solutions from the official OBS Project forum and real user reports from Reddit’s r/obs community.
Table of Contents
- Quick Checklist: The 5 Fastest Fixes
- Why Isn’t OBS Capturing Your Desktop Audio?
- Check the Windows Volume Mixer First
- Select the Correct Desktop Audio Device in OBS Settings
- Fix Audio Monitoring Set to Monitor Only
- Match the Sample Rate Between OBS and Windows
- Update or Reinstall Your Audio Drivers
- Adjust Advanced Audio Properties and Audio Tracks
- Windows 11 and macOS Specific Fixes
- Restart OBS Studio as a Last Resort
- Frequently Asked Questions
- Conclusion
Quick Checklist: The 5 Fastest Fixes
Before diving into detailed troubleshooting, try these quick checks. Most users find their fix in the first two.
- Check the Windows Volume Mixer — Right-click the speaker icon, open Volume Mixer, and confirm OBS (or obs64.exe) isn’t muted or set to zero volume.
- Select the correct Desktop Audio device — In OBS, go to Settings > Audio and make sure Desktop Audio points to your active playback device, not “Default.”
- Set audio monitoring to “Monitor Off” — Right-click the audio source in OBS, select Advanced Audio Properties, and switch any “Monitor Only” sources to “Monitor Off.”
- Match the sample rate — Ensure both Windows sound settings and OBS use the same sample rate (48kHz is recommended).
- Restart OBS Studio completely — Close OBS from the system tray, not just the window, then reopen it.
If none of these resolve the issue, keep reading for detailed instructions on each fix, plus driver troubleshooting and platform-specific solutions.
Why Isn’t OBS Capturing Your Desktop Audio?
OBS Studio captures desktop audio through its Global Audio Devices settings. It routes your system’s sound output into the OBS audio mixer, where it gets combined with microphone input and other sources for your recording or stream.
When that pipeline breaks, the audio meter in OBS might show activity but produce no sound in the final recording — or it might show complete silence. Both symptoms point to different root causes.
Here are the most common reasons OBS fails to capture desktop audio:
- Muted in Volume Mixer: Windows has a per-app volume control. If OBS (sometimes listed as obs64.exe) gets muted or turned down, no desktop audio reaches the recording.
- Wrong audio device: OBS defaults to “Default” for desktop audio. If your active output device doesn’t match what OBS is using, it captures silence.
- Monitor Only mode: When a source is set to “Monitor Only,” OBS plays the audio through your headphones but excludes it from the recording and stream.
- Sample rate mismatch: If OBS runs at 48kHz and Windows runs at 44.1kHz, audio can become distorted, delayed, or completely silent.
- Driver conflicts: Windows updates occasionally break or replace audio drivers, causing OBS to lose access to the audio device.
- OBS glitch or caching issue: Sometimes OBS holds onto stale audio settings from a previous session. A clean restart fixes this.
One detail that confuses many users: Windows may list OBS as “obs64.exe” in the Volume Mixer rather than “OBS.” This is normal — it’s just the executable name. If you see obs64.exe greyed out in the mixer, that means OBS isn’t currently producing audio, which is a symptom of one of the issues above.
Now let’s walk through each fix in detail.
Check the Windows Volume Mixer First
The volume mixer is the most overlooked fix. Windows controls volume per application, and OBS gets its own slider. If that slider is muted or at zero, desktop audio won’t make it into your recording — even though everything looks fine inside OBS.
This is also where the “obs64.exe” naming quirk trips people up. They look for “OBS” in the mixer and don’t see it, assuming everything is fine.
Step 1: Right-click the speaker icon in your Windows taskbar (bottom-right corner).
Step 2: Select “Open Volume Mixer” or “Volume Mixer” from the menu. On Windows 11, you may need to click “More sound settings” first.
Step 3: Look for either “OBS” or “obs64.exe” in the list of applications. If OBS is running, it should appear here.
Step 4: Make sure the volume slider for OBS is at 100% and not muted. Click the speaker icon next to the slider to toggle mute on or off.
Step 5: If you don’t see OBS in the mixer at all, start a recording or stream in OBS for at least 30 seconds. Windows only adds an app to the mixer after it produces audio, so OBS needs to be actively capturing for the entry to appear.
A common scenario from the OBS Reddit community: a user changes their default audio output device (like switching from speakers to headphones), and Windows automatically mutes OBS in the mixer. Always re-check the mixer after changing your output device.
Select the Correct Desktop Audio Device in OBS Settings
If the volume mixer looks fine, the next most likely culprit is a mismatched audio device. OBS needs to know exactly which sound output to capture, and the “Default” setting doesn’t always behave as expected.
When you plug in headphones, connect a Bluetooth speaker, or switch monitor audio outputs, Windows changes the default device. But OBS might still be trying to capture from the old device — resulting in silence.
Step 1: Open OBS Studio and click “Settings” in the bottom-right controls panel.
Step 2: Select the “Audio” tab on the left sidebar.
Step 3: Look for “Desktop Audio” under the Global Audio Devices section. You’ll see dropdowns for Desktop Audio 1 and Desktop Audio 2.
Step 4: Change the dropdown from “Default” to your specific audio device. For example, if you’re using headphones, select your headphone model by name — not “Default.”
Step 5: If you have a microphone selected under Mic/Auxiliary Audio, double-check that it’s also pointed to the correct input device.
Step 6: Click “Apply” and then “OK” to save your settings.
Step 7: Play audio on your desktop (a YouTube video works well) and check if the green volume meter under Desktop Audio in the OBS mixer starts moving.
Setting the device explicitly — rather than relying on “Default” — is more reliable because it removes any ambiguity. If Windows changes the default device for any reason, OBS won’t suddenly start capturing from the wrong source.
For users who switch between speakers and headphones frequently, I recommend setting Desktop Audio 1 to your speakers and Desktop Audio 2 to your headphones. This way, OBS captures audio from whichever one is active.
Fix Audio Monitoring Set to Monitor Only
This is the fix that trips up the most experienced users. OBS has an audio monitoring system that lets you listen to audio sources through your headphones while recording or streaming. But one particular setting — “Monitor Only” — causes audio to play in your ears while being completely excluded from the recording.
Here’s what happens: you see the volume meter moving in OBS, you hear the audio through your headphones, but when you play back the recording, there’s silence. The audio never made it into the file.
The three monitoring options in OBS are:
- Monitor Off: Audio goes to the recording only. You won’t hear it through your headphones, but it will be in the output. This is the correct setting for desktop audio.
- Monitor Only (Mute Output): Audio plays through your headphones but is excluded from the recording and stream. This is the setting that causes the problem.
- Monitor and Output: Audio goes to both your headphones and the recording. Use this for microphone audio if you want to hear yourself.
Step 1: In the OBS audio mixer panel (bottom-center of the interface), click the gear icon next to “Desktop Audio.”
Step 2: Select “Advanced Audio Properties” from the dropdown menu.
Step 3: A new window opens showing all audio sources. Find “Desktop Audio” in the list.
Step 4: Look at the “Audio Monitoring” column. If it says “Monitor Only,” that’s your problem. Change it to “Monitor Off.”
Step 5: While you’re here, verify that the “Tracks” checkboxes are set correctly. Track 1 should be checked for all sources you want in your main recording. If no tracks are checked, the audio won’t be included.
Step 6: Click “Close” and test your recording again.
The Advanced Audio Properties window is also where you can assign different audio sources to separate tracks. This is useful if you want to isolate game audio, microphone, and music into separate channels for post-production editing. Just make sure Track 1 is checked for every source you want in your default recording.
Match the Sample Rate Between OBS and Windows
A sample rate mismatch between OBS and Windows can cause audio distortion, latency, crackling, or complete silence in recordings. This problem often appears after a Windows update or after installing new audio hardware.
Sample rate is how many times per second an audio signal is measured during digital conversion. The two standard rates are 44.1kHz (CD quality) and 48kHz (professional video standard). OBS recommends 48kHz, and most modern audio hardware defaults to it.
If Windows is set to 44.1kHz and OBS is set to 48kHz — or vice versa — OBS has to resample the audio on the fly. This can cause the audio pipeline to fail silently.
Step 1: Check your OBS sample rate. Go to Settings > Audio. At the top of the window, you’ll see “Sample Rate” with a dropdown. Note the current value (48kHz is recommended).
Step 2: Check your Windows sample rate. Right-click the speaker icon in the taskbar and select “Sound settings.” Click on your output device, then select “Device properties” or “Additional device properties.”
Step 3: In the device properties window, go to the “Advanced” tab. Look at the “Default Format” dropdown. It should display the sample rate (e.g., “24-bit, 48000 Hz”).
Step 4: If the Windows sample rate doesn’t match OBS, change it. Set both to 48000 Hz (48kHz) for best results.
Step 5: Click “Apply” and “OK” in the Windows sound settings, then restart OBS Studio.
On Windows 11, the path is slightly different. Go to Settings > System > Sound, click your output device, scroll down to “Format,” and select “24-bit, 48000 Hz.” The naming and layout changed between Windows 10 and 11, but the setting is the same.
If you still hear crackling or distortion after matching sample rates, try reducing the audio buffer size in your audio interface settings, or switching to a different audio driver mode (like WASAPI instead of DirectSound).
Update or Reinstall Your Audio Drivers
Audio driver conflicts are a frequent cause of OBS desktop audio not capturing, especially after Windows updates. Windows can silently replace your audio driver with a generic one, or a driver update can introduce compatibility issues with OBS.
If you’ve tried all the settings fixes above and desktop audio still doesn’t work, the drivers are the next place to look.
Step 1: Right-click the Start button and select “Device Manager.”
Step 2: Expand the “Sound, video and game controllers” section.
Step 3: Right-click your primary audio device (your headphones, speakers, or audio interface) and select “Update driver.”
Step 4: Choose “Search automatically for drivers.” Windows will look for and install the latest version.
Step 5: If Windows says the driver is up to date, try “Uninstall device” instead. Restart your computer, and Windows will reinstall a fresh driver automatically.
Step 6: For dedicated audio interfaces (Focusrite, GoXLR, Elgato Wave), download the latest driver directly from the manufacturer’s website rather than relying on Windows Update. Manufacturer drivers often fix OBS-specific issues that generic drivers don’t address.
A specific scenario reported on the OBS Project forum: after a Windows feature update, users found that their Realtek audio driver was replaced with a generic “High Definition Audio” driver. OBS couldn’t capture desktop audio until the original Realtek driver was reinstalled from the manufacturer’s site.
If you’re using a USB microphone or audio interface, also check the manufacturer’s firmware update page. Firmware updates can resolve audio routing bugs that no driver update will fix.
Adjust Advanced Audio Properties and Audio Tracks
Beyond monitoring settings, OBS has a powerful multi-track audio system that, when misconfigured, can cause audio to be excluded from recordings entirely. Understanding how audio tracks work in OBS prevents a class of problems that stump many creators.
OBS supports up to 6 audio tracks in a single recording. Track 1 is the default — it’s what most players and editing software will use. Tracks 2 through 6 are optional and can be used to separate different audio sources for post-production.
The problem arises when a source has Track 1 unchecked but other tracks checked. The recording file contains the audio on Track 2, but when you play it back in a media player that only reads Track 1, you hear silence.
Step 1: In the OBS mixer, click the gear icon next to any audio source and select “Advanced Audio Properties.”
Step 2: For each audio source, verify that Track 1 is checked in the tracks column. This ensures the audio is included in the main recording output.
Step 3: If you want multi-track recording (for separate audio in editing), go to Settings > Output > Recording tab and set “Audio Track” to include tracks 1-6.
Step 4: Make sure the “Volume” column for each source is at 100% (or your desired level) and not at 0%.
Step 5: Check the “Audio Mix Down” method at the bottom. For most users, “Downmix to Mono” should be unchecked unless you specifically want mono output.
This section is where a lot of the “audio shows up in OBS but doesn’t play through the recording” problems originate. The OBS forum has multiple threads from users who had audio meters moving in OBS but silent recordings — all because Track 1 was unchecked.
Windows 11 and macOS Specific Fixes
Different operating systems handle audio routing differently. If the general fixes above haven’t worked, your OS may have specific quirks that need addressing.
Windows 11 Audio Settings
Windows 11 changed the sound settings interface significantly from Windows 10. The classic Sound control panel is hidden, and some settings that OBS depends on are buried in new menus.
Windows 11 fix 1: Go to Settings > System > Sound > More sound settings. This opens the classic Sound control panel where you can access device properties and the Levels tab.
Windows 11 fix 2: In Settings > System > Sound, check that your output device is correctly set under “Choose where to play audio.” If this doesn’t match the device selected in OBS, you’ll get silence.
Windows 11 fix 3: Disable audio enhancements. Go to your output device properties > Advanced > uncheck “Enable audio enhancements.” Enhancements can interfere with OBS audio capture on some systems.
Windows 11 fix 4: Check for the “Communications” tab in Sound settings. Windows can automatically reduce the volume of other sounds when it detects communications activity. Set this to “Do nothing” to prevent Windows from ducking your desktop audio.
macOS Audio Capture
On macOS, OBS cannot capture desktop audio natively. Apple’s CoreAudio doesn’t expose system audio to third-party applications by default. This isn’t a bug — it’s a deliberate design choice.
macOS fix: You need a virtual audio routing tool. The two most common options are:
- BlackHole (free, open-source): Routes audio between applications. You set your output to BlackHole, then add a BlackHole audio source in OBS.
- Loopback (paid, by Rogue Amoeba): A more user-friendly option with a visual interface for routing audio. Costs around $100 but is more reliable for complex setups.
For macOS, also make sure you’ve granted OBS microphone permissions in System Settings > Privacy & Security > Microphone. Without this permission, OBS can’t access any audio input on macOS.
Restart OBS Studio as a Last Resort
It sounds simple, but a clean restart of OBS Studio fixes a surprising number of audio issues. OBS caches audio device connections when it starts. If the audio device was unavailable when OBS launched — because you plugged in headphones after starting OBS, for example — OBS won’t reconnect to it until you restart.
Step 1: Close OBS completely. Don’t just click the X — check your system tray (bottom-right on Windows, top menu bar on macOS) and quit OBS from there.
Step 2: Wait 5 seconds to ensure all OBS processes have terminated.
Step 3: Reopen OBS Studio.
Step 4: Before starting a recording or stream, check that your audio devices are correctly detected in Settings > Audio.
Step 5: Play desktop audio and confirm the volume meter in the OBS mixer responds.
If a restart doesn’t help and none of the fixes above have worked, a full reinstall may be necessary. Before reinstalling, export your current OBS profile and scene collection so you don’t lose your setup.
To export your profile: go to Settings > Profiles > Export. To export scenes: go to the Scene Collection menu (top menu bar) > Export. Save both files somewhere safe before uninstalling OBS.
One tip from the OBS community: try running OBS as an administrator on Windows. Right-click the OBS shortcut and select “Run as administrator.” This can resolve permission issues that prevent OBS from accessing audio devices, particularly on systems with strict security configurations.
Frequently Asked Questions
Why isn’t OBS Studio capturing my desktop audio?
The most common reasons are OBS being muted in the Windows Volume Mixer, the wrong audio device selected in OBS Settings u0026gt; Audio, or a source set to Monitor Only mode. Check the Volume Mixer first, then confirm your Desktop Audio device matches your active playback device.
Why can’t I hear my desktop audio on OBS?
If you can’t hear desktop audio while using OBS, your source may be set to Monitor Off (which sends audio to the recording only) or your monitoring device isn’t configured. Go to Settings u0026gt; Advanced u0026gt; Monitoring Device and select your headphones, then set the source to Monitor and Output in Advanced Audio Properties.
Why am I getting no audio on OBS?
No audio in OBS usually means the wrong device is selected, the sample rate doesn’t match between OBS and Windows, audio drivers need updating, or Track 1 is unchecked in Advanced Audio Properties. Work through the quick checklist: check Volume Mixer, verify the audio device, fix monitoring mode, match sample rates, and restart OBS.
How to make OBS pick up desktop audio?
Go to OBS Settings u0026gt; Audio, set Desktop Audio 1 to your specific output device (not Default), click Apply and OK, then play audio on your computer and check the green volume meter in the OBS mixer. If the meter doesn’t move, try the other fixes in this guide starting with the Volume Mixer check.
Why is OBS desktop audio greyed out?
OBS desktop audio appears greyed out or inactive when no audio is being produced at that moment. Start playing audio on your desktop and the meter should activate. If OBS shows as obs64.exe in the Volume Mixer and is greyed out, it means OBS isn’t currently capturing audio — restart OBS and verify your audio device settings.
Conclusion
Fixing OBS desktop audio not capturing comes down to working through a systematic checklist. Start with the volume mixer, verify your audio device selection, check monitoring settings, match sample rates, update drivers, and restart OBS. In nearly every case, one of these steps resolves the issue.
The key takeaway: understanding why each fix works helps you diagnose faster. Monitor Only mode blocks audio from recordings. Sample rate mismatches cause silent capture. The wrong device means OBS listens to a source that isn’t producing sound. Knowing these causes turns a frustrating hour of troubleshooting into a 2-minute fix.
If you’re still stuck after trying every method in this guide, the OBS Project forum and the r/obs subreddit are excellent community resources. Post your OBS log file (Help > Log Files > Upload Last Log) with your question — experienced users can often identify the problem from the log data.