
Learning how to schedule a premiere or live stream on YouTube can transform an ordinary video upload into a community event. Whether you are dropping a music video, launching a product, or broadcasting a weekly show, scheduling gives your audience time to gather, get notified, and show up together.
I have set up dozens of YouTube premieres and live streams over the years, from small podcast episodes to large product launches. Along the way I have hit every common snag, from missing countdown themes to stream key errors. This guide walks through the entire process step by step, covering both premieres and live streams so you do not have to bounce between articles.
By the end, you will know exactly how to schedule a premiere, how to schedule a live stream, how the two compare, how to customize your countdown and trailer, and how to troubleshoot the issues that trip up creators most often.
Table of Contents
- What Is a YouTube Premiere?
- How to Schedule a YouTube Premiere?
- Premiere vs Live Stream: Key Differences
- How to Schedule a YouTube Live Stream
- How to Customize Your Countdown and Trailer?
- How to Promote Your Premiere or Live Stream
- The Watch Page Lifecycle: Before, During, and After
- Troubleshooting Common Premiere and Live Stream Issues
- Frequently Asked Questions
- Conclusion
What Is a YouTube Premiere?
A YouTube Premiere is a scheduled first viewing of a prerecorded video. Instead of publishing instantly, the video debuts at a specific time on a public watch page. A countdown ticks down before the video starts, and viewers can chat together in real time as if it were a live event.
The key distinction is that the content itself is pre-recorded. You upload the file, schedule a date and time, and YouTube handles the rest. Your audience watches the video together at the same moment, creating a shared experience that a standard upload cannot match.
Premieres also support live chat, Super Chat, and chat replay after the event ends. Once the premiere finishes, the video stays on your channel as a regular upload with the full chat history preserved.
How to Schedule a YouTube Premiere?
Scheduling a premiere takes about five minutes once your video file is ready to upload. Here is the exact process in YouTube Studio.
Step 1: Sign in to YouTube Studio and click the Create button in the top-right corner, then select Upload video.
Step 2: Select your video file from your computer. YouTube will begin processing the upload immediately.
Step 3: While the video uploads, fill in your details. Add a title, description, thumbnail, and any other metadata. This information helps YouTube understand and recommend your content.
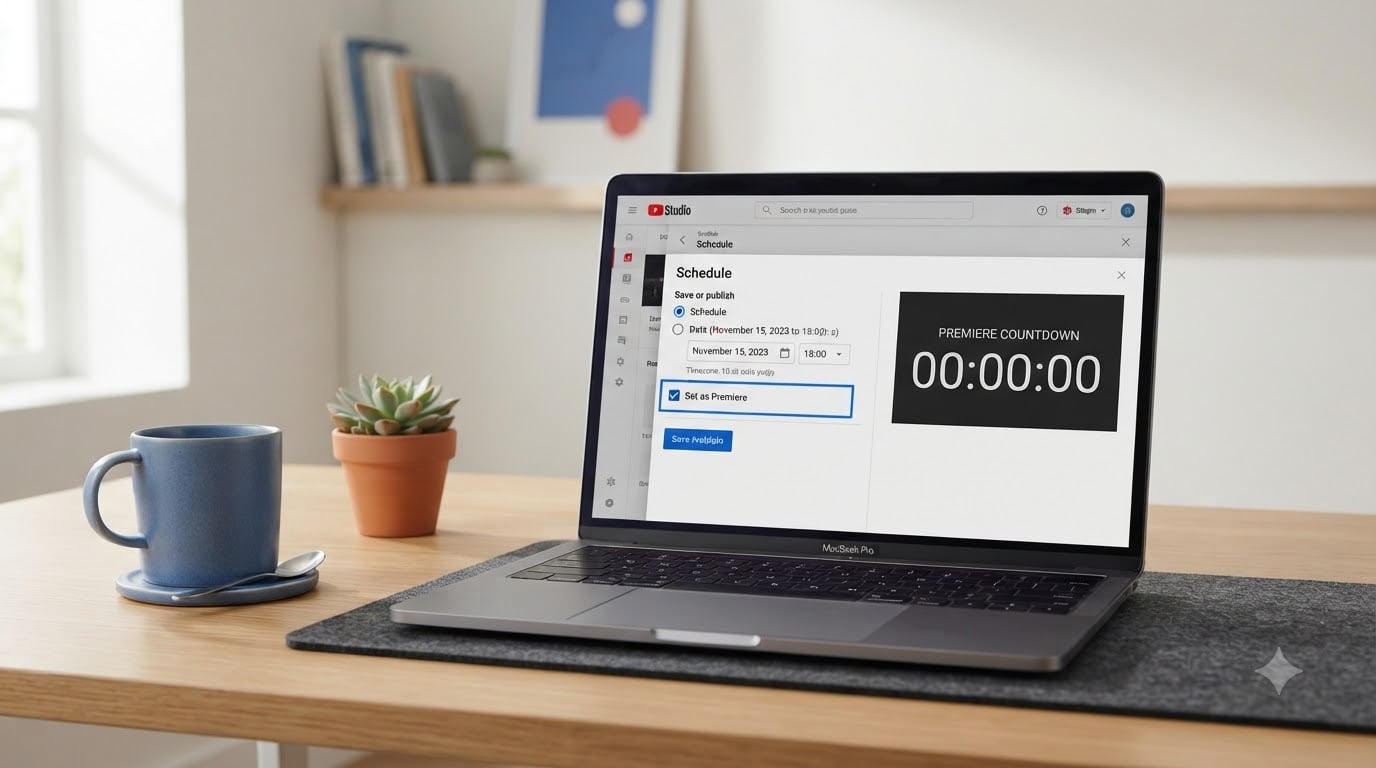
Step 4: Scroll down to the Visibility section. Instead of choosing Public or Unlisted, click Schedule.
Step: Pick your premiere date and time. YouTube uses your local time zone, so double-check it matches when your audience is most active.
Step 6: Tick the box that says Set as Premiere. This is the critical step. Without checking this box, the video will publish as a regular scheduled upload with no countdown or live chat.
Step 7: Optionally tick Add a trailer to upload a short teaser video that plays on the watch page before the premiere begins.
Step 8: Click Done. Your premiere is now scheduled. YouTube gives you a shareable watch page URL you can promote right away.
Once scheduled, the watch page goes live with an “Upcoming” badge and a countdown timer. Viewers can click Set Reminder to get a notification when the premiere is about to start.
Scheduling a Premiere on Mobile
You can schedule a premiere from the YouTube mobile app, though the options are more limited than on desktop. Open the app, tap the plus icon, select Upload a video, and choose your file. During the upload flow you will see a Visibility option where you can set a schedule date and toggle on Set as Premiere. The trailer option and some advanced settings are desktop-only.
Premiere vs Live Stream: Key Differences
Many creators confuse premieres with live streams, but they work differently under the hood. A premiere plays a pre-recorded video at a scheduled time. A live stream broadcasts video in real time as it happens. Both support live chat, but the content source is what separates them.
Here is a side-by-side comparison to help you choose the right format for your content.
| Feature | YouTube Premiere | YouTube Live Stream |
|---|---|---|
| Content type | Pre-recorded video | Real-time broadcast |
| Can edit before it goes live | Yes, the file is finalized | No, it is live |
| Countdown and watch page | Yes | Optional |
| Live chat | Yes, during premiere only | Yes, throughout |
| Requires encoding software | No | Yes (OBS, Streamlabs, or similar) |
| Best for | Music videos, episode drops, trailers | Gaming, talk shows, events, Q&A |
Use a premiere when you have a polished, finished video and want to build anticipation. Use a live stream when you need real-time interaction and the content is happening in the moment.
How to Schedule a YouTube Live Stream
Scheduling a live stream is slightly more involved than a premiere because you need to connect encoding software. Here is how to set it up in YouTube Studio.
Step 1: Open YouTube Studio and click Create in the top-right corner, then select Go Live.
Step 2: If this is your first stream, YouTube may ask you to verify your channel. This can take up to 24 hours, so plan ahead.
Step 3: In the Live tab, click the Stream or Manage tab. Enter a title, description, and select a category for your stream.
Step 4: Upload a thumbnail and select the visibility. You can choose Public, Unlisted, or Private.
Step 5: Scroll down to find the Stream Settings section. Toggle on the option to Schedule for later if you want to set a future date and time rather than going live immediately.
Step 6: Copy your stream key from the Stream Settings panel. You will paste this into your encoding software like OBS Studio, Streamlabs, or vMix.
Step 7: Open your encoding software and enter the stream key along with the RTMP server URL (usually rtmp://a.rtmp.youtube.com/live2). Configure your video resolution and bitrate to match YouTube’s recommended settings.
Step 8: In your encoder, click Start Streaming. Back in YouTube Studio, you will see a preview of your stream. Once the preview is active, you can schedule it or go live immediately.
Step 9: If scheduling for later, set the date and time and click Done. Share the resulting watch page URL so viewers can set reminders.
Scheduling a Live Stream on PC vs Mobile
On PC, you have full access to all settings including stream keys, custom encoders, and scheduling. On the YouTube mobile app, you can go live directly using your phone camera but the scheduling options are more limited. For advanced scheduling with a phone, you may need a third-party streaming app that supports RTMP.
How to Customize Your Countdown and Trailer?
One of the best parts of a premiere is the countdown that plays before the video starts. YouTube offers several built-in countdown themes, and creators with at least 1,000 subscribers can upload a custom countdown.
To change your countdown theme, open YouTube Studio and go to Settings, then Customization, then the Layout tab. Scroll to the Video countdown section and pick from the available themes. You can also set a pre-premiere countdown that starts up to two hours before the scheduled time.
A trailer is a short teaser video that plays on the watch page before the premiere begins. To add one, check the Add a trailer option during the scheduling process. The trailer can be up to three minutes long and should give viewers a reason to stick around until the main video starts.
The trailer URL is separate from the main video, so you can promote it independently to drive last-minute views before the big moment.
How to Promote Your Premiere or Live Stream
The watch page URL is generated the moment you schedule your premiere or stream. Grab that link and start promoting it right away across every channel you have.
Post the link on your other social platforms at least 48 hours before the event. Include the date, time, and time zone so viewers know exactly when to show up. A graphic or short clip helps the post stand out in a crowded feed.
Send the link to your email list with a clear call to action. Remind subscribers to click Set Reminder on the watch page so they get a notification the moment the premiere or stream begins.
From my experience, the creators who get the most premiere views are the ones who promote the watch page link in three waves: once when scheduling, once the day before, and once an hour before go-live. Each wave catches a different segment of your audience.
The Watch Page Lifecycle: Before, During, and After
Understanding the three phases of a premiere or scheduled stream helps you plan your engagement strategy.
Before: The watch page shows a countdown timer and an “Upcoming” badge. Viewers can chat in pre-show mode, and you can pin a message with details or rules. This is the time to share the link and encourage reminders.
During: The video plays for everyone at the same time. Live chat is active, and viewers can use Super Chat and Super Stickers. As the creator, you can moderate chat and respond to comments in real time, which boosts engagement.
After: The video transitions to a regular upload. Chat replay is available so latecomers can read the conversation. Your view count from the premiere carries over, and the video is eligible for recommendation just like any other upload.
Troubleshooting Common Premiere and Live Stream Issues
Here are the problems I see most often and how to fix them.
Countdown not showing: If the countdown does not appear on your watch page, confirm you checked Set as Premiere during scheduling. A regular scheduled upload does not get a countdown. You can also check your Customization settings to make sure the countdown theme is enabled.
Premiere vs Upcoming badge confusion: A video labeled “Upcoming” without a countdown badge is a scheduled upload, not a premiere. To get the premiere badge and countdown, you must tick Set as Premiere in the Visibility settings.
Stream key not connecting: Double-check that you copied the full stream key without extra spaces. Make sure the RTMP server URL matches YouTube’s current setting. If your encoder shows no connection, try generating a new stream key in YouTube Studio.
Video stuck in processing: High-resolution videos can take time to process. Schedule your premiere at least a few hours ahead so YouTube has time to finish processing before go-time. If processing stalls, re-upload the file.
Live chat not appearing: Chat only works when the video is actively premiering or streaming. If chat is missing, check that your channel has no active community guidelines strikes, which can restrict live features.
Frequently Asked Questions
Can you schedule a YouTube live stream?
Yes, you can schedule a YouTube live stream. In YouTube Studio, click Create, then Go Live. Enter your stream details, then toggle on the option to schedule for later. Set your date and time, copy your stream key into your encoding software, and share the watch page link.
How to create a YouTube live schedule?
To create a YouTube live schedule, go to YouTube Studio, click Create and select Go Live. In the Stream tab, fill in your title and description, then set a future date and time under scheduling options. YouTube generates a watch page URL you can promote to your audience ahead of time.
How to set Premiere on YouTube?
To set a Premiere on YouTube, upload your video in YouTube Studio, go to the Visibility section, click Schedule, choose your date and time, and check the box labeled Set as Premiere. Click Done and your premiere watch page will be created with a countdown and live chat.
What is the difference between a YouTube Premiere and a live stream?
A YouTube Premiere plays a pre-recorded video at a scheduled time with a countdown and live chat. A live stream broadcasts content in real time as it happens. Premieres are finished videos, while live streams are unedited real-time broadcasts that require encoding software.
How to set up a 24/7 live stream on YouTube?
To set up a 24/7 live stream, you need a dedicated streaming setup with encoding software or a cloud-based streaming service that can broadcast continuously. Create a live stream in YouTube Studio, copy your stream key, and configure your encoder to loop content or run a continuous playlist. Monitor bandwidth and encoder stability to prevent drops.
Conclusion
Knowing how to schedule a premiere or live stream on YouTube gives you two powerful tools for building community and anticipation around your content. Premieres turn finished videos into shared events with countdowns and live chat, while scheduled live streams let your audience join you in real time.
The process is straightforward once you know the steps. Upload your video, pick a schedule, check Set as Premiere for prerecorded content, or grab your stream key for a live broadcast. Then promote the watch page link across your channels and show up ready to engage when the countdown hits zero.
Your next step is simple: pick the format that fits your content, follow the steps above, and schedule your first event this week. The more you use premieres and scheduled streams, the more natural the workflow becomes.