
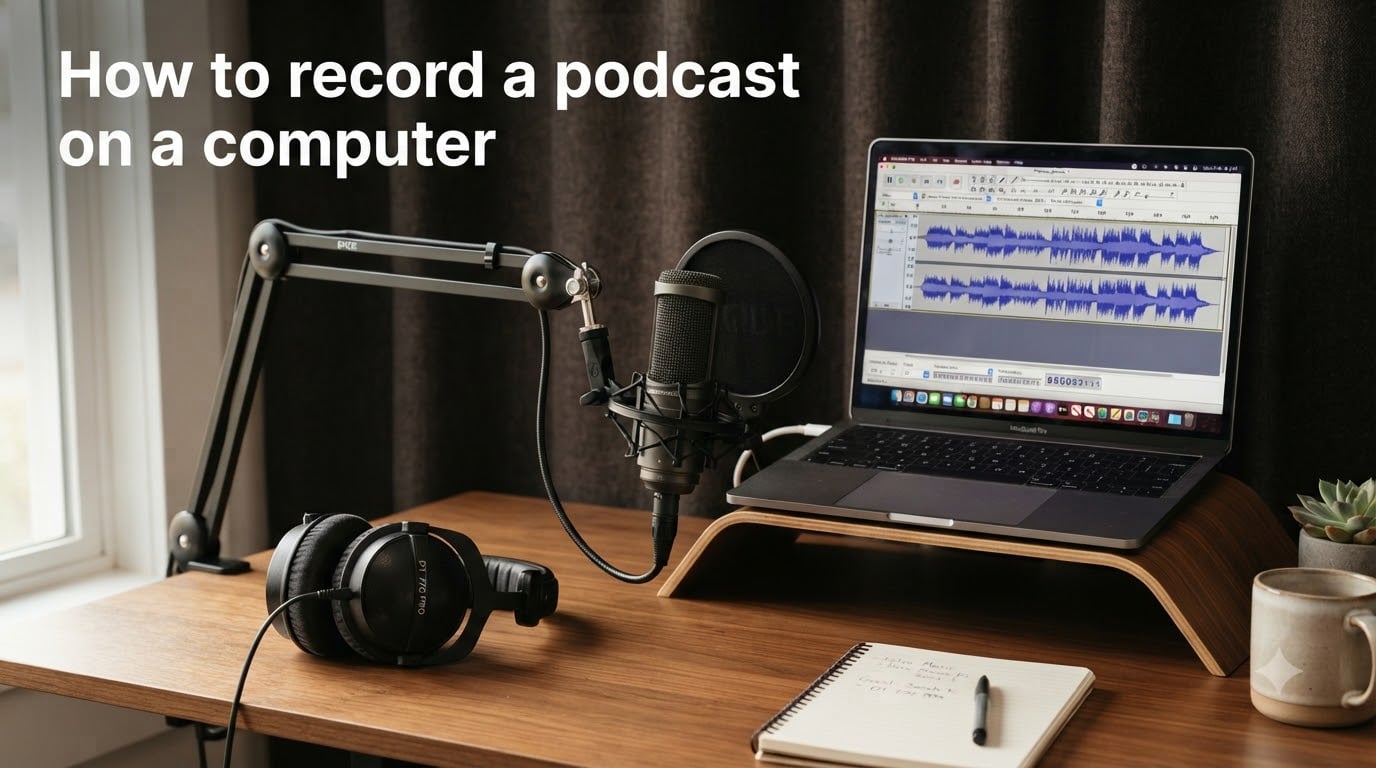
Learning how to record a podcast on a computer is the first real step toward launching a show people actually want to listen to. You do not need a professional studio or thousands of dollars in equipment to produce clean, broadcast-quality audio from your desk. With the right microphone, a free recording program, and a quiet room, you can record your first episode today.
Our team has helped hundreds of creators set up home podcasting studios, and we have tested everything from $40 USB mics to professional XLR chains running through audio interfaces. The process always comes down to the same core steps: connect a microphone, install recording software, set your input levels, hit record, and edit the result.
This guide walks you through the entire workflow from scratch. We cover what equipment you actually need, the differences between USB and XLR microphones, the best free and paid recording software, detailed step-by-step instructions for both Windows and Mac, remote recording setups for interviews, audio quality tips, and troubleshooting fixes for common problems that trip up beginners.
Whether you are recording solo episodes, interviewing remote guests, or building a video podcast, the fundamentals are the same. Let us break down exactly how to record a podcast on a computer in 2026.
Table of Contents
- Quick Answer: How to Record a Podcast on a Computer in 5 Steps
- What You Need to Record a Podcast on a Computer
- USB vs XLR Microphones: Which Should You Choose?
- Best Free and Paid Podcast Recording Software
- How to Record a Podcast on a Computer: Step by Step
- Recording a Remote Podcast with Guests
- Tips for Better Audio Quality
- Common Podcast Recording Problems and How to Fix Them
- Problem: Buzzing or Humming Sound in Your Recording
- Problem: Your Recording Has Echo or Reverb
- Problem: Background Noise Like Fans, AC, or Traffic
- Problem: Your Audio Is Too Quiet or Too Loud
- Problem: Software Is Not Recognizing Your Microphone
- Problem: Recording Sounds Different on Left and Right Channels
- Frequently Asked Questions
- Conclusion
Quick Answer: How to Record a Podcast on a Computer in 5 Steps
If you want the short version, here is how to record a podcast on a computer from start to finish:
1. Connect a microphone to your computer using a USB cable or an audio interface for XLR mics.
2. Install podcast recording software like Audacity (free), GarageBand (Mac), or Descript.
3. Open the software, select your microphone as the input device, and adjust the gain so your loudest speaking moments stay below clipping level.
4. Put on closed-back headphones, press the record button, and deliver your episode.
5. Edit the recording to remove mistakes, export it as an MP3 or WAV file, and upload it to your podcast host.
That is the entire process at a high level. The rest of this guide dives into each step with specific recommendations and troubleshooting advice.
What You Need to Record a Podcast on a Computer
The minimum equipment needed to record a podcast on a computer is surprisingly modest. You need a computer (Windows, Mac, or even a Chromebook for browser-based recording), a microphone, headphones, and recording software. That is it.
Your computer does not need to be powerful. Any machine made in the last five years can handle audio recording. You will want at least 8GB of RAM if you plan to edit multi-track recordings, but for basic single-host recording, even 4GB works fine. Storage matters more than processing power, because uncompressed audio files take up space. Aim for at least 10GB of free disk space per hour of recorded audio.
Microphone
This is the single most important piece of gear for podcast recording. Your built-in laptop microphone will work in an emergency, but it will sound thin, echoey, and amateurish. A dedicated microphone transforms your audio quality instantly.
For beginners, a USB microphone is the easiest path. You plug it directly into your computer, and it works without any additional hardware. Popular beginner options include the Samson Q2U, Audio-Technica ATR2100x, and Blue Yeti. These mics cost between $50 and $130 and deliver dramatically better sound than any built-in option.
Headphones
Closed-back headphones are essential for monitoring your recording in real time. Without them, your microphone can pick up audio bleeding from your speakers, creating a nasty echo loop. You do not need expensive studio headphones to start. Any decent pair of over-ear headphones that seal against your head will work. Many podcasters use budget options like the Sony MDR-7506 or Audio-Technica ATH-M20x.
Never use earbuds with rubber tips for monitoring if you can avoid it. The sound leakage is minimal, but the audio quality is usually too bass-heavy to judge your recording levels accurately.
Optional but Helpful Gear
A few accessories make a noticeable difference in your final audio quality:
A pop filter reduces plosives, those harsh bursts of air that hit the mic when you say words with P, B, or T sounds. A basic nylon mesh pop filter costs under $15 and saves you hours of editing.
A boom arm holds your microphone at the perfect distance and angle, freeing up desk space and reducing desk vibrations that travel up the mic stand. Look at affordable options like the Rode PSA1 or the Blue Compass.
A shock mount isolates your microphone from handling noise and desk bumps. Some microphones come with one included. If yours does not, a third-party shock mount is worth the $20 to $40 investment.
An acoustic treatment panel or even heavy blankets behind you can reduce room echo. You do not need professional foam panels to start. Recording in a room with soft furniture, rugs, and curtains already absorbs a lot of reflected sound.
USB vs XLR Microphones: Which Should You Choose?
This is the most common question beginners ask, and the answer determines the rest of your setup. USB microphones and XLR microphones serve different needs and budgets.
USB Microphones
USB microphones plug directly into your computer’s USB port. They have a built-in preamp and analog-to-digital converter, which means the microphone handles everything. No interface, no extra cables, no mixer. You plug it in, select it as your input in your recording software, and start talking.
For solo podcasters and beginners, USB is almost always the right choice. The setup takes about two minutes, the audio quality is excellent for the price, and there is virtually no learning curve. The Samson Q2U is widely recommended because it offers both USB and XLR outputs, meaning you can start with USB today and upgrade to an XLR interface later without buying a new microphone.
The downside is that USB microphones are limited to one mic per computer without additional software workarounds. If you plan to record two people in the same room with separate microphones, USB gets complicated fast.
XLR Microphones
XLR microphones use the three-pin XLR cable standard that professional studios rely on. They require an audio interface or mixer to connect to your computer. The interface converts the analog signal from the microphone into a digital signal your software can record.
XLR setups cost more and require more setup time, but they offer superior audio quality, more control over your sound, and the ability to connect multiple microphones simultaneously. Popular entry-level XLR mics include the Shure SM7B, Rode PodMic, and Shure MV7. Pair them with an interface like the Focusrite Scarlett 2i2 or the P4 Zoom PodTrak.
If you are serious about podcasting long-term, plan to have co-hosts in the same room, or want broadcast-quality sound, XLR is the upgrade path. For everyone else, USB is more than enough.
Best Free and Paid Podcast Recording Software
Your recording software, also called a DAW or Digital Audio Workstation, is where you capture, edit, and export your audio. There are excellent free options and powerful paid options. Here is what we recommend based on your situation.
Audacity (Free, Windows and Mac)
Audacity is the gold standard for free podcast recording software. It is open-source, works on Windows, Mac, and Linux, and handles multi-track recording, noise reduction, EQ, compression, and export to MP3 or WAV. The interface looks dated, but the functionality is more than enough for professional podcasting.
Reddit communities like r/podcasting consistently recommend Audacity for beginners. Many successful podcasters use it for their entire workflow and never upgrade to paid software. If you want to record a podcast on a computer for free, start here.
GarageBand (Free, Mac Only)
If you use a Mac, GarageBand is already installed on your computer. It is a more polished and intuitive alternative to Audacity, with a cleaner interface and built-in presets for voice recording. GarageBand handles multi-track recording, editing, and exporting with ease. For Mac users, there is almost no reason to look elsewhere when starting out.
Descript (Paid, Windows and Mac)
Descript takes a different approach to podcast production. It transcribes your audio into text, and you edit the recording by editing the text. Delete a sentence in the transcript, and Descript removes the corresponding audio automatically. It also includes studio sound enhancement, filler word removal, and screen recording for video podcasts.
Descript is ideal if you want to move fast and hate traditional audio editing. The free tier lets you try it, and paid plans start for listeners who need more transcription hours.
Riverside (Paid, Browser-Based)
Riverside records high-quality local audio and video from each participant, then uploads the files for you. Because each person’s audio is recorded locally on their own computer, you never lose quality to internet connection drops. Riverside is the top choice for recording remote interviews and video podcasts.
Adobe Podcast (Free and Paid, Browser-Based)
Adobe offers a free web-based recording tool called Adobe Podcast Studio that captures studio-quality audio through your browser. It also includes an AI-powered Enhance Speech tool that cleans up poor-quality recordings. The free tier is surprisingly capable for solo recording and remote interviews.
Built-In Options: Windows Sound Recorder and Voice Memos
Windows 11 includes a rebuilt Sound Recorder app that handles basic recording and saving. On Mac, Voice Memos does the same thing. These tools lack editing features and multi-track support, but they work in a pinch if you just need to capture audio quickly without installing anything.
How to Record a Podcast on a Computer: Step by Step
Now let us walk through the actual recording process. These steps work whether you are using Audacity on Windows, GarageBand on Mac, or any other recording software.
Step 1: Set Up Your Recording Space
Choose the quietest room in your home. Avoid rooms with hard floors, bare walls, and lots of windows, because these surfaces reflect sound and create echo. A bedroom or a room with carpet, curtains, and upholstered furniture works well. Close all windows, turn off fans and air conditioners, and silence your phone notifications.
Position your microphone about four to six inches from your mouth. If you are using a pop filter, place it about two inches from the mic capsule. Angle the microphone slightly so you are talking across it rather than directly into it. This reduces plosives and captures a warmer sound.
Step 2: Connect Your Microphone
For a USB microphone, plug the cable directly into a USB port on your computer. Use a port directly on the machine, not a hub, to ensure stable power delivery. Your operating system should recognize the microphone automatically.
For an XLR microphone, connect the mic to your audio interface using an XLR cable. Then connect the interface to your computer via USB. Turn on phantom power (the 48V button) if your microphone requires it, which most condenser mics do but most dynamic mics do not.
Step 3: Open Your Recording Software and Select Your Microphone
Launch Audacity, GarageBand, or whichever software you chose. Before recording anything, go into the software’s input settings and select your microphone as the recording device. This step is critical, because software often defaults to your computer’s built-in microphone.
In Audacity, click the microphone dropdown at the top of the window and select your USB mic or audio interface. In GarageBand, go to Preferences, then Audio/MIDI, and choose your input device. Verify that you see the input meter moving when you tap or speak into the microphone.
Step 4: Set Your Recording Levels
This is the step most beginners skip, and it causes the majority of audio quality problems. You need to set your gain, or input level, so that your loudest speaking moments peak around negative 12 to negative 6 decibels on the meter. This leaves headroom to prevent clipping, which is the distorted, unusable sound that happens when your audio is too loud for the system to handle.
Speak into the microphone at the volume you will actually use during recording, not quieter. Watch the input meter in your software. If it ever hits zero or turns red, your gain is too high and your audio will clip. If it barely moves, your gain is too low and you will introduce hiss when you boost the volume later.
Adjust the gain knob on your microphone or audio interface until your speaking voice consistently peaks in that sweet spot between negative 12 and negative 6 decibels.
Step 5: Do a Test Recording
Before recording your full episode, do a 30-second test. Record yourself speaking at your normal volume, then play it back through your headphones. Listen for background noise, echo, plosives, or any distortion. If something sounds wrong, fix it now rather than discovering it after a full episode.
This test also confirms that your software is actually recording from the correct input. Nothing is worse than recording a 45-minute episode only to realize the software captured silence because the wrong microphone was selected.
Step 6: Record Your Episode
Press the record button, wait two seconds before you start speaking to give yourself clean room tone for editing, and deliver your episode. Stay consistent with your distance from the microphone. If you lean in and pull away throughout the recording, your audio level will fluctuate and sound unprofessional.
If you make a mistake, do not stop recording. Just pause for three seconds, clap your hands loudly, and re-read the sentence or section. The clap creates a visible spike in your recording waveform, making it easy to find and edit later.
Step 7: Edit and Export
Once you finish recording, save the raw project file immediately. Then begin editing. Remove mistakes, long pauses, filler words, and any sections you want to cut. Apply noise reduction if you have consistent background hum. Add a gentle EQ to boost the frequencies that make speech clear and cut the frequencies that add muddiness.
Export your finished episode as an MP3 at 128 kbps for mono podcasts or 192 kbps for stereo. MP3 is the standard format for podcast distribution because it is universally compatible and reasonably sized.
Recording a Remote Podcast with Guests
If your podcast involves interviewing guests or co-hosting with someone in another location, you need a different approach. Simply recording a Zoom or Discord call produces compressed, low-quality audio that sounds noticeably worse than a dedicated podcast recording.
The solution is to use remote recording platforms that capture each participant’s audio locally and then combine the files. This means even if someone’s internet connection drops mid-recording, their local audio file is preserved at full quality.
Riverside is the leading platform for this. It records uncompressed audio and 4K video from each participant through a browser link, so guests do not need to install any software. Zencastr offers a similar browser-based service with a free tier for up to two participants. SquadCast is another strong option designed specifically for podcasters.
For a budget approach, you can ask each guest to record themselves locally using Audacity or a voice memo app, then send you the file. This is called double-ender recording. It requires more coordination but produces excellent quality without any subscription cost.
Avoid using regular phone calls or standard video conferencing tools as your primary recording method. The audio compression these services apply is designed for real-time communication, not for producing downloadable content that people will listen to on good headphones or car stereos.
Tips for Better Audio Quality
Good equipment matters, but technique matters just as much. These tips will make your podcast sound more professional regardless of what microphone you use.
Treat Your Room
Room acoustics have a bigger impact on your audio quality than the price of your microphone. A $400 microphone in an echoey, untreated room sounds worse than a $60 microphone in a well-treated space. You do not need acoustic foam panels to improve your sound dramatically.
Recording in a closet full of clothes is an old podcasting trick, because the fabric absorbs reflections completely. Short of that, add soft materials to your recording space. Hang heavy blankets behind and beside you. Record facing a bookshelf. Close curtains over hard windows. Every soft surface reduces reflected sound.
Master Your Microphone Technique
The distance between your mouth and the microphone changes everything. Too far, and your voice sounds distant with noticeable room echo. Too close, and you get excessive bass buildup and plosive pops. Four to six inches is the sweet spot for most dynamic microphones.
Consistency is key. If you move closer and farther from the mic during recording, your volume will fluctuate and your listener will notice. Use a boom arm to keep the microphone at a fixed position relative to your mouth.
Use a Pop Filter
A pop filter is a $15 accessory that saves you from harsh plosive sounds. When you say words containing P and B sounds, a burst of air hits the microphone capsule and creates a low-frequency thump that is difficult to remove in editing. A pop filter disperses that air before it reaches the mic. This is one of the highest return-on-investment purchases in podcasting.
Record at a Higher Sample Rate and Bit Depth
Set your recording software to capture at 44.1 kHz or 48 kHz sample rate with 24-bit depth. This gives you more headroom and better quality for editing. You can always downsample to 16-bit for the final export, but starting with higher resolution gives you flexibility during post-production.
Speak With Energy and Clarity
Technical quality matters, but your delivery is what keeps listeners engaged. Speak slightly louder and more animated than you would in normal conversation. Podcast listeners cannot see your facial expressions or hand gestures, so your voice carries all the energy. Stand up while recording if it helps you project.
Common Podcast Recording Problems and How to Fix Them
Even with good preparation, things go wrong. Here are the most common podcast recording problems and exactly how to fix them.
Problem: Buzzing or Humming Sound in Your Recording
This is almost always an electrical grounding issue. The hum comes from your equipment picking up electrical interference. First, make sure your microphone cable is not running parallel to a power cable. Cross cables at right angles if they must intersect. If you are using an XLR setup, check that your audio interface is properly grounded. Try plugging your equipment into a different outlet or a power conditioner.
Problem: Your Recording Has Echo or Reverb
Echo means your room is too reflective or your microphone is too far from your mouth. Move closer to the microphone and add soft materials to your room. If the echo persists, switch from an omnidirectional microphone pattern to a cardioid pattern, which rejects sound coming from behind and beside the mic.
Also check whether your headphones are leaking sound. If your mic is picking up your headphone audio, switch to closed-back headphones or lower your monitoring volume.
Problem: Background Noise Like Fans, AC, or Traffic
Turn off all noise sources before recording. This includes ceiling fans, air conditioners, refrigerators (if they are in the same room), and anything with a motor. Close windows to block traffic noise. If you cannot eliminate the noise, use the noise reduction tool in Audacity or the Enhance Speech feature in Adobe Podcast to clean it up after recording.
Problem: Your Audio Is Too Quiet or Too Loud
If your recording is too quiet, your gain was set too low. You can boost the volume in editing, but this also amplifies background noise. For future recordings, increase your input gain. If your recording is distorted and crackly, your gain was too high and the audio clipped. Clipping cannot be fixed in editing. You must re-record with lower gain.
Problem: Software Is Not Recognizing Your Microphone
First, check your physical connections. Unplug and replug the USB cable. Try a different USB port. Restart your computer. Then check your operating system’s sound settings to confirm the microphone appears as an available input device. On Windows, right-click the speaker icon and check Sound Settings. On Mac, go to System Settings then Sound. Finally, make sure your recording software has permission to access your microphone in your system’s privacy settings.
Problem: Recording Sounds Different on Left and Right Channels
This happens when your software is recording in stereo but your microphone is mono. The audio only appears on one side. Fix this by setting your recording track to mono in your software settings before recording. In Audacity, change the recording channels dropdown from stereo to mono.
Frequently Asked Questions
Can I record a podcast for free?
Yes, you can record a podcast for free. Audacity is a free, open-source recording and editing program available for Windows, Mac, and Linux. GarageBand is free on Mac. For remote recording, Zencastr and Adobe Podcast Studio offer free tiers. You only need a USB microphone, which you can get starting around $50, to produce quality audio.
What do I need to record a podcast on my computer?
You need a computer, a microphone, headphones, and recording software. A USB microphone like the Samson Q2U plugs directly into your computer. Free software like Audacity or GarageBand handles recording and editing. Closed-back headphones let you monitor your audio. Optional extras include a pop filter, boom arm, and acoustic treatment.
What is the best way to record audio for a podcast?
The best way to record a podcast is to use a dedicated USB or XLR microphone connected to recording software like Audacity or GarageBand. Set your input levels so peaks stay between negative 12 and negative 6 decibels, record in a quiet room with soft surfaces, and monitor through closed-back headphones. For remote guests, use a platform like Riverside that records each participant locally.
What software should I use to record a podcast?
Audacity is the best free option for Windows and Mac. GarageBand is the best free option for Mac users. For paid options, Descript offers text-based editing, Riverside is ideal for remote recording, and Adobe Podcast Studio provides browser-based recording with AI enhancement. Choose based on your operating system, budget, and whether you record solo or with remote guests.
Can I use my computer’s built-in microphone for podcasting?
You can use it in an emergency, but it is not recommended for regular podcasting. Built-in microphones produce thin, echoey audio that sounds amateurish. A $50 to $80 USB microphone dramatically improves your quality. If you must use a built-in mic, get as close to it as possible, record in a quiet room, and use noise reduction tools in post-production.
Conclusion
Recording a podcast on a computer comes down to five core steps: connect a microphone, install recording software, set your levels, hit record, and edit. The barrier to entry has never been lower. Free software like Audacity and GarageBand gives you professional-grade tools without spending a cent, and a sub-$100 USB microphone delivers audio quality that rivals what professional studios produced a decade ago.
Focus on your room acoustics and microphone technique before worrying about expensive upgrades. A well-treated room and consistent mic positioning matter more than the price tag on your equipment. Once you have your first episode recorded and edited, the next step is choosing a podcast hosting platform to distribute your show to Apple Podcasts, Spotify, and other listening apps.
The hardest part is pressing record for the first time. Everything after that is refinement. Start with what you have, record your first episode this week, and improve your setup as you learn what your show actually needs.