
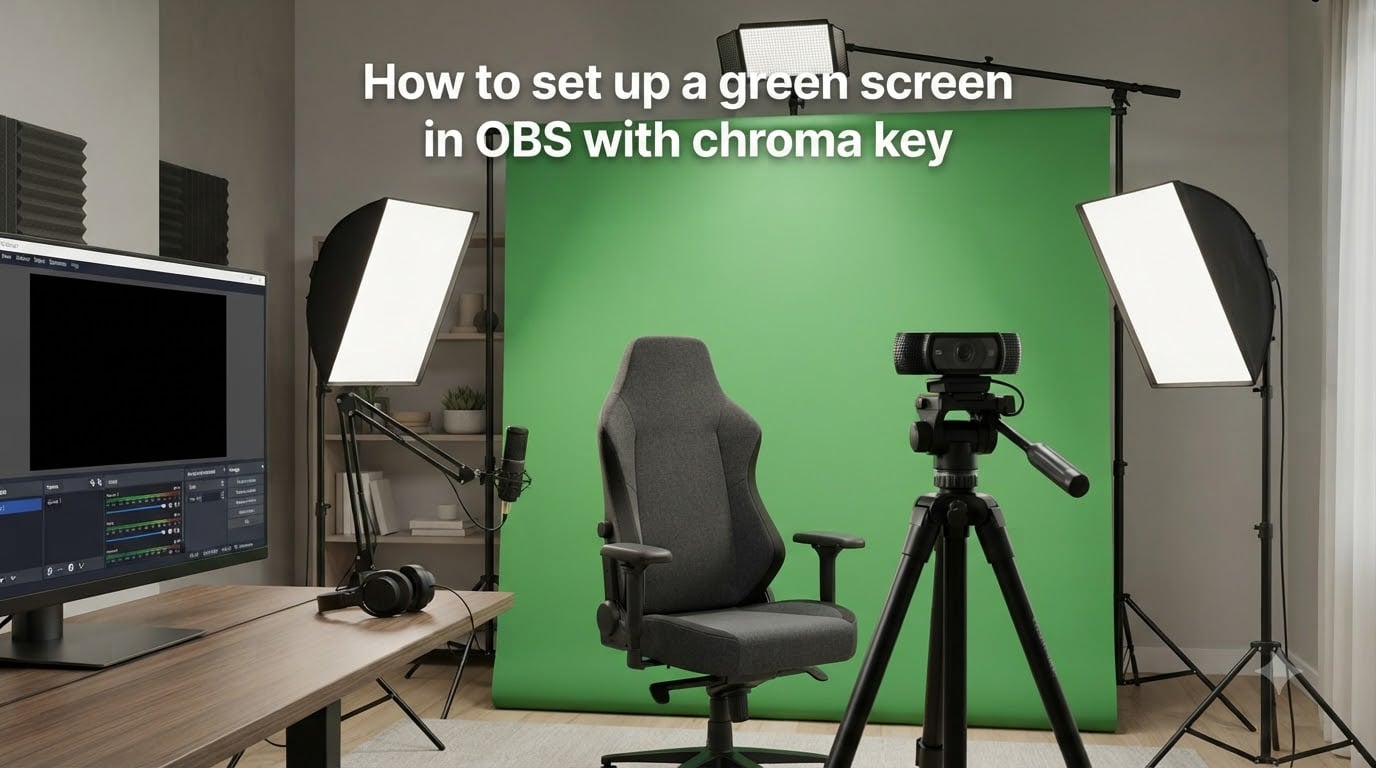
If you have ever watched a polished streamer and wondered how their background looks so clean, the answer is almost always a green screen. I spent the last few weeks testing different setups, and learning how to set up a green screen in OBS with chroma key turned out to be much easier than I expected once I understood how the filter actually works.
In this guide, I will walk you through the exact process I use. We will cover what gear you need, how to light your backdrop, the step-by-step OBS configuration, and how to fix the most common problems that show up when the key is not quite right.
Table of Contents
- What Is a Green Screen and How Chroma Key Works in OBS?
- Equipment You Need Before You Set Up a Green Screen in OBS
- Setting Up Your Physical Green Screen and Lighting
- How to Set Up a Green Screen in OBS With Chroma Key (Step by Step)
- Understanding the Chroma Key Sliders (Similarity, Smoothness, Key Color Spill Reduction)
- Adding Virtual Backgrounds Behind Your Green Screen
- Virtual Greenscreen vs Physical Green Screen Comparison
- Troubleshooting Common Green Screen Issues in OBS
- Tips for Camera Settings That Improve Chroma Key Quality
- Frequently Asked Questions
- Final Thoughts on How to Set Up a Green Screen in OBS With Chroma Key
What Is a Green Screen and How Chroma Key Works in OBS?
A green screen is a flat, brightly colored green backdrop placed behind you while you record or stream. OBS Studio uses a chroma key filter to detect that specific shade of green and make it transparent in real time.
The word “chroma” comes from the Greek word for color. Chroma keying is a visual effects technique that removes a chosen color from a video so another image or video can show through. Green is the most common choice because it sits far away from human skin tones on the color wheel, which makes the key cleaner with less bleeding.
Once OBS removes the green background, anything below your camera layer in the scene list shows through. That is how streamers end up in front of game captures, branded overlays, or virtual sets. The technology is the same one used in weather reports and Hollywood films, scaled down for a desktop app.
Equipment You Need Before You Set Up a Green Screen in OBS
Before you open OBS, gather the right gear. You do not need a professional studio, but a few basics make a huge difference in the final result.
Green screen backdrop: A collapsible fabric screen, a pull-up roller, or even a stretch of muslin dyed bright green. A flat, wrinkle-free surface works best.
Camera: Any USB webcam, DSLR, or mirrorless camera that OBS can recognize as a video source. Higher-quality cameras produce cleaner edges.
Lighting: At minimum two softbox lights. Three is the sweet spot recommended by most streamers: one for the backdrop, two for your face.
Software: OBS Studio, free and available for Windows, macOS, and Linux.
Virtual greenscreen plugins also exist if you do not have a physical backdrop. They work in a pinch but rarely match the quality of a real screen with proper lighting.
Setting Up Your Physical Green Screen and Lighting
Lighting is the single most important factor in a clean chroma key. Forum users on r/obs and r/Twitch consistently point out that the right light placement saves more headaches than any software tweak.
Position yourself between 3 and 6 feet away from the green screen. Too close and you will pick up green reflections on your shoulders and hair. Too far and the backdrop will appear small and uneven in the frame.
Light the backdrop separately from your face. One softbox pointed directly at the green screen keeps the color even and bright. Lighting from below or beside the screen creates hot spots and shadows that will ruin the key.
Then add two lights in front of you, angled at roughly 45 degrees. This separates you from the background and stops the green from bouncing onto your clothes. Lower your ISO or gain settings on your camera if you can, since digital noise interferes with the keying process.
How to Set Up a Green Screen in OBS With Chroma Key (Step by Step)
Now for the main event. Once your lighting is in place, OBS does the heavy lifting. Follow these steps and you will have a working green screen in under five minutes.
Open OBS Studio and select the scene you want to use from the Scenes panel at the bottom left.
Add your camera as a source. Click the plus icon under Sources, choose Video Capture Device, and pick your webcam or capture card. Name it something clear like “Webcam” so you can find it later.
Position and resize your camera feed by dragging the red box in the preview window. Make sure your head and shoulders fit comfortably with a small buffer above.
Open the filters menu. Right-click your camera source and choose Filters. A new window will pop up listing audio and video effects.
Add the chroma key filter. Click the plus icon in the bottom-left of the Filters window, scroll through the list, and select Chroma Key. Name it “Chroma Key” so it is easy to identify.
Pick the key color. OBS sets a default green that works for most screens. If your backdrop is a different shade, click the eye dropper and select the green directly from the preview.
Adjust the three sliders (covered in detail below) until the green disappears cleanly.
Close the Filters window and check your preview. You should see through the green screen to whatever is below your camera in the source list.
Understanding the Chroma Key Sliders (Similarity, Smoothness, Key Color Spill Reduction)
These three sliders are where most people get stuck. Each one solves a different problem, and tuning them together is the secret to a professional-looking result.
Similarity
Similarity controls how close a pixel must be to the chosen key color before it becomes transparent. Increase it to remove more green, decrease it to keep more of your subject visible. A starting value of 400 works for most screens lit with softboxes.
Smoothness
Smoothness softens the edges of the key. Higher values blend the transition between you and the new background, which removes jagged or pixelated outlines. Start around 80 and raise it slowly if your edges look rough.
Key Color Spill Reduction
Green screens cast a faint green tint on anything close to them, especially hair and shoulders. This slider cancels that green halo. A value between 50 and 100 usually clears it without affecting skin tones.
Adjust the sliders in small increments. Big jumps cause one problem to disappear while another appears. The goal is to see your subject standing cleanly in front of a transparent background, with no visible green edges.
Adding Virtual Backgrounds Behind Your Green Screen
Once the green is gone, you need something to replace it. Adding a virtual background in OBS is a simple layer-ordering trick.
Click the plus icon under Sources and choose Image for a static background or Media Source for a video loop.
Browse to your file and click OK. The new background will appear in the preview, possibly covering your camera.
Drag the new background source below your camera in the Sources list. OBS layers sources from top to bottom, so anything below shows behind everything above.
Lock the camera layer by clicking the padlock icon next to its name. This prevents accidental clicks in the preview from moving your camera while you tweak the background.
Virtual Greenscreen vs Physical Green Screen Comparison
Both options work, but they shine in different situations. Here is a quick comparison to help you choose.
| Feature | Virtual Greenscreen | Physical Green Screen |
|---|---|---|
| Setup cost | Free plugin or low one-time fee | Moderate for fabric, higher for portable kits |
| Setup time | 5 minutes | 15-30 minutes |
| Lighting needs | Low | High |
| Edge quality | Good for casual streaming | Excellent for pro results |
| Best for | Beginners, casual streams, gaming | YouTube creators, business calls, podcasts |
If you are just starting out, a virtual greenscreen lets you test the workflow without buying anything. If you stream regularly or produce content for an audience, a physical backdrop with proper lighting pays off within a few months.
Troubleshooting Common Green Screen Issues in OBS
Even with a perfect setup, things go wrong. Here are the issues I hit most often and how to fix each one.
Green edges or halo around the subject
This is green spill reflecting off your backdrop. Move further from the screen, raise the Key Color Spill Reduction slider, and check that your backdrop is lit separately from your face.
Jagged or pixelated edges
Your Smoothness slider is too low. Increase it in small steps until the edges look natural. If the edges start to blur into the background, you have gone too far.
Subject appearing transparent
Your Similarity or Spill Reduction is too aggressive. Lower both sliders until skin tones look solid. Wearing green clothing makes this worse, so avoid green outfits on stream days.
Shadows or hot spots on the backdrop
Your backdrop lighting is uneven. Add a second light pointed at the screen from the opposite side, or move your existing light further away. Flat, even lighting is the goal.
Green screen not being detected at all
Reset the chroma key filter by clicking the eye dropper and reselecting the green. If it still fails, your screen colour may be too dark or too blue. A brighter, more saturated green fabric solves the issue.
Tips for Camera Settings That Improve Chroma Key Quality
Your camera controls how much detail OBS has to work with. A few tweaks make a noticeable difference.
Set white balance manually instead of using auto. Auto white balance shifts the green hue during your stream, which forces the chroma key to chase a moving target. Lock it once and the key stays stable.
Lower your ISO or gain as far as your lighting allows. Higher ISO introduces grain that confuses the chroma key filter, leading to noisy edges. A well-lit scene at ISO 100 keys cleaner than a dim one at ISO 1600.
Match your camera resolution and frame rate to your stream output. Streaming at 1080p 30 fps from a 4K camera wastes CPU and rarely improves chroma key quality. Match the settings and your key will look sharper.
Frequently Asked Questions
How to chroma key a green screen?
Add your camera as a Video Capture Device in OBS, right-click the source, choose Filters, click the plus icon, and select Chroma Key. Pick the green color with the eye dropper, then adjust the Similarity, Smoothness, and Key Color Spill Reduction sliders until the background becomes transparent.
How to set up a green screen for streaming?
Hang a green screen 3 to 6 feet behind you, light it evenly with its own softbox, and add two lights in front of you at 45-degree angles. In OBS, add your camera as a source, apply the Chroma Key filter, and place your virtual background below the camera in the Sources list.
How to make a green screen transparent on OBS?
Right-click your camera source in the Sources list, open Filters, and add the Chroma Key filter. Use the eye dropper to select the green, then raise the Similarity slider until the background disappears. Fine-tune Smoothness and Key Color Spill Reduction for clean edges.
How do I put a background on my green screen?
In OBS, click the plus icon under Sources and add an Image or Media Source for your background. Drag the new background below your camera in the Sources list so it sits behind you. Lock the camera layer to prevent accidental moves during your stream.
Final Thoughts on How to Set Up a Green Screen in OBS With Chroma Key
Learning how to set up a green screen in OBS with chroma key is one of the highest-impact upgrades you can make to your streaming setup. The steps themselves are simple, but the quality comes from your lighting and your willingness to adjust the sliders slowly.
Start with the lighting guide, add the chroma key filter in OBS, and tune the three sliders until your edges look clean. Once the key is dialed in, drop in your virtual background and lock the layers. From there, your streams will look more polished with every broadcast.