
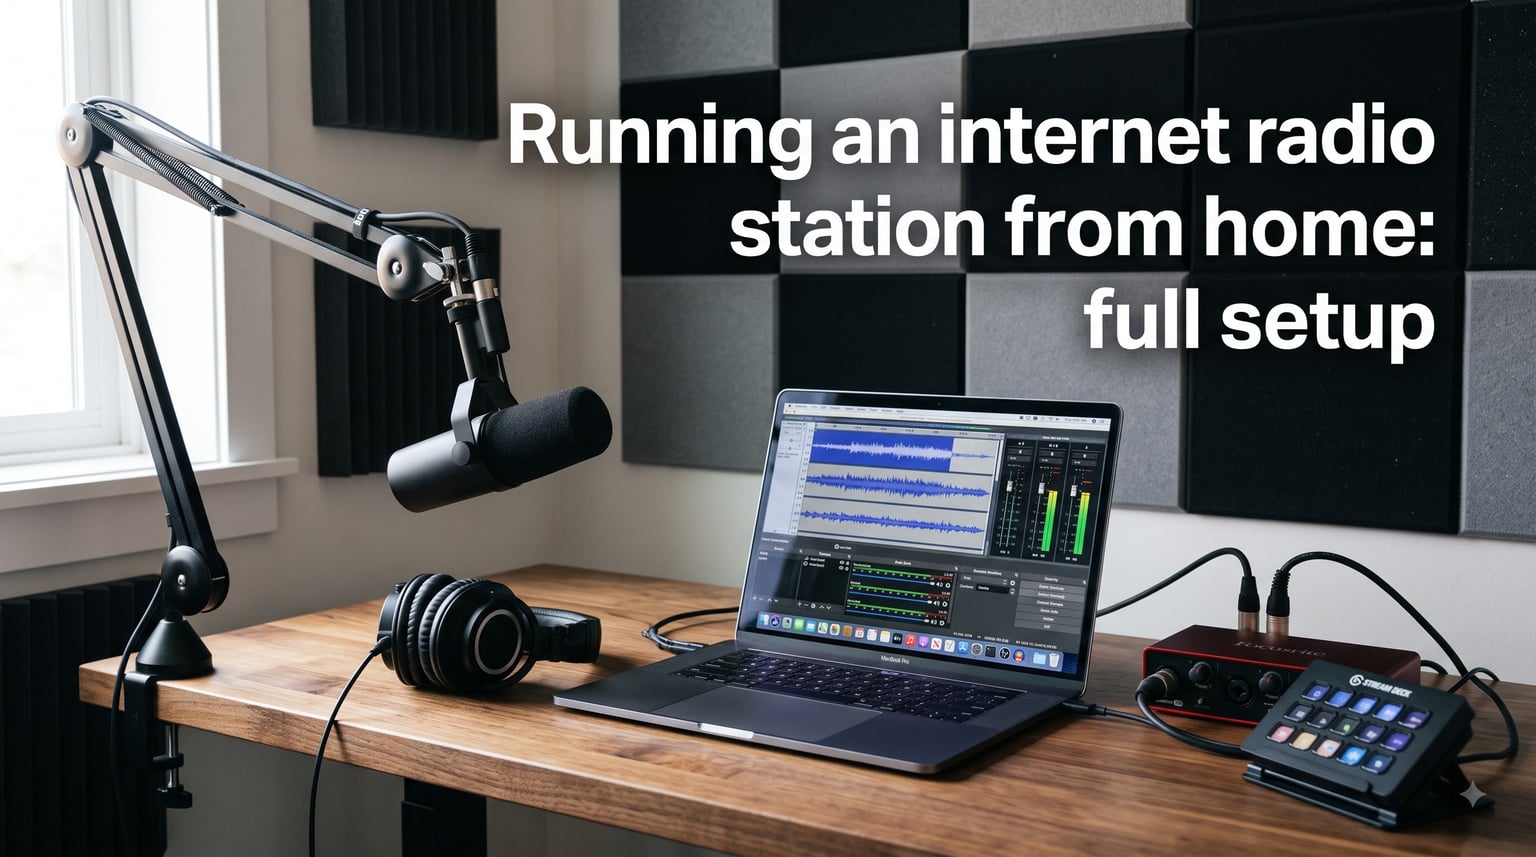
Running an internet radio station from home is something anyone can do with the right software, basic equipment, and a streaming server. You do not need a broadcast license, a studio, or thousands of dollars to get started. All you need is a computer, an internet connection, and the willingness to learn the setup process.
I have spent years watching beginners struggle with the same questions: What software do I use? Do I need licensing? How much will this actually cost me? The confusion is understandable because the information out there is scattered across forums, outdated tutorials, and vendor websites pushing their own products.
This guide breaks down everything you need to know about running an internet radio station from home. I cover the equipment, software options, step-by-step setup, streaming servers, music licensing, cost breakdowns, and the common mistakes that trip up first-time broadcasters. By the end, you will have a clear roadmap from zero to going live.
Whether you want to spin vinyl records at midnight, run a talk show about local politics, or build a 24/7 automated music channel, the fundamentals are the same. Let me walk you through the full setup.
Table of Contents
- Why Start an Internet Radio Station From Home
- What Equipment You Need to Run an Internet Radio Station From Home
- Broadcasting Software Options for Internet Radio
- How to Set Up an Internet Radio Station From Home: Step-by-Step
- Streaming Server Options: Shoutcast vs Icecast vs Managed Hosting
- Music Licensing for Internet Radio: What You Must Know
- How Much Does It Cost to Start an Internet Radio Station
- Common Mistakes to Avoid When Starting Your Internet Radio Station
- Live Broadcasting vs AutoDJ: Choosing Your Approach
- FAQs
- Wrapping Up: Your Path to Broadcasting From Home
Why Start an Internet Radio Station From Home
Internet radio gives you something traditional radio never could: complete control. You choose the music, the schedule, the format, and the audience. No program director tells you what to play. No advertiser demands you change your content. You own the station.
The barrier to entry is remarkably low compared to FM or AM broadcasting. Traditional radio requires a federal license (which can cost millions for commercial frequencies), expensive transmission equipment, and regulatory compliance. Internet radio skips all of that. You start with a laptop and a microphone.
Here is what draws people to internet radio from home:
Creative freedom. You can play any genre, talk about any topic, and format your station however you like. Niche communities that traditional radio ignores, like obscure electronic subgenres or indie talk radio, thrive online.
Global reach. Traditional radio signals fade after a few dozen miles. Your internet stream can reach listeners on every continent with an internet connection. A home DJ in Ohio can build a following in Tokyo.
Affordability. You can start a basic station for free using open-source software and free streaming tiers. Even a professional home setup costs a fraction of traditional broadcasting gear.
Flexibility. Run it as a hobby, a side income, a community service, or a stepping stone to a broadcasting career. You can go live when you want or let automation run 24/7 while you sleep.
People start internet radio for all kinds of reasons. Some want to share their record collection with fellow music lovers. Others build community around a niche topic. Churches, schools, podcasters, and independent DJs all use internet radio to reach audiences without gatekeepers.
What Equipment You Need to Run an Internet Radio Station From Home
The equipment you need for a home internet radio setup falls into four categories: a computer, a microphone, headphones, and optionally an audio interface. Let me break down what matters for each.
Computer Requirements
Your computer is the brain of your station. It runs the broadcasting software, encodes audio, and sends the stream to your server. You do not need a powerhouse, but you need something reliable.
Minimum specs: A dual-core processor from the last 8 years, 4GB RAM, and a stable internet connection with at least 5 Mbps upload speed. Windows, Mac, or Linux all work, though Windows has the broadest software compatibility.
Recommended specs: A quad-core processor, 8GB or more RAM, and an SSD for faster boot times and smoother performance when running multiple audio applications simultaneously.
Dedicate your computer to broadcasting if possible. Running heavy applications like video editors or games while streaming can cause dropouts and audio glitches that ruin the listener experience.
Microphone Options
Your microphone defines how professional you sound on air. Two main types dominate internet radio: USB and XLR.
USB microphones plug directly into your computer with no extra hardware. They are perfect for beginners because they are simple to set up and affordable. Popular choices in the community include the Audio-Technica ATR2100x, Samson Q2U, and Blue Yeti. Expect to spend between $50 and $150 for a solid USB mic.
XLR microphones are the professional standard. They require an audio interface to connect to your computer but deliver superior sound quality and durability. The Shure SM7B and Rode PodMic are community favorites for radio broadcasting. XLR mics start around $100 and go up significantly.
For a first-time internet radio setup from home, a USB microphone is more than enough. You can always upgrade later once your station grows.
Headphones for Monitoring
You need headphones to monitor your audio while broadcasting. This lets you hear exactly what your listeners hear and catch problems before they go out on air.
Closed-back headphones are the standard choice because they prevent sound from leaking into your microphone. Look for models from Audio-Technica (ATH-M30x or ATH-M50x), Sony (MDR-7506), or Sennheiser (HD 280 PRO). Budget options start around $40, while professional monitoring headphones run $100 to $200.
Avoid using earbuds or open-back headphones for broadcasting. Earbuds leak sound, and open-back designs let ambient noise bleed into your recordings.
Audio Interface (If Using XLR)
If you choose an XLR microphone, you need an audio interface to convert the analog signal to digital. The Focusrite Scarlett 2i2 is the most recommended interface for home broadcasters. It offers clean preamps, simple controls, and reliable performance for around $150.
Other solid options include the Behringer UMC22 for budget setups (around $50) and the GoXLR Mini for streamers who want hardware audio control.
Home Studio Acoustics
Your room affects your audio quality more than any piece of equipment. Hard surfaces like walls, windows, and desks reflect sound, creating echoes and reverb that make broadcasts sound amateurish.
You do not need a professionally treated studio. Simple improvements make a massive difference:
Reduce reflections. Hang blankets, acoustic panels, or even heavy curtains on bare walls near your microphone. Carpet on the floor helps too.
Pick the right room. A small room with soft furniture (bedroom, closet, or padded office) sounds better than a large empty room. Closets filled with clothes are surprisingly effective budget vocal booths.
Get closer to the mic. Positioning your mouth 2 to 4 inches from the microphone increases the direct sound and reduces room noise pickup. This is the single biggest free upgrade to your audio quality.
Use a pop filter. A $10 pop filter prevents plosives (the harsh bursts of air from P and B sounds) from ruining your broadcast.
Broadcasting Software Options for Internet Radio
Broadcasting software captures your audio, encodes it into a streaming format, and sends it to your streaming server. The right software depends on your budget, technical comfort, and whether you want live shows or automated playlists.
Free Broadcasting Software
BUTT (Broadcast Using This Tool). The most recommended free option for beginners. It is dead simple: you connect your audio input, enter your server details, and hit start. BUTT works on Windows, Mac, and Linux. It handles MP3 and AAC encoding and supports Shoutcast and Icecast servers. If you just want to go live with minimal fuss, start here.
Mixxx. Open-source DJ software that doubles as a broadcasting tool. Mixxx lets you mix tracks, add effects, and stream directly to your server. It supports AutoDJ-style playlist management and live mixing. Great for DJs who want hands-on control without spending money.
Rocket Broadcaster. A professional-grade encoder with a free tier. It offers advanced audio processing, multi-server streaming, and excellent stability. The free version covers most home broadcaster needs. The paid version adds features like metadata management and failover streaming.
Paid Broadcasting Software
SAM Broadcaster. The industry standard for internet radio automation. SAM handles everything from playlist scheduling to live broadcasting to listener statistics. It includes built-in audio processing for a polished radio sound. The downside is the price tag, which runs several hundred dollars.
RadioDJ. Free automation software that rivals paid options for features. It handles playlist rotation, scheduling, jingles, and advertisements. The learning curve is steep, but once configured, it runs reliably for automated broadcasting. Many community stations use RadioDJ as their backbone.
Virtual DJ. Popular with DJs who transition into radio broadcasting. It offers mixing, effects, and streaming capabilities in one package. The free home version supports basic streaming, while the pro version adds commercial features.
How to Choose Your Software
For absolute beginners, I recommend starting with BUTT. It takes 10 minutes to set up and gets you streaming immediately.
If you want automated 24/7 broadcasting, RadioDJ is the best free option. The setup takes longer, but it runs playlists on schedule without you touching it.
If you are a DJ who wants to mix live, Mixxx or Virtual DJ give you the tools to perform while streaming.
If you want a professional all-in-one solution and have budget, SAM Broadcaster is the gold standard.
How to Set Up an Internet Radio Station From Home: Step-by-Step
Now let me walk you through the complete setup process. I will break this into eight steps that take you from concept to going live.
Step 1: Define Your Concept and Format
Before touching any equipment, decide what your station is about. Your concept drives every other decision, from software to equipment to licensing.
Ask yourself: What type of content will I broadcast? Music, talk, or a mix? If music, what genres? If talk, what topics? Will I go live regularly or run automated playlists? Who is my target audience?
Write down a one-sentence mission statement for your station. For example: “A weekly live show featuring underground house music with occasional DJ interviews.” This keeps you focused and helps you make consistent decisions throughout setup.
Step 2: Set Up Your Equipment
Position your microphone on a desk stand or boom arm at mouth height. Connect it to your computer (directly for USB, through an audio interface for XLR). Plug in your headphones and put them on.
Open your computer’s sound settings and verify the microphone is recognized. Adjust the input level so your speaking voice peaks around minus 12 to minus 6 decibels on your computer’s input meter. You want plenty of signal without clipping.
Record a 30-second test clip in any basic recording software and listen back with your headphones. If you hear echo or room noise, adjust your acoustic treatment or move closer to the microphone.
Step 3: Install and Configure Broadcasting Software
Download and install your chosen broadcasting software. For this example, I will use BUTT since it is the simplest starting point, but the process is similar for other programs.
Open BUTT and click the Settings button. Under Audio, select your microphone as the input device and your headphones as the output. Set your streaming bitrate to 128 kbps for MP3 or 64 kbps for AAC, which provides good quality for most listeners.
Under Server, click Add and enter your streaming server details (which we cover in the next step). Leave BUTT open and move to Step 4.
Step 4: Choose a Streaming Server
Your streaming server is what actually delivers audio to your listeners. The broadcasting software on your computer sends audio to the server, and the server distributes it to everyone who connects.
You have two main paths: self-hosted or managed hosting.
Self-hosted means running Shoutcast or Icecast server software on your own computer or a VPS (virtual private server). Icecast is free and open-source, making it popular for budget setups. Shoutcast is the older standard with broader player compatibility. Self-hosting costs nothing in software but requires technical knowledge and a reliable internet connection with enough upload bandwidth to serve all your listeners simultaneously.
Managed hosting means paying a service to run the server for you. Providers like Radio.co, Airtime Pro, and RadioKing handle the server, bandwidth, and listener distribution. You just configure your broadcasting software to connect to their server. Plans typically start around $10 to $30 per month for beginner-tier listener slots.
For most home broadcasters, managed hosting is the practical choice. It eliminates bandwidth concerns and gives you a web player, listener stats, and mobile app support out of the box.
Step 5: Configure AutoDJ and Playlists (Optional)
If you want your station to run 24/7 without you being live constantly, you need AutoDJ. This feature lives on your streaming server and plays tracks from a uploaded playlist when you are not broadcasting live.
Most managed hosting providers include AutoDJ. You upload your music library through their dashboard, create playlists, and set rotation rules. The server then plays your music in order, inserting jingles or advertisements at intervals you define.
Organize your playlists thoughtfully. Create separate folders for different moods, genres, or time of day. Set rules so no artist plays more than once per hour. This keeps your station sounding professional rather than repetitive.
Step 6: Set Up Live Broadcasting
When you are ready to go live, your broadcasting software takes over from AutoDJ. In BUTT, simply click the Play button and your live audio replaces the automated playlist on your stream.
Configure metadata before going live. Metadata is the text that appears in media players showing your station name, current song, and DJ name. In BUTT, set this under the Stream Info section. Accurate metadata makes your station look professional and helps listeners find what is playing.
Test the transition between AutoDJ and live broadcasting before your first real show. Some servers have a slight delay or gap when switching. Knowing how your setup behaves prevents awkward dead air during your debut.
Step 7: Test Your Stream
Before announcing your station to the world, test everything. Connect to your own stream URL in a web browser or media player like VLC. Listen for at least 5 minutes and check the following:
Is the audio clear with no dropouts or glitches? Does the volume level sound appropriate (not too quiet, not distorting)? Does the metadata display correctly? Does the stream stay connected when you refresh the page?
Ask a friend to listen from their location and report any issues. Network conditions vary, so a second opinion from a different connection is valuable.
Step 8: Go Live and Promote Your Station
Once your stream is stable, it is time to attract listeners. Start with the basics: share your stream link on social media, tell friends and family, and post in relevant online communities (Reddit communities like r/radio, Facebook groups, Discord servers).
Submit your station to directories like TuneIn, Internet Radio, and Streema. These platforms expose your station to people actively looking for new internet radio. Most directories let you submit for free.
Create a simple web page or social media profile for your station with your stream link, schedule, and a brief description. Consistency matters more than volume. Regular content builds regular listeners.
Streaming Server Options: Shoutcast vs Icecast vs Managed Hosting
Your streaming server choice affects audio quality, listener capacity, and cost. Let me compare the three main paths.
Shoutcast
Shoutcast is the oldest internet radio streaming protocol, created in 1999. It remains widely supported by media players and directories. Shoutcast v2 supports multiple streams from one server and includes built-in metadata handling.
Shoutcast is proprietary software but offers a free version for small broadcasters. It works with virtually every internet radio player and directory, making it a safe choice for compatibility.
Icecast
Icecast is the open-source alternative to Shoutcast. It uses the same basic streaming technology but is free to use and modify. Icecast supports both MP3 and Ogg Vorbis streaming and handles multiple simultaneous streams efficiently.
Icecast is popular among community radio stations and technically inclined broadcasters who want full control without licensing fees. Its compatibility is slightly narrower than Shoutcast in older media players, but modern players support both.
Managed Hosting Providers
Managed hosting handles the server for you, eliminating the technical complexity of running Shoutcast or Icecast yourself. Providers include:
Radio.co offers an all-in-one platform with AutoDJ, web players, mobile apps, and listener analytics. Plans start around $30 per month.
Airtime Pro provides scheduling tools, multi-user access, and integration with third-party players. Plans start around $20 per month.
RadioKing offers similar features with a focus on ease of use and audience growth tools. Plans start around $15 per month.
Free options exist but come with limitations like low listener caps, ads inserted into your stream, or limited bandwidth. They work for testing but are not suitable for a growing station.
Bandwidth and Listener Capacity
Bandwidth is the technical constraint that determines how many listeners you can support. Every listener who connects consumes a portion of your upload bandwidth equal to your streaming bitrate.
For example, at 128 kbps, each listener uses about 16 KB per second of upload bandwidth. A home internet connection with 10 Mbps upload can theoretically support about 75 simultaneous listeners at 128 kbps, though you should leave headroom for other internet activities.
This is why managed hosting is so valuable. The hosting provider’s servers handle the bandwidth, not your home connection. You can serve thousands of listeners regardless of your own internet speed.
Music Licensing for Internet Radio: What You Must Know
Music licensing is the topic that confuses beginners the most. I see the same questions on forums every week: Do I need a license? What happens if I do not get one? How much does it cost?
Let me clear this up. If you play copyrighted music on your internet radio station, you need licenses. There is no exemption for small stations, hobby broadcasters, or non-commercial operations. The law applies to everyone.
Why Licensing Matters
Every song has two separate copyrights: the composition (the underlying music and lyrics) and the sound recording (the specific recorded version). Internet radio requires you to license both.
Playing unlicensed copyrighted music can result in takedown notices, fines, and legal action from rights holders. The risk is real, and platforms like TuneIn and streaming hosts may remove unlicensed stations.
US Licensing Requirements
If you broadcast to listeners in the United States, you typically need licenses from three types of organizations:
Performance Rights Organizations (PROs) license the composition. The three major US PROs are ASCAP, BMI, and SESAC. You need a separate license from each one because they represent different songwriters. Annual fees for internet radio start around $300 to $600 per PRO, depending on your revenue.
SoundExchange licenses the sound recording for digital performances. This is mandatory for internet radio in the US. Fees are based on a per-song, per-listener rate set by the Copyright Royalty Board. For small stations, SoundExchange offers a microcaster rate of approximately $500 annually.
GreatSong (formerly Harry Fox Agency) handles mechanical licenses, which may apply if your station allows downloads or on-demand playback.
International Licensing
If you have listeners outside the US, licensing gets more complex. Each country has its own collection societies. Some broadcasters geo-block their stream to specific countries to simplify licensing.
Alternatively, services like StreamLicensing and LoudCity offer blanket licensing that covers multiple PROs and SoundExchange in one package. These simplify the process but add to your costs, typically $30 to $100 per month for small stations.
Royalty-Free and Alternative Music Sources
If you want to avoid licensing complexity entirely, several options exist:
Royalty-free music libraries provide tracks you can broadcast without additional licensing. Sites like Free Music Archive, ccMixter, and Jamendo offer Creative Commons-licensed music. Read the specific license terms, as some require attribution.
Independent artists often grant permission for airplay in exchange for exposure. Reach out directly to artists on Bandcamp or SoundCloud. Many are happy to have their music played.
royalty-free production libraries like Kevin MacLeod’s Incompetech or the YouTube Audio Library offer music designed for broadcast use.
The trade-off is that royalty-free music does not attract listeners the way mainstream hits do. You need to build your audience around curation and personality rather than familiarity.
How Much Does It Cost to Start an Internet Radio Station
One of the most common questions I see is about cost. The answer ranges from completely free to several thousand dollars depending on your goals. Let me break it into clear tiers.
Free Setup: $0
Yes, you can start for free. Here is what that looks like:
Use your existing computer and its built-in microphone (not ideal, but functional). Install BUTT or Mixxx for free. Use a free Icecast server or a free-tier streaming host with limited listener slots. Play royalty-free or Creative Commons music to avoid licensing costs.
This setup works for testing and learning the ropes. Expect limitations: poor audio quality from the built-in mic, low listener capacity (often capped at 10 to 50), and no mainstream music.
Budget Tier: $100 to $300
This is where most beginners start. Add a decent USB microphone ($50 to $100), closed-back headphones ($40 to $80), and a basic managed hosting plan ($10 to $20 per month).
You get dramatically better audio quality and enough server capacity for 50 to 100 simultaneous listeners. If you play copyrighted music, add a blanket licensing service ($30 to $50 per month).
Mid-Range Setup: $300 to $500
Upgrade to an XLR microphone ($100 to $200), an audio interface like the Focusrite Scarlett 2i2 ($150), a boom arm and pop filter ($50), and better headphones ($100).
This tier delivers near-professional audio quality. Pair it with a mid-tier hosting plan ($20 to $40 per month) supporting 200 to 500 listeners. Add licensing as needed.
Professional Home Studio: $500+
This tier includes a broadcast-grade microphone like the Shure SM7B ($400), a high-quality preamp or interface ($200 to $500), acoustic treatment ($100 to $300), and professional broadcasting software.
Hosting plans at this level ($50 to $100 per month) support thousands of listeners and include features like mobile apps, advanced analytics, and multiple bitrates.
Ongoing Monthly Costs
Beyond the initial equipment, budget for recurring expenses: streaming host ($10 to $100 per month), music licensing ($30 to $100 per month for blanket coverage), domain name and website hosting ($10 to $20 per month), and internet service (you likely already have this).
A typical small internet radio station costs $50 to $150 per month to operate after the initial equipment purchase. That is remarkably affordable for global broadcasting capability.
Common Mistakes to Avoid When Starting Your Internet Radio Station
Every experienced internet radio broadcaster I have talked to made the same mistakes when starting. Here are the ones that cause the most frustration, and how to avoid them.
1. Ignoring Music Licensing
This is the number one mistake. People assume that because their station is small or non-commercial, copyright law does not apply. It does. Rights holders actively monitor internet radio for unlicensed use, and penalties can be severe.
The fix is simple: either get proper licensing or use royalty-free music. There is no middle ground. Do not skip this step hoping nobody notices.
2. Poor Audio Quality From Bad Room Acoustics
A $400 microphone in a bad-sounding room sounds worse than a $50 microphone in a treated room. Beginners focus on gear and ignore their environment.
Before spending money on a better microphone, fix your room. Hang blankets, move to a smaller space, get closer to the mic. These free fixes deliver more improvement than any equipment upgrade.
3. Underestimating Bandwidth Needs
If you self-host your streaming server, your home upload bandwidth limits your listener count. People set up a station, invite 50 friends to listen, and their connection chokes because their 3 Mbps upload cannot serve 50 streams at 128 kbps.
Calculate your bandwidth needs before going live. If your listener ambitions exceed your upload speed, use managed hosting.
4. Skipping the Testing Phase
Excitement leads people to announce their launch before testing the stream properly. The result is a debut show filled with dead air, dropouts, and technical problems that scare away first-time listeners.
Test for at least a full day before your public launch. Listen from multiple devices and connections. Fix every issue you find. You only get one chance at a first impression.
5. No Content Plan Before Going Live
Going live with no plan leads to awkward silence, repetitive music, and a station that feels directionless. Listeners tune out quickly when there is nothing compelling to hear.
Prepare a content plan: what plays when, what you say between songs, when your live shows happen. A station with structure retains listeners far better than one that wings it.
6. Overlooking Listener Engagement
Broadcasting is not a one-way street. Stations that ignore listener feedback, requests, and interaction feel cold and lifeless. The best internet radio stations build community.
Add a chat room, respond to messages, take requests during live shows, and acknowledge your regular listeners. These small touches turn casual listeners into loyal fans.
Live Broadcasting vs AutoDJ: Choosing Your Approach
One of the first decisions you make is whether to broadcast live, run automated playlists, or combine both. Each approach has distinct advantages.
What Is AutoDJ
AutoDJ is a feature on your streaming server that plays tracks from uploaded playlists automatically. You upload your music library, create rotation rules, and the server handles the rest. Your station runs 24/7 without your computer even being on.
AutoDJ is perfect for maintaining a consistent broadcast schedule. Listeners can tune in any time and hear music, even when you are asleep or at work. It gives your station a professional, always-on presence.
Benefits of Live Broadcasting
Live shows create the personal connection that makes internet radio special. Listeners hear a real human voice, get real-time commentary, and can interact through chat or requests. Live shows build loyalty faster than any automated playlist.
Live broadcasting lets you respond to current events, take requests, conduct interviews, and create content that no algorithm can replicate.
The Hybrid Approach
Most successful internet radio stations use a hybrid approach. AutoDJ runs the schedule most of the time, and you go live for scheduled shows at specific times each week.
This gives you the best of both worlds: 24/7 availability for casual listeners and scheduled live shows that build community and give people a reason to tune in at specific times.
Switching Between Live and AutoDJ
When you go live, your broadcasting software connects to the server and takes over the stream from AutoDJ. When you disconnect, AutoDJ resumes automatically. There is typically a brief gap of a few seconds during the transition.
Plan your transitions smoothly. Fade the AutoDJ track, introduce yourself, and start talking. When ending a live show, let listeners know you are signing off and AutoDJ will continue the music.
FAQs
Are internet radio stations profitable?
Internet radio stations can be profitable but most generate modest income rather than full-time revenue. Common monetization methods include listener donations, sponsorships from relevant brands, advertising spots, premium subscriptions, and merchandise sales. Profitability depends on audience size, engagement, and your monetization strategy. Small stations typically earn enough to cover operating costs, while larger stations with thousands of regular listeners can generate meaningful income.
How much does it cost to start an internet radio station?
You can start an internet radio station for free using existing equipment and open-source software. A budget setup with decent audio quality costs $100 to $300 for equipment plus $10 to $20 monthly for streaming hosting. A mid-range professional setup runs $300 to $500 in equipment. If you play copyrighted music, add $30 to $100 monthly for licensing. Ongoing operating costs typically range from $50 to $150 per month for a small station.
Can anyone start an internet radio station?
Yes, anyone with a computer and internet connection can start an internet radio station. Unlike FM or AM broadcasting, internet radio requires no government broadcast license. You need broadcasting software, a streaming server, and optionally a microphone and headphones. The technical setup takes a few hours to complete. The only legal requirement is obtaining music licensing if you play copyrighted songs, which applies regardless of station size.
What equipment is needed to start an internet radio station?
The minimum equipment needed is a computer and an internet connection. For better audio quality, add a USB or XLR microphone ($50 to $200), closed-back headphones for monitoring ($40 to $100), and optionally an audio interface if using an XLR microphone ($50 to $150). You also need broadcasting software like BUTT or Mixxx (free) and a streaming server through a hosting provider. A pop filter and basic acoustic treatment improve audio quality significantly for under $50 total.
Wrapping Up: Your Path to Broadcasting From Home
Running an internet radio station from home is one of the most rewarding projects I have seen people undertake. The barrier to entry is low, the creative freedom is enormous, and the global reach is unmatched by any traditional media format.
Start small. Use free software like BUTT, get a basic USB microphone, and learn the fundamentals before investing heavily. The most important step is simply getting on air and learning through experience. You can upgrade equipment, switch software, and expand your listener capacity as your station grows.
Do not skip music licensing. It is the one area where shortcuts lead to real consequences. Either get proper licensing or stick to royalty-free music until you can afford the fees.
Your first broadcast will not be perfect, and that is fine. Every experienced broadcaster started exactly where you are now. Set up your equipment, install your software, configure your streaming server, and hit that go-live button. Your audience is waiting.